

What Is Auto-Migration
Auto-Migration is a direct transfer method that sends your WordPress site from the source server to the destination server without using intermediary storage or requiring manual file downloads.
This method allows you to:
- Transfer your entire site directly between two WordPress installations
- Complete migrations in fewer steps with no manual file handling
- Avoid the need for remote storage accounts or local file transfers
- Migrate large websites efficiently through a secure encrypted connection
Auto-Migration is ideal when both sites are online and accessible, you need the fastest migration method, or you want to avoid managing backup files manually.
Before Starting the Migration
The following conditions should be met before proceeding:
- WPvivid Backup & Migration Pro is installed and activated on both sites
- Both websites are accessible online with active internet connections
- Firewall settings allow outbound connections from source site and inbound connections to destination site
- Both web hosting servers have sufficient disk space (at least 2x the source site size recommended)
If your server has strict firewall rules or security restrictions, you may need to whitelist the IP addresses of both sites to allow the direct connection.
Step-by-Step Migration Process
Step 1: Generate Migration Key on Destination Site
On the destination website (where you want to migrate to):
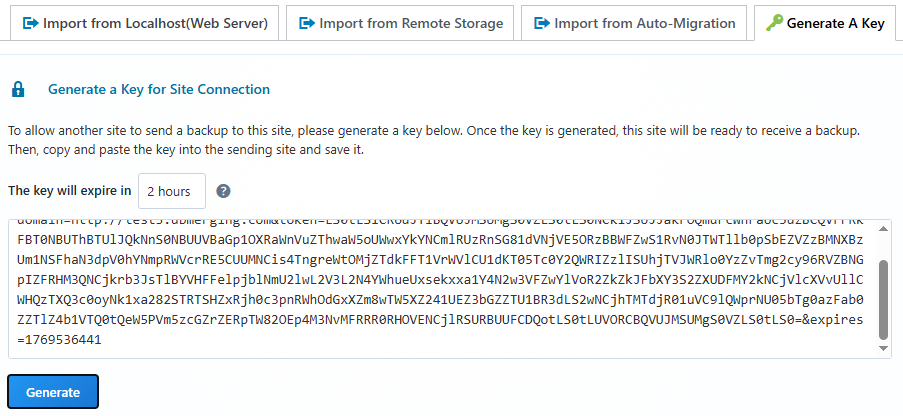
- Go to WPvivid Backup Pro → Import Site
- Select Generate A Key
- Click Generate to create a secure transfer key
- Copy the generated key to your clipboard
This unique key establishes a secure connection between your source and destination sites. The key will automatically expire after the specified time and can only be used for this specific migration.
Step 2: Configure Source Site with Migration Key
On the source website (where you want to migrate from):
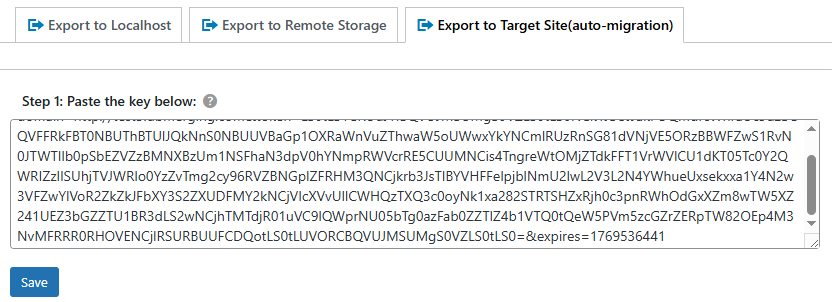
- Go to WPvivid Backup Pro → Export Site
- Select Export to Target Site (Auto Migration)
- Paste the migration key into the key field
- Click Save to establish the connection
WPvivid will verify the connection and confirm that both sites can communicate securely.
Step 3: Select Content to Export
Choose what content you want to migrate:
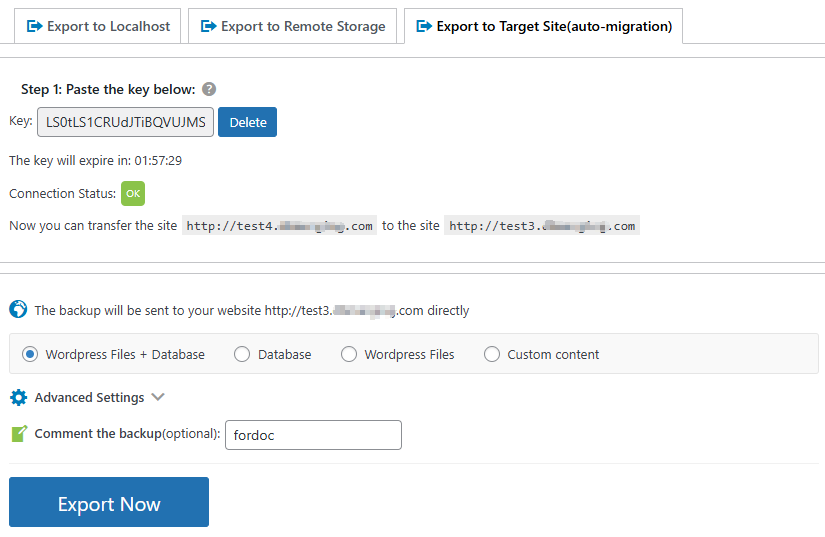
- WordPress Files + Database
Complete site migration (recommended for full migrations) - Database Only
Transfer only database content (useful when files are already in place) - WordPress Files Only
Transfer only files without database - Custom Content
Select specific files, folders, or database tables to migrate
Optionally, add a comment to identify this migration for your records.
Step 4: Start Export Process
- Review your content selection
- Click Export Now to begin the transfer
- WPvivid will package and transfer your site directly to the destination server
Step 5: Monitor Export Progress
During the export process, WPvivid displays real-time progress including:
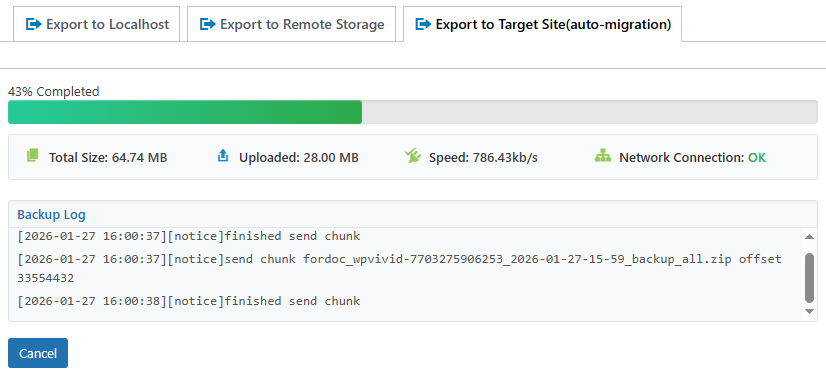
- Export percentage completed
- Current file or database being processed
- Transfer speed and estimated time remaining
- Data volume transferred
Wait until you see the export successful message before proceeding to the destination site.
Step 6: Import Site on Destination
Once the export completes successfully, go to the destination website:
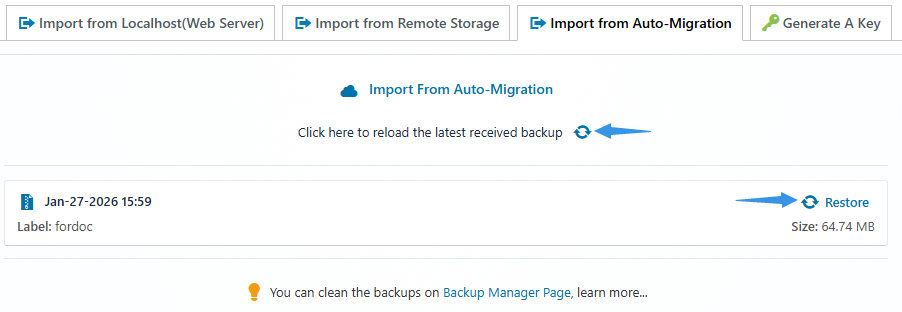
- Go to WPvivid Backup Pro → Import Site
- Select Import from Auto Migration
- Click the Refresh icon to load received backups
- Locate the transferred site in the list
- Click Restore to begin the restoration process
Step 7: Monitor Restore Progress
During the restore process, WPvivid will display real-time progress information including:
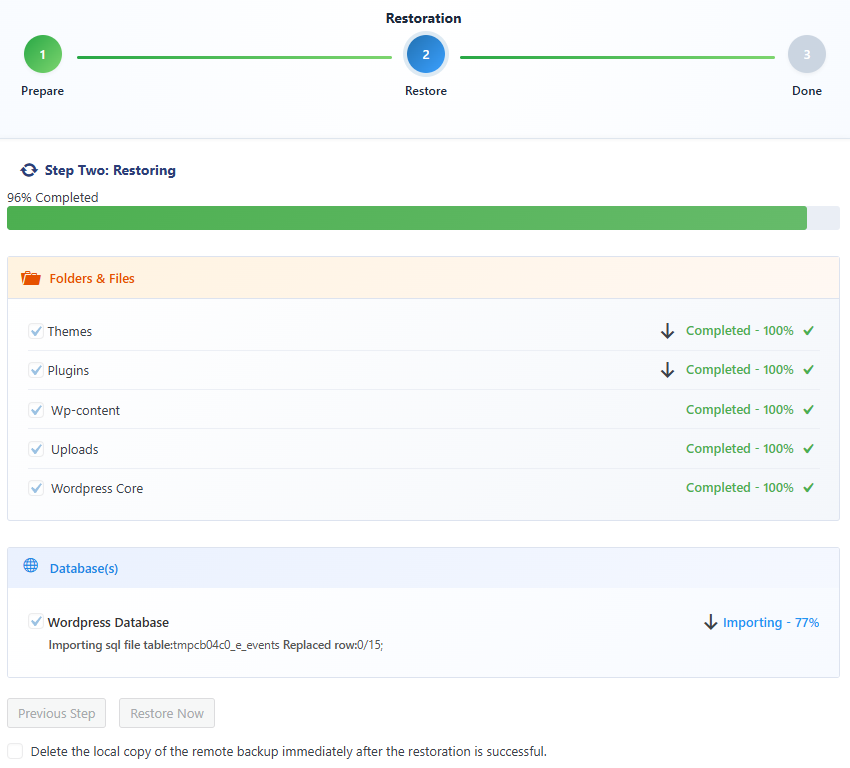
- Restore percentage
- File extraction status
- Database import progress
- Current task stage
Do not close or refresh the restore page. Wait until the process completes and the success confirmation appears.
Step 8: Verify Migration Results
After restoration completes:
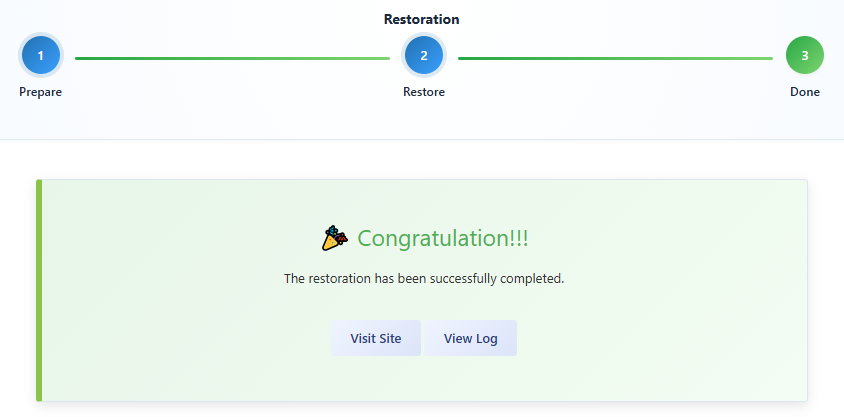
- You’ll see a restore successful message
- Check your homepage and key internal pages
- Verify plugins and themes are functioning properly
- Confirm media files display correctly
- Test important functionality (contact forms, e-commerce, user login)
- Check that database content is intact (posts, pages, users, settings)
Best Practices for Auto-Migration
To ensure smooth and reliable migrations, follow these best practices:
- Perform migrations during low-traffic periods to minimize user impact
- Ensure both source and destination sites are running compatible PHP and WordPress versions.
- Test the migration process on a staging environment before migrating production sites
- Do not delete the source website until you confirm the destination site works as expected
- Clear any caching plugins on destination site after migration.
Troubleshooting Migration Issues
If the migration process fails, times out, or becomes stuck, try adjusting the WPvivid Advanced Settings according to the documentation below:
If the issue persists, please contact WPvivid support for further guidance.