WPvivid Backup Pro provides the ability to create scheduled incremental backups of your site.
You can customize the content, cycle(frequency), start time for the incremental backup schedule, as well as where to store the backup: localhost(web server) or remote storage.
How to Create Incremental Backups?
1. Enable Incremental Backup Schedule
The first thing you will need to do to create incremental backups is to enable incremental backup schedule.
To do that, Go to WPvivid > Schedule page> Incremental Backup Schedule tab, click Enable Incremental Backup Schedule button.
Then a confirm message will pop up, click OK to confirm the action.

Once enabled, a pre-set incremental backup schedule will take effect automatically, which includes
- A weekly full files backup schedule
- A every-hour files incremental backup schedule
- A weekly database backup schedule
and you will see the status of the backup start time under the Next Backup changed from N/A to a week later than the current local time(the date and time you set in the WordPress Settings).
You will also have the option to choose whether you want to perform a full backup immediately when enabling incremental backup. It can help you quickly restore the website in case it it breaks before the incremental backups start.

2. Edit Incremental Backup Schedule
If you find the pre-set schedule doesn’t meet your need, you can click the Edit button under the schedule sheet to change the schedule.
With the options that expand, you can:
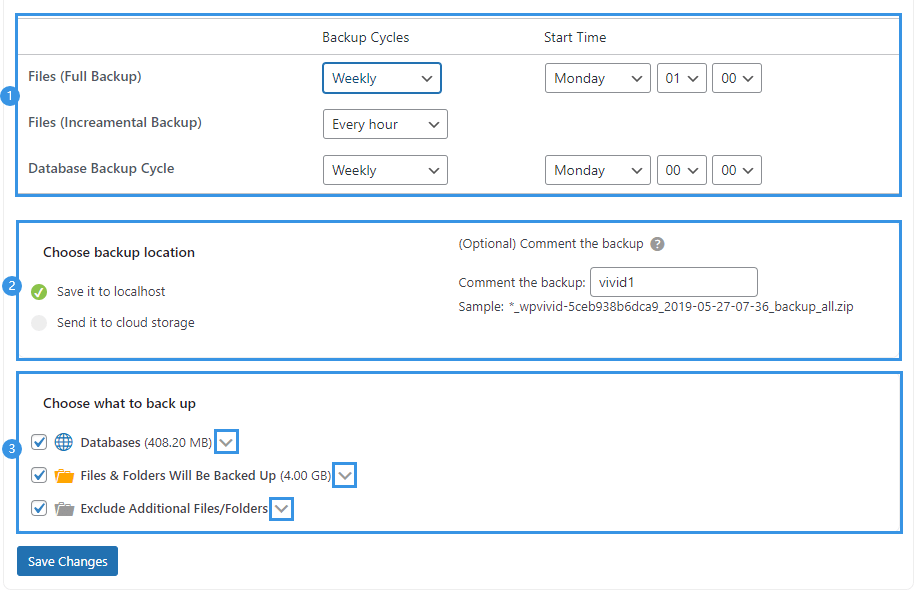
Set backup cycles and start time
1. Set backup cycles and start time for full files backup
Set backup cycle of all WordPress files on your website. All WordPress files that are newly created or changed since the latest full backup will be backed up as increments to it.
2. Set backup cycles for files incremental backup,
Set how long the plugin will back up changed files since the latest full backup
- Set backup cycles and start time for database backup.
Tips: Incremental backup will start only when a full files backup is triggered. So, if you want the incremental backup start immediately, try to set the start time of Files(Full Backup) to be few minutes later than the current local time.
Choose backup location
Choose where the backups will be stored, localhost(web server) or cloud storage.
Choose backup content
Choose which folders and database tables to be covered in the incremental backup. Click arrows to expand the options.
Comment the backup(optional)
Add a comment to the backup for easy identification, which is optional.
Once done, click Save Changes button to make the changes take effect.
How to Restore Incremental Backups?
1. Restore An Incremental Backup from Localhost


2. Restore An Incremental Backup from Remote Storage

