WPvivid Backup Pro offers an option for white label branding. With the white label option, you can replace WPvivid branding in the plugin with your own branding, hence presenting WPvivd Backup Pro functionalities to your clients as your own service.
How to White Label WPvivid Backup Pro?
In WPvivid Backup Pro 1.9.18 or newer, the white label settings is no longer in the left admin menu. Now you can access it by adding a slug at the end of the url of your WPvivid plugin page.
If it’s the first time you access the white label settings, please log in into your WordPress dashboard first, add the following default slug (which you can edit and change later) to the your domain url(for example, yourdomain.com):
/wp-admin/admin.php?page=wpvivid-dashboard&wpvivid_white_label=1
Then the full url should be something like this:
yourdomain.com/wp-admin/admin.php?page=wpvivid-dashboard&wpvivid_white_label=1
Note:
For WordPress Multisite, you can access the white label settings by visiting yourdomain.com/wp-admin/network/admin.php?page=wpvivid-dashboard&wpvivid_white_label=1. You need to add /network/ to the url because WPvivid plugins are installed on the Mu network admin.
Next, hit the Enter key to load the page, then you’ll be taken to the WPvivid White Label Settings page.
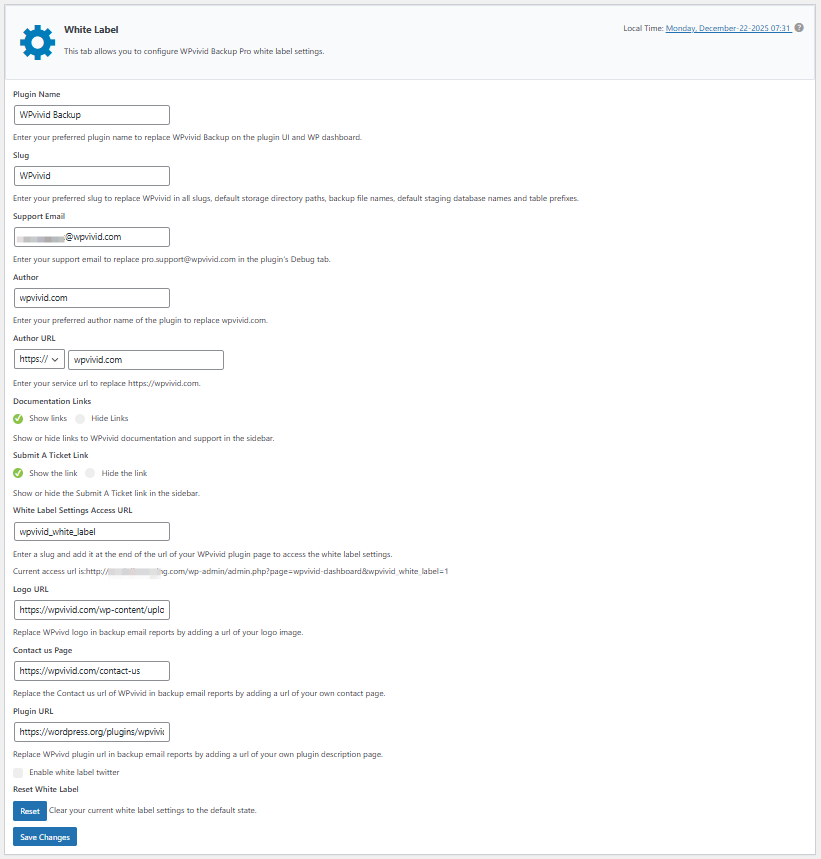
Now, you can set up your white label configurations:
- Plugin Name: Enter your preferred plugin name to replace WPvivid on the plugin UI and WP dashboard.
- Slug: Enter your preferred slug to replace wpvivid in all slugs, default storage directory paths, backup file names, default staging table prefixes.
- Support Email: Enter your support email to replace [email protected] in the plugin’s Debug tab.
- Author: Enter your preferred author name of the plugin to replace wpvivid.com.
- Author URL: Enter your service URL to replace https://wpvivid.com on the plugin UI.
- Documentation Links: Show or hide links to WPvivid documentation and support in the sidebar.
- Submit A Ticket Link: Show or hide the Submit A Ticket link in the sidebar.
- White Label Settings Access URL: Enter a custom slug and add it at the end of the url of your WPvivid plugin page to access the white label settings. The default slug is &wpvivid_white_label=1, you can replace the wpvivid_white_label part with any custom slug you entered here.
- Logo URL: Replace WPvivd logo in backup email reports by adding a url of your logo image.
- Contact us Page: Replace the Contact us url of WPvivid in backup email reports by adding a url of your own contact page.
- Plugin URL: Replace WPvivd plugin url in backup email reports by adding a url of your own plugin description page.
- Enable whitelabel twitter: Replace Twitter of WPvivid in the backup email report by adding a url of your Twitter.
Click Save Changes to apply your settings. Then you may want to check out these changes in effect.
To revert to the default configuration, click the Reset button.
Check White Label Settings in Effect
1. On the plugin UI, in WPvivid url slugs, default storage directory paths and backup file names.

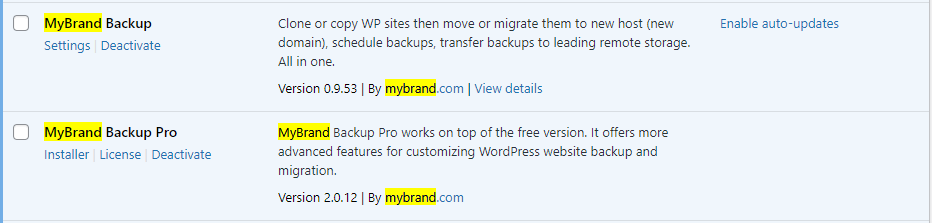
2. In your WordPress plugins list.
How to Access White Label Settings Page After You Set Up White Label?
Copy and past the following url in your browser’s search bar and hit Enter. Replace the ‘mybrand‘ and ‘wpvivid_white_label‘ in the url with the brand name(in lower case) and white label access url slug you input when you first set up the white label settings.
yourdomain.com/wp-admin/admin.php?page=mybrand-dashboard&wpvivid_white_label=1
Note:
If WPvivid white label option is enabled on the source site, in that case, the target site also needs to be white labeled to the same brand name for the plugin to recognize the backup file.
That’s it! If you have any further questions or concerns about white labeling WPvivid Backup Pro, feel free to contact us.