WPvivid Backup Plugin can help you transfer one WordPress site to another in just a few simple steps. It supports two migration methods:
1. Automatic Transfer
The simplest option for transfers between two sites and from a dev environment to a live server.
2. Manual Transfer:
The best option if you are experiencing any connection, permission, or database issues with the automatic transfer.
Whether you choose the automatic or manual transfer, the plugin must be installed on both websites.
Download and install WPvivid Backup Plugin on both the destination website and the site you want to copy. We recommend that you try the automatic transfer first, because it requires the least amount of steps for you to complete. The final steps, restoring the website, is the same for both processes.
Automatic Transfer
Step 1: Generate a Key
To transfer files safely between the two websites, you need to generate a key on the destination website. Once the key is generated, the destination website is ready to receive files.
On the destination website, go to WPvivid >> Key. Select the key’s expiration time. You can choose between 2, 8 and 24 hours. Then select the Generate button:

A key is generated for you by the plugin. Copy this key, as we are going to use it in step 2.
Step 2: Entering the key and starting the transfer
Return to the WordPress admin area of the site that you would like to copy.
Go to WPvivid >> Auto-Migration tab and add your key:

Select one of the three available options:
- Database + Files (Entire website)
- All files (Exclude Database)
- Only Database

Click Clone then Transfer to begin.
During the entire transfer, you can monitor the progress with the progress bar. You will be notified of the Database Size, File Size, Total size, Uploaded, Speed, and Network Connection.
Below are two examples of how the different stages of the transfer are reported:

How long the transfer takes depends on your connection speed and the size of your website.
When the transfer is complete, the following message will be displayed:

When you have completed these steps, please skip to Restoring the website.
Manual Transfer
Log in to the website that you would like to copy, and go to WPvivid >> Backup & Restore.
Step 1: Create a backup
A detailed explanation on how to create a backup is part of our Get Started series, please see Get Started: Create a Manual Backup.
Step 2: Download the backup to your computer
Select the Download option from the list of available backups.
Note: If the backup is stored in remote storage, our plugin will retrieve the backup to your web server first.
Step 3: Upload the backup to your destination website
There are two suggested ways to upload the backup to your destination website.
Option one:
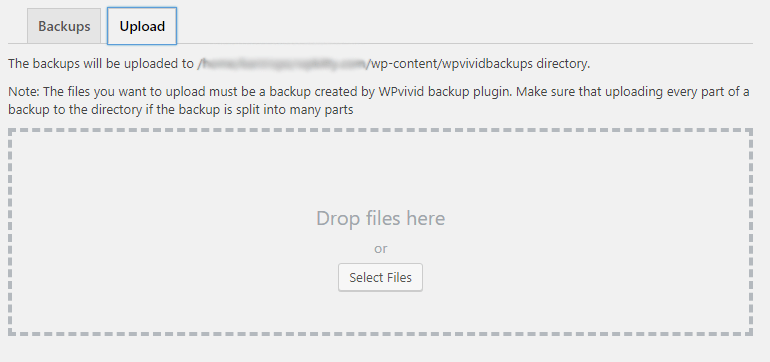
1. On the destination website, go to WPvivid >> Backup & Restore.
2. Select the Upload option and upload the backup file(s):
Note: If you got multiple parts/files, please select and upload them at once.
Option two:
1. Upload the backup files to the destination website via a ftp client: The plugin has automatically created a folder for your backups at: /wp-content/wpvividbackups
2. Make sure that all the backup files are placed in the correct folder.
Restoring The Website
Step 1: Find the files in backup list
Head over to the destination website and go to WPvivid >> Backup & Restore, you will see the newly transferred files has been automatically added to the list of available backups:

Step 2: Restoring the backup
A detailed guide on how to restore the backup can be found here: Get Started: Restore Your Site from a Backup.
Important:
The restore function will replace the site’s themes, plugins, uploads, database and/or other content directories with the existing equivalents in the selected backup.
Click the Restore button after the backup in the list, you will be asked to confirm the changes. You will then be able to follow the process through the log, where you can see files being extracted and restored.

Once completed, a window will pop up notifying you of the success of restoration.
Click OK to confirm, you’ll then be automatically logged out of the admin area.

Next, log in to the site using new credentials (credentials of the site you’ve transferred).
And then, what you have been waiting for:

Congratulations!
With the migration complete, please test your website carefully to make sure it works as expected.
How to Migrate A Site to A New Host And Keep the Domain Unchanged
The correct procedure to migrate a website but keep the same domain would be:
- Create a full backup (database + files) of the source site and download it to your computer.
- Go to your domain provider’s website and point your domain name to the new hosting. See this example tutorial.
- Install WordPress on the new host and install WPvivid Backup Plugin.
- Upload the backup to the target site(using WPvivid plugin’s upload function or using an FTP to upload the backup to the wp-content/wpvividbackups folder) then restore.
- Check and make sure the new site works as expected, then delete the source site.
Or if you’d like to use the ‘Auto Transfer’ option, follow the steps below:
- Install WordPress on the target server and make sure it is accessible and connectable. You can still install and access WordPress when you do not have another domain name for the target site, you can use the IP address of the new server. See this example tutorial or contact your web host for help if you are not sure how to do this.
- Use WPvivid auto migration feature to transfer files from the source to the target site.
- Point your domain name to the new server and make sure it takes effect(it will take you to the new site when you visit the domain). To do that, go to the target site backend > Settings > General > change the WordPress Address (URL) and Site Address (URL) to the domain name > Save changes.
- Restore the site using the transferred backup.
- Check and make sure the new site works as expected, then delete the source site.
Troubleshooting
If you are experiencing issues with the automated transfer, please try to the manual transfer first. Here some known issues and the solutions:
Error: A key is required
This message is presented if you have accidentally clicked the transfer button before pasting your key.
Error: 404 Error. Page Not Found
If you encounter this error when you click on pages or menus on the site after migration. Please go to Settings > Permalink, and click Save Changes button.
Generally, our plugin updates the permalinks automatically when completing the processing of migration, but it could fail to update the permalinks on some webhostings. In that case, you can update it manually.
cURL error 28 -Operation timeout
Please try again. If this problem persist, try to increase the memory limit in your servers php.ini file. If you are not comfortable editing the file, contact your webhost support and see if they can help.
Transfer failed: Error establishing a database connection
If this error is presented when you select Database + Files (Entire website), select the Only Database option instead and then attempt the transfer again.
If the transfer is successful, you can then select the All Files (Exclude Database) option to transfer the rest of your site.
You will need to restore both backup files on your destination site.
The transfer is taking too long
If there are no error messages and if the progress bar is moving, then the transfer is still being handled. How long the transfer takes depends on your connection speed and the size of your website.
More issues and corresponding solutions can be found on our troubleshooting issues on WPvivid Backup plugin.