WPvivid Image Optimization Pro works on top of the free version and uses specialized API and improved algorithms to process images in a faster and safer way.
It comes with many advanced options, including custom compression rate, WebP conversion, excluding files/folders from optimization, scheduled optimization and more.
Let’s take a look at how the WPvivid Image Optimization Pro works.
Install WPvivid Image Optimization Pro
Check out this step-by-step guide to install WPvivid Image Optimization Pro on your WordPress website.
Optimize Images
Once installed, you can access the image optimization page where you can optimize images and manage optmized images.
Before starting optimizing images, you have the option to choose:
- Resizing images only or,
- SIBO(Smart image bulk optimization)
* The SIBO option is a smart image optimization method introduced by WPvivid. With the option ticked, our plugin will perform compression and resizing on the fly according to the image status, and run WebP conversion according to your settings. All you have to do is clicking the ‘Optimize Now’ button to start the process.
Once you are done with the options, click the ‘Optimize Now’ button to start the process.

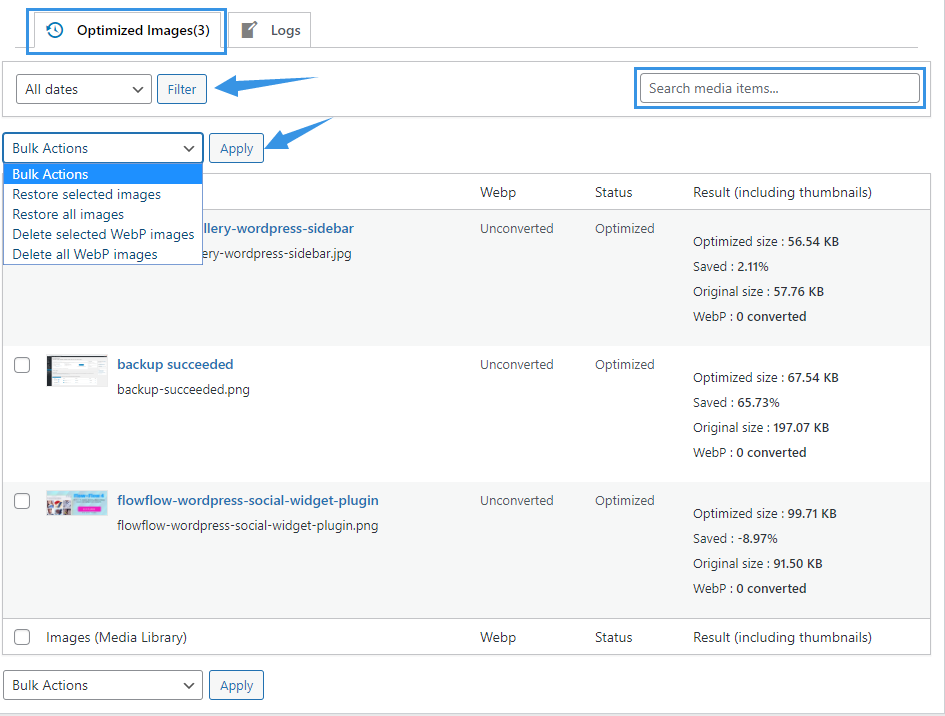
Manage Optimized Images
All the optimzied images are displayed in a list where you can manage them:
- Restore selected images
- Restore all images
- Deleted selected WebP images
- Delete all WebP images
You can also filter images by the date when they were uploaded, and search for images by entering the image file name.
Settings
The Settings page allows you to configure all the plugin settings for the image optimization, including:
- Choose server location for image optimization
- Choose which optimization option to use: Optimize images immediately upon upload, or Set up a schedule to automatically run optimization in background.
- Choose folders to optimize images inside them: Media Library, or Custom Folders
- Choose compression mode: lossless, lossy, Super, Custom
- Leave EXIF data of images
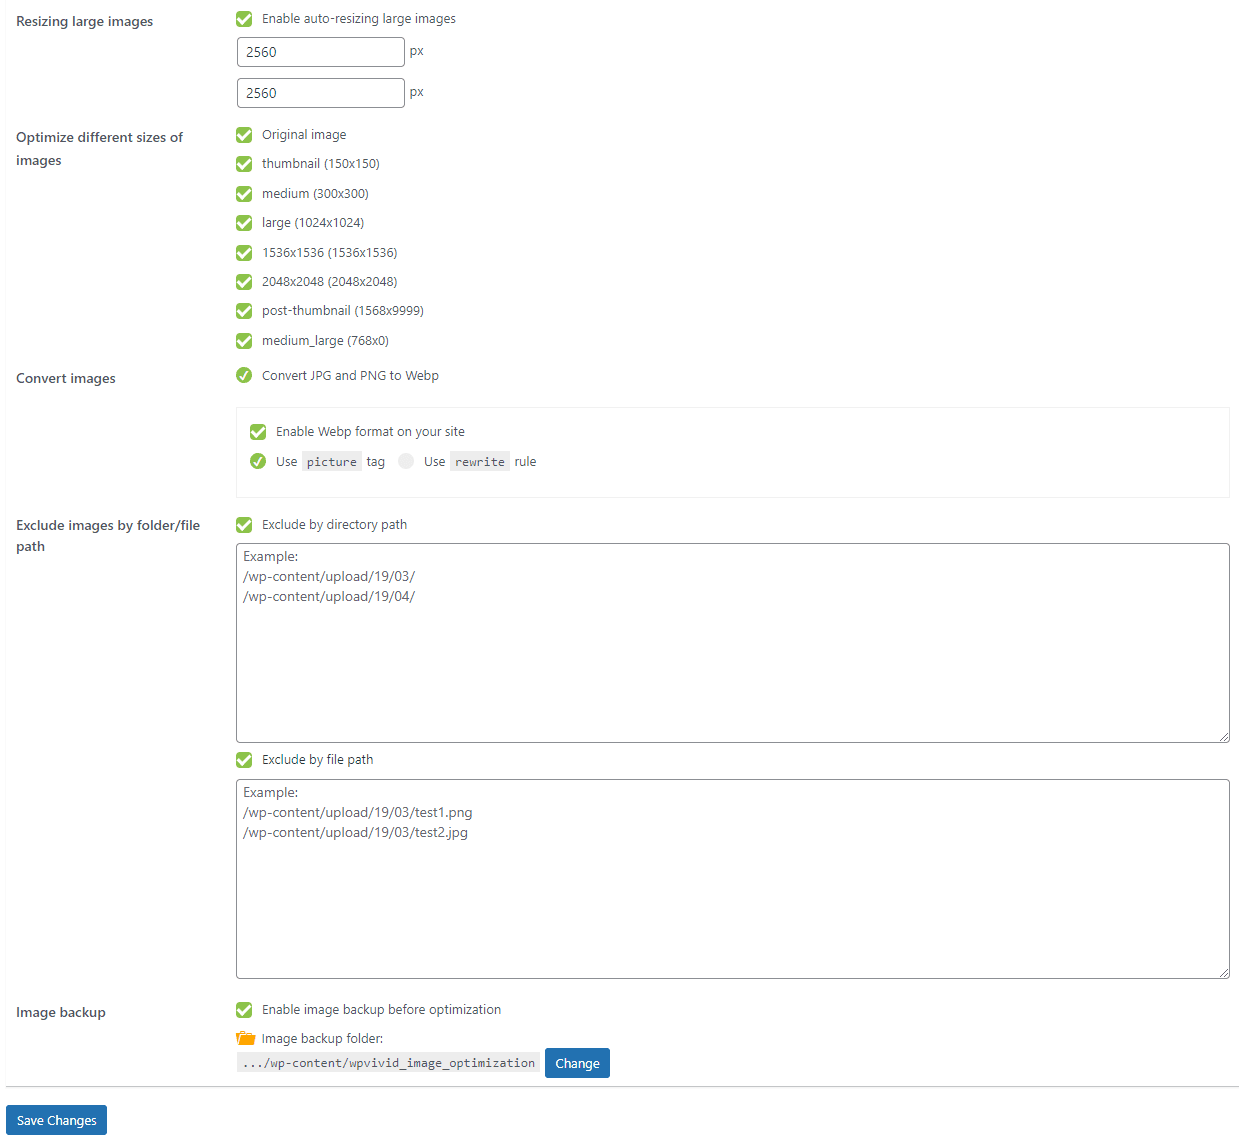
- Enable auto-resize large images
- Optimize different sizes of images
- Enable Convert JPG/PNG to WebP option
- Enable WebP formate on the site
- Exclude files/folders from optimization
- Enable image backup before optimization
- Enable real-time optimization for images upon upload

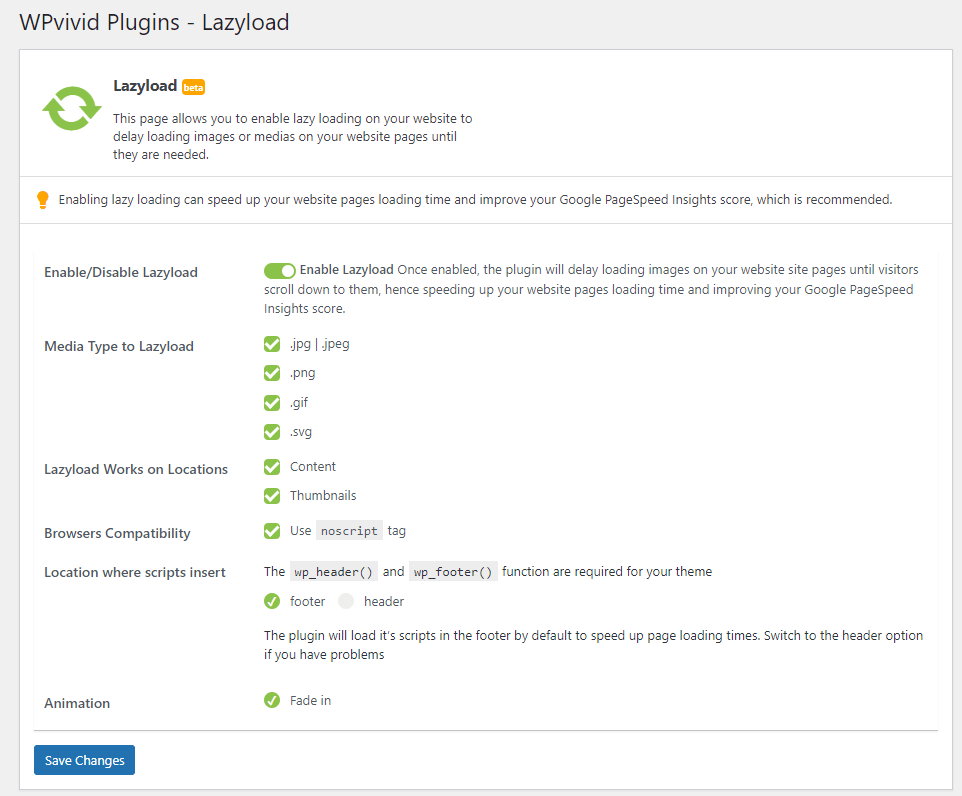
Advanced Lazyload
From the Lazyload page, you can enable advanced lazyload for all types of medias on your website, including images, iframes, Youtube videos, widgets.
- Media Type to Lazyload: Choose media type you want to lazyload, which includes .jpg/.jpeg, .png, .gif, and .svg.
- Locations where lazyload works: Content, and Thumbnails.
- Browsers Compatibility: Use noscript tag.
- Location where scripts insert: Footer or Header, the wp_header() and wp_footer function are required for your theme.
- Animation: Fade in, and more are coming soon.