In this guide, we will see how to install and activate WPvivid Image Optimization Pro plugin on your WordPress website.
Step 1. Install WPvivid Plugins Pro
To install the WPvivid Image Optimization Pro plugin, you will need to first install WPvivid Plugins Pro on your website.
Follow this step-by-step tutorial on How to install WPvivid Plugins Pro in WordPress.
Step 2. Install WPvivid Image Optimization Pro
Once you have successfully installed/upgraded to WPvivid Plugins Pro, you’ll be taken to the WPvivid Plugins Installer page where you can choose the plugins you want to install and use on the site.
Simply tick the WPvivid ImgOptim Pro Addon and click Install Now button to start the installation process.
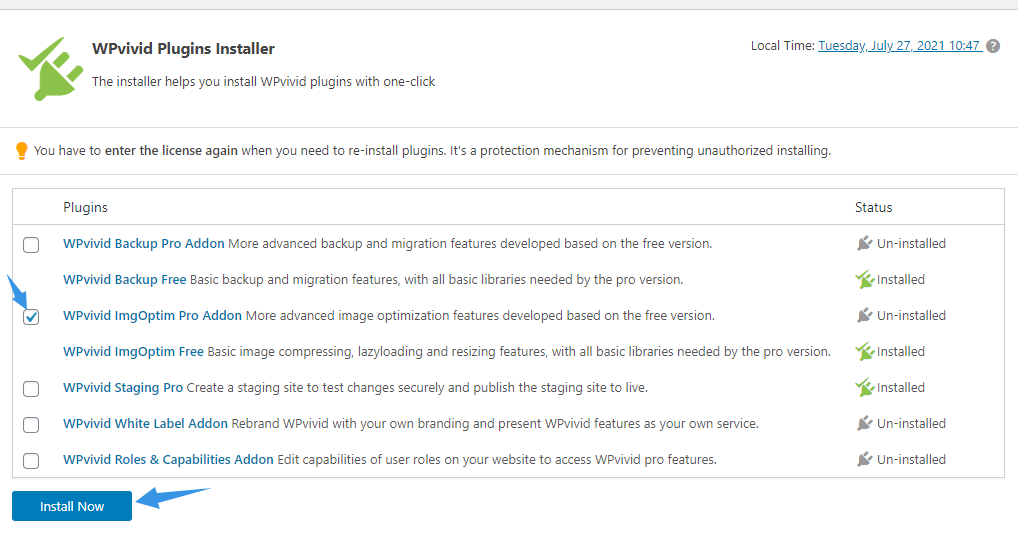
Note: The free version of the WPvivid Backup Plugin and WPvivid Image Optimization plugin will be installed by default when you choose to install the pro version of the plugins, that is because the free plugins contains all basic libraries needed by the pro plugins.
That’s it. Once the installation is done, you can navigate to the Image Optimization page from the dashboard to start using the plugin.