A CDN or Content Delivery Network is a technology of serving your website content from several locations to speed up your page load time, hence improving user experience and your PageSpeed Insights score.
As version of 2.0.13 Beta, WPvivid Image Optimization Pro plugin provides the ability to integrate a CDN service to your website with just one click.
Note: WPvivid Image Optimization Pro does not offer CDN service itself, so you should have a valid CDN service to move forward.
In this guide, we’ll see how to integrate a CDN service to your website with WPvivid Image Optimization Pro.
How to Integrate CDN in WordPress?
1. Install WPvivid Image Optimization Pro
Please follow this step-by-step guide to install WPvivid Image Optimization Pro on your WordPress website.
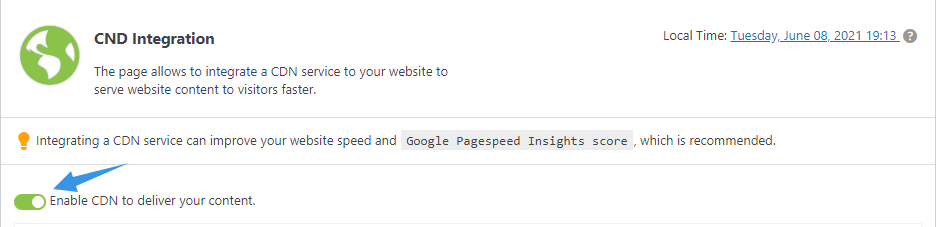
2. Enable CDN
Once installed, go to your WordPress admin dashboard > in the left admin menu, click WPvivid Plugins > click CDN Integration > Enable CDN to deliver your content.
3. Configure CDN Settings
Next, you will need to configure CDN settings:
- Enter your CDN Url(without trailing ‘/’): e.g. http://examplecdn.com
- Choose to enable CDN for relative path or/and https connections
- Included Directories: Input directories so that assets under it will be pointed to your CDN url: e.g., wp-content, wp-includes(separate directories by comma).
- Exclude Extensions/Directories: Input file extensions and directories so the files/directories will be excluded from CDN rewriting: e.g., .php,.js, .css.
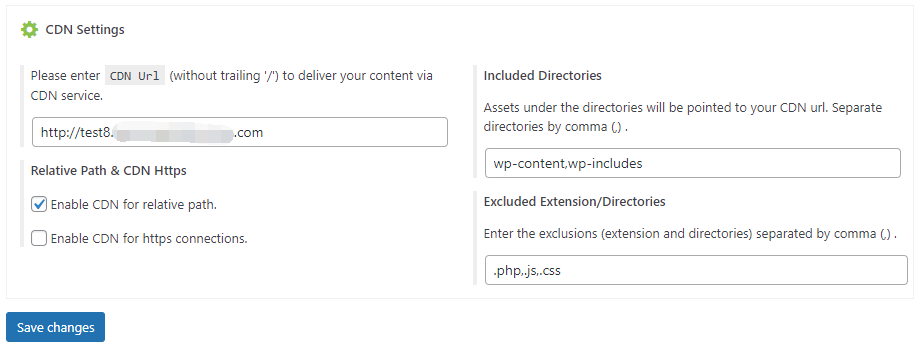
4. Save Changes
Once you are done with all settings, click Save Changes button to make the CDN integration take effect.
How to Verify If CDN Integration Has Been Effected?
To verify whether the CDN integration has been effected, simply right-click an image on your website and click Inspect, you would see the image is loaded by your CDN service provide now.
