

This guide explains how multisite restore works in WPvivid Backup & Migration Pro. It covers supported restore scenarios, how multisite restore operates at the network level, current limitations, and best practices for safely restoring WordPress Multisite network backups.
Supported Multisite Restore Scope
Currently, WPvivid Backup & Migration Pro supports full multisite network restoration.
Supported Restore Type
WPvivid Backup & Migration Pro supports the following multisite restore operation:
- Full Network Restore
Restores the entire multisite environment, including all subsites, database tables, plugins, themes, and uploads.
Unsupported Restore Scenarios (Current Limitation)
The following restore operations are not supported in the current version:
- Single Subsite Restore
Restoring one subsite independently from a multisite backup is not supported. - Cross-Type Restore
Restoring backups of single-site WordPress installations to multisite is not supported.
Note
Multisite restore is designed for complete network recovery rather than individual site-level restoration.
Multisite restore is designed for complete network recovery rather than individual site-level restoration.
What Gets Restored in Multisite Mode
When performing a multisite restore, WPvivid Backup & Migration Pro replaces the existing multisite environment with data from the selected backup.
The restore process includes:
- Network Database Tables
All multisite database tables, including network settings and subsite data. - All Subsites Content
Posts, pages, media, users, and metadata from every site in the network. - Plugins and Themes
Network-activated and site-activated plugins and themes. - Uploads and Media Files
All media files stored across the multisite environment. - Network Configuration
Network settings, subsite configurations, and WordPress core files.
Warning
The restore operation will completely overwrite your current multisite installation. All existing data, including any changes made after the backup was created, will be lost.
The restore operation will completely overwrite your current multisite installation. All existing data, including any changes made after the backup was created, will be lost.
Restoring a WordPress Multisite Network Backup
WPvivid Backup & Migration Pro allows you to restore complete multisite network backups from the Network Admin dashboard. The restoration process replaces the entire multisite network with the backup data.
Step 1: Locate the Backup
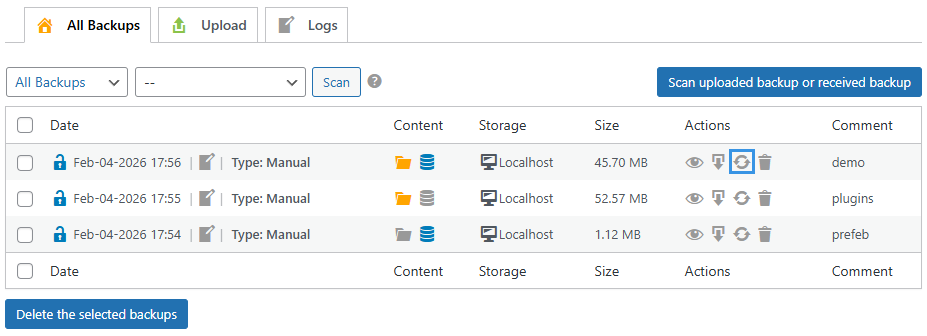
- Navigate to My Sites → Network Admin → WPvivid Backup Pro → Backup Manager.
- Locate the multisite backup you want to restore in the backups list.
- Click the Restore icon (circular arrow) in the Actions column.
Step 2: Select Restore Content
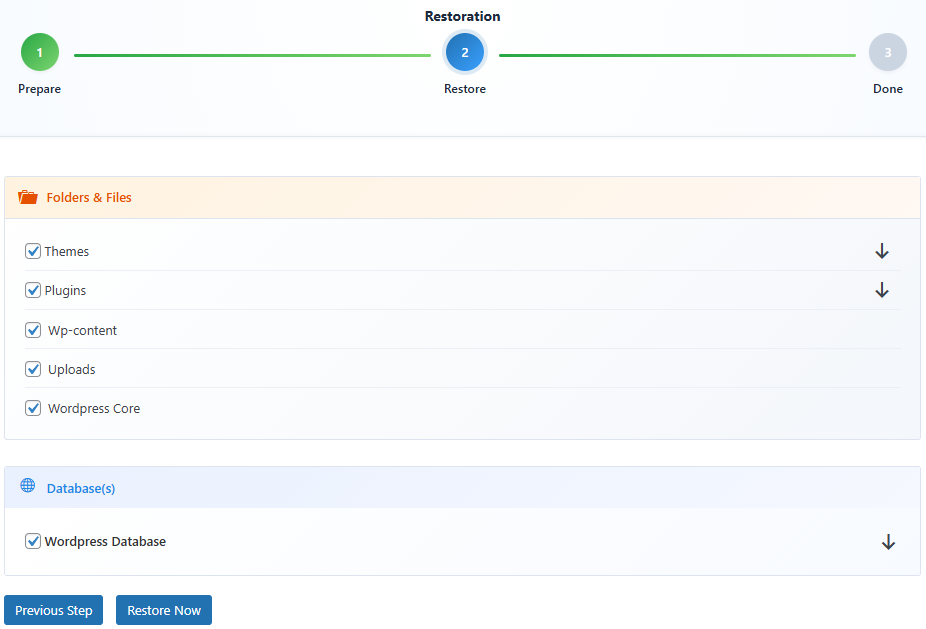
- Review the Folders & Files section and select the file components you want to restore.
- Review the Database(s) section and select the database tables you want to restore.
- By default, all components are selected. Uncheck any components you do not want to restore.
- Click the dropdown arrows to view detailed file lists if needed.
Step 3: Execute the Restoration
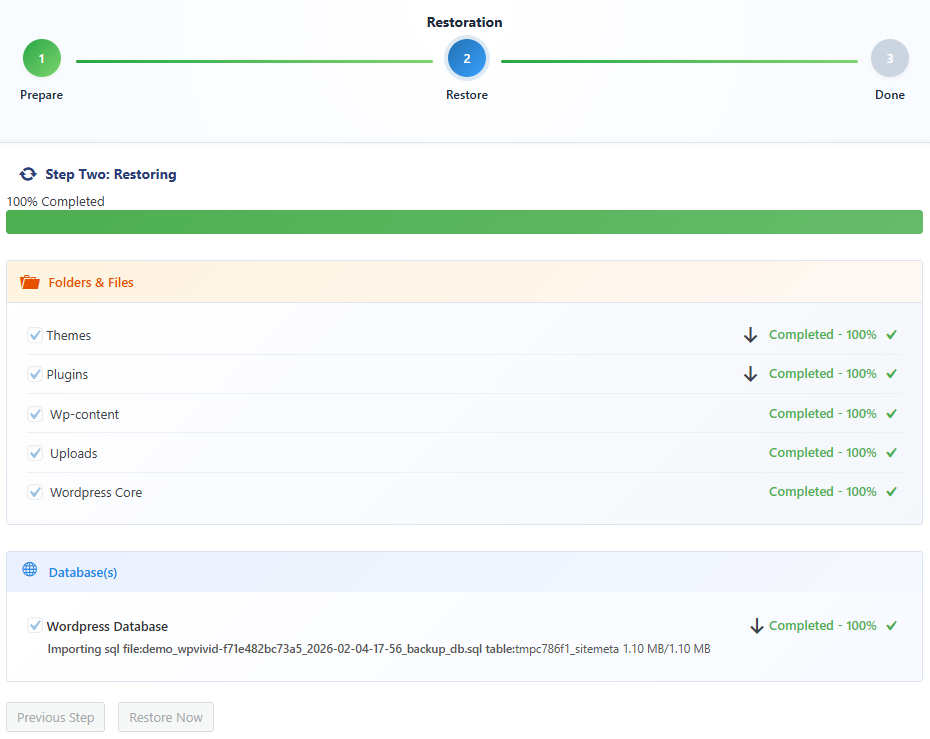
- Click Restore Now to begin the restoration process.
- WPvivid will extract and restore the selected components to your multisite network.
- Monitor the progress bar as the restoration completes.
- Do not close the browser window or navigate away during the restore operation.
Step 4: Verify Restoration
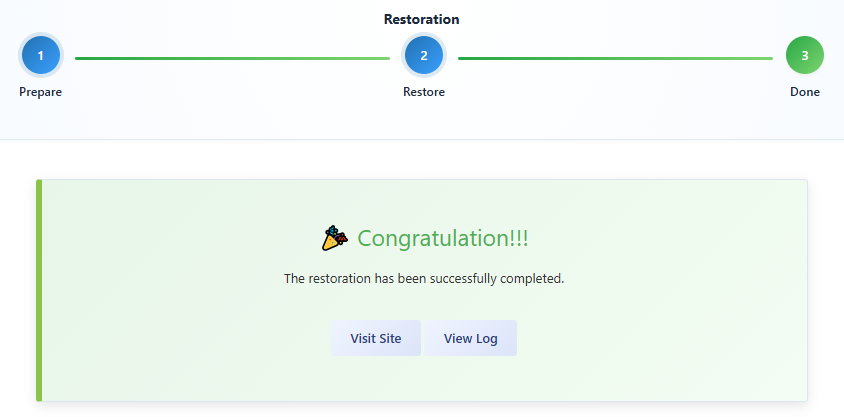
- Once completed, you will see a success message confirming the restoration.
- Verify that all subsites are accessible and functioning correctly.
- Test critical network features and subsite functionality.
Tip
After restoring a multisite network backup, clear all caches and check network settings. If you use custom domain mapping or network-wide plugins, verify their configurations are correct after restoration.
After restoring a multisite network backup, clear all caches and check network settings. If you use custom domain mapping or network-wide plugins, verify their configurations are correct after restoration.
Known Limitations
Current multisite restore limitations include:
- Full Network Restore Only
Restoring individual subsites from a multisite backup is not supported. The restore process applies to the entire network. - Subdirectory Structure Required
Restores are only supported for subdirectory-based multisite networks. Subdomain-based configurations cannot be restored using WPvivid Backup & Migration Pro. - Network Admin Access Required
Multisite restore operations must be performed from the Network Admin dashboard. Individual site administrators cannot initiate or manage network restores. - Same Network Type Required
The backup must be restored to a multisite environment with the same network structure (subdirectory-based) as the original backup source.
Best Practices for Multisite Restore
For safe and reliable multisite recovery, follow these best practices:
- Test restores in a staging environment before performing them on production networks.
- Keep multiple backup versions available for different recovery points.
- Store backups on remote cloud storage to protect against server failures.
- Verify all subsite functionality and network settings after restore completion.
- Clear all caches and check permalinks across all subsites after restoration.