The Manual Backup page is the primary hub of the WPvivid plugin. From here, you can manually create on-demand backups for safekeeping, restoration, or website migration.
The process is divided into three simple steps:
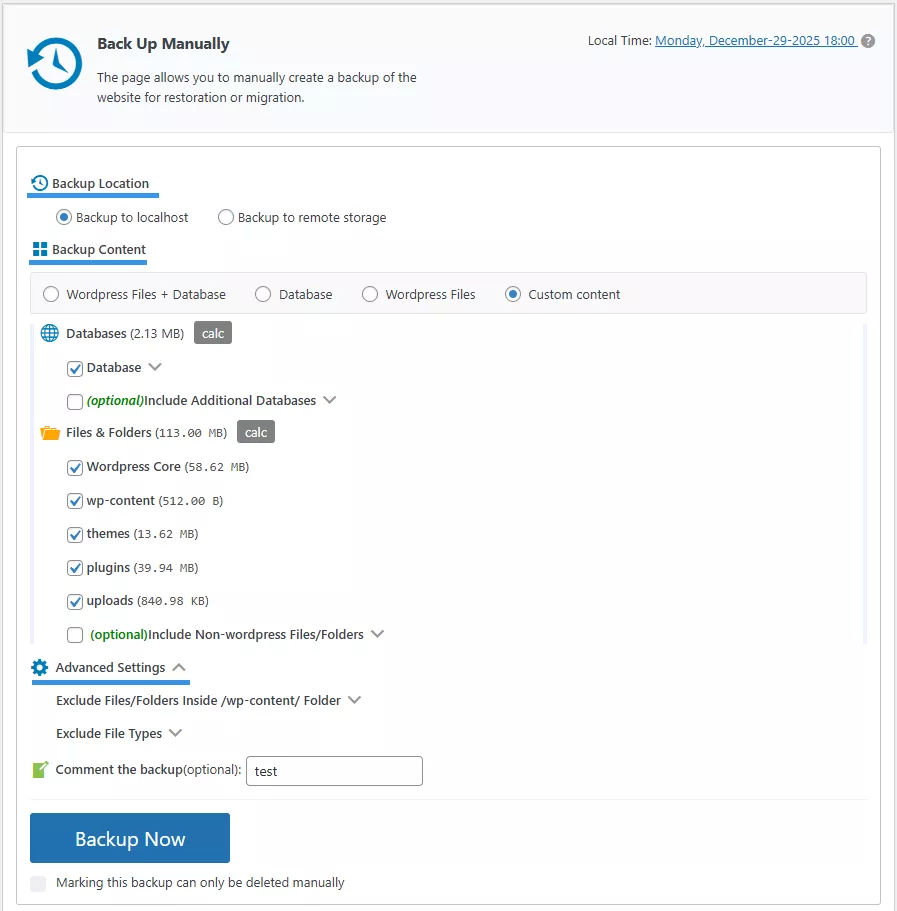
Step 1: Choose Backup Location
Select where you would like to store your backup files:
-
Localhost: Saves the backup locally on your web server.
-
Remote Storage: Sends the backup directly to your configured cloud storage (e.g., Google Drive, Dropbox, etc.).
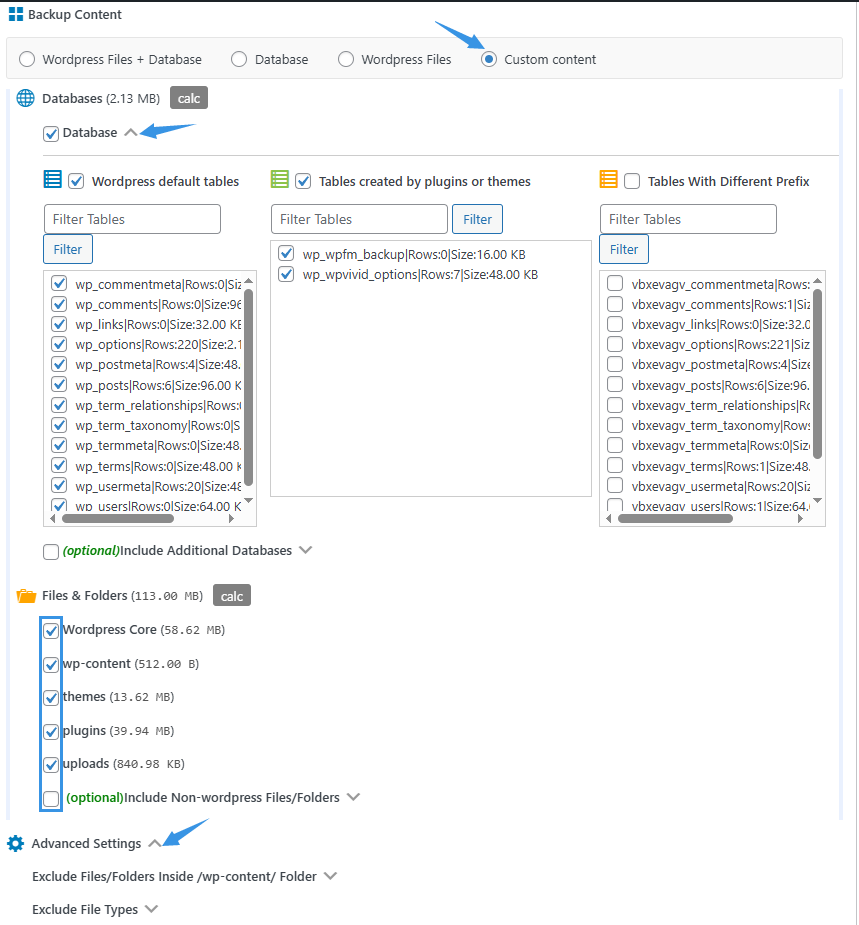
Step 2: Select Backup Content
Customize exactly what data you want to include or exclude:
Database:
- WordPress default tables.
- Tables created by plugins or themes.
- Tables with different prefixes.
- Include additional external databases (Optional).
Files & Folders:
- Select from WordPress core,
wp-content, themes, plugins, and uploads. - Include non-WordPress files and folders located in your directory (Optional).
Global Advanced Settings:
- Exclude specific files or folders inside the
/wp-content/directory. - Exclude specific file types (e.g.,
.mp4,.zip). - Add a custom note to the backup for easy identification later.
Step 3: Perform the backup
Click the Backup Now button to start making a backup. You can choose to “Lock” the backup. A locked backup is protected from automatic deletion and can only be removed manually.
Important Notes
- WPvivid does not restore
.htaccessorwp-config.phpfiles. Restoring these on a different server or site can cause critical errors. Please manually download and copy these files if specific configurations are needed. -
WPvivid excludes its own plugin files from backups. To move your configuration, you can use the Export/Import Settnigs option on the plugin Settings page.
-
If migrating a child theme, ensure the parent theme is also included in the backup if it is not already installed on the destination site.
-
For the smoothest migration experience, we recommend temporarily deactivating 301 redirect plugins, firewalls/security plugins, and caching plugins before starting the transfer.