Auto migration allows sending the source site directly to the target site, therefore is the fastest way to migrate a WordPress site.
The migration can be done in two simple steps:
Step 1. Export the Source Site to Target site(Auto Migration)
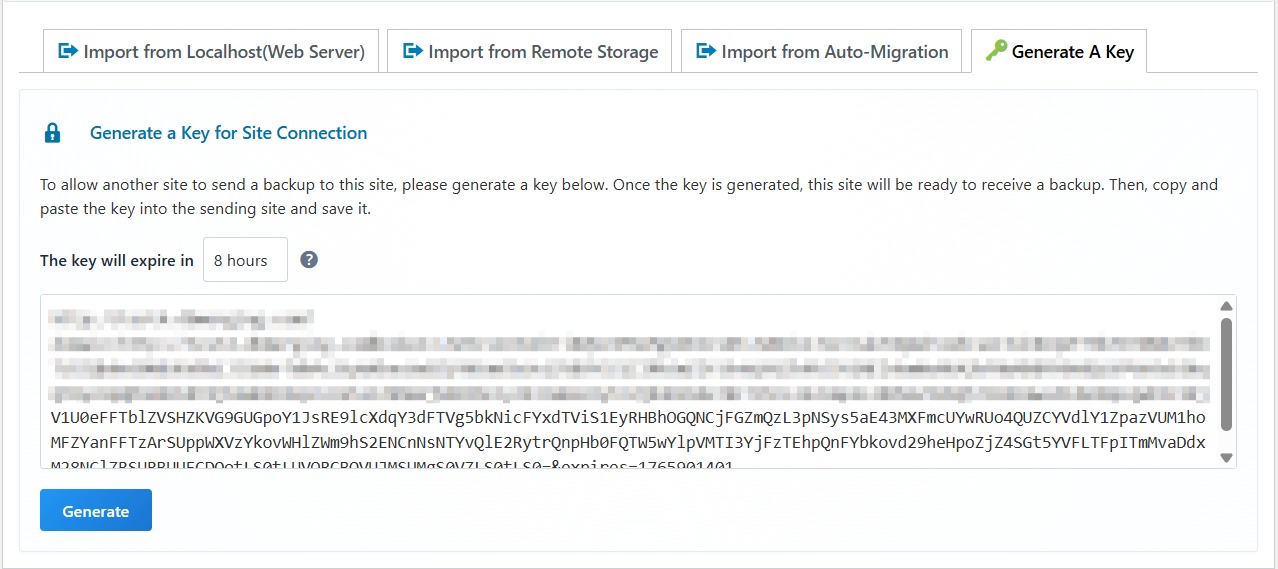
Go to the target site(where you want to migrate to), go to WPvivid Backup Pro > Import Site > Generate A Key, click Generate to generate a key, then copy the key.
Next, go to the source site(where you want to migrate from) > WPvivid Backup Pro > Export Site > Export to Target Site(Auto Migration). Paste the key to the field and click Save.
Once done, you can choose what content to export:
- WordPress Files + Databases
- Database only
- WordPress Files only
- Custom Content
And add a comment to the exported zip(s) for better identification(optional).
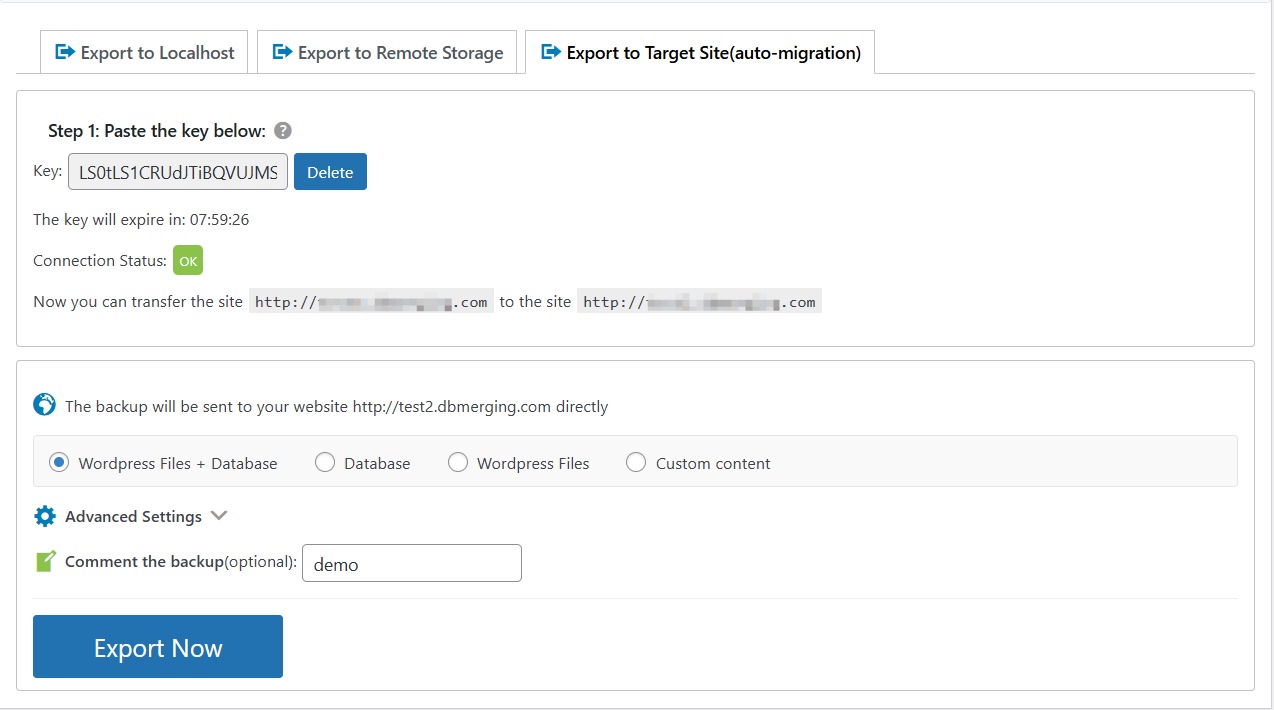
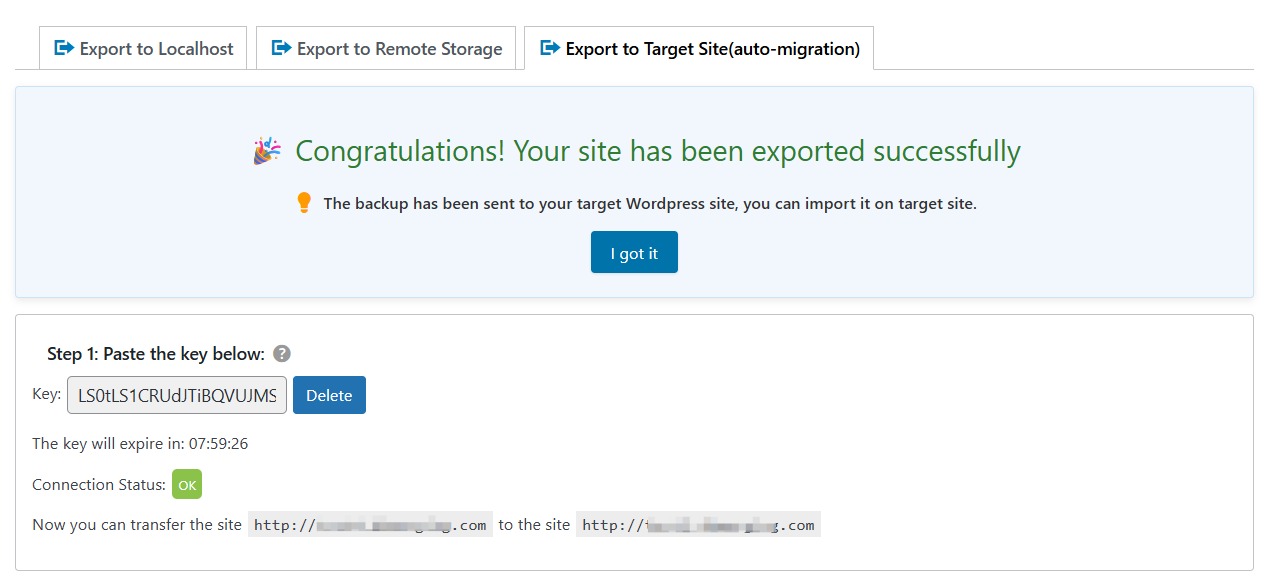
After that, click on Export Now. You will an success message once the process is done. Then you can go to the destination site to import the site.
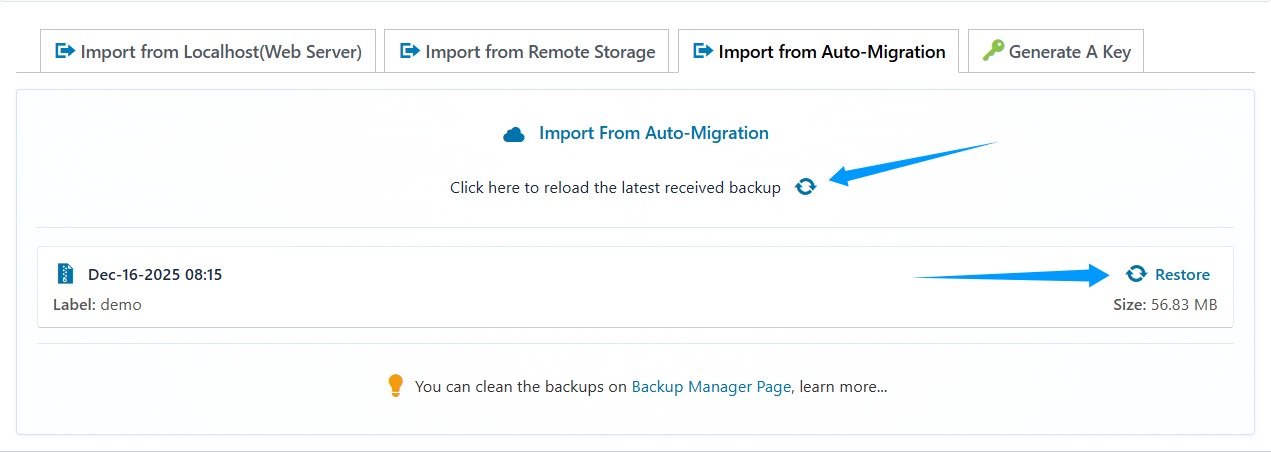
Step 2. Import the Source Site to the Target Site
Once exporting the source site is done, go to the target site > WPvivid Backup Pro > Import Site > Import from Source Site(Auto Migration), click the ‘refresh‘ icon to retrieve the received site to the list. Then click Restore button to restore the site.