You can select the content that you want to copy from the live site to the staging site.
Once the staging site is created, you also have the options to update the live site to staging site and push the staging site back to live with one click.
How to Create A Staging Site?
To create a staging site, login to your admin dashboard > click WPvivid Staging in the left side menu > On the Staging sites tab, click the Create A Staging Site button.
Note: WPvivid Staging will automatically exclude some most-used cache plugins when creating a staging site, but considering that there are hundreds of cache plugins on the market, we would recommend temporarily deactivating cache plugins before creating a staging site to rule out possibilities of unknown failures.
1. Choose Database and Directory for the Staging Site
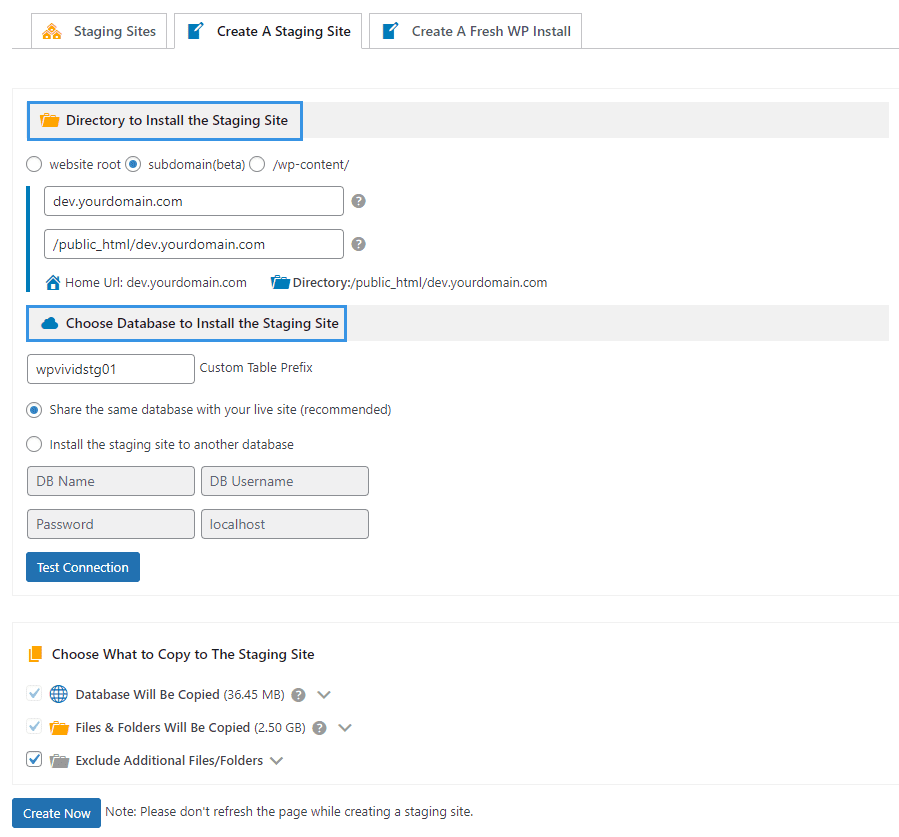
First, select a directory where the staging site will be saved under your WordPress installation, and name the staging directory, which is also the staging site’s name.
As of version 2.0.1, WPvivid Staging Pro offers the option to install the staging site to a subdomain, you will need to fill in the information below to use this option:
- An existing subdomain of your live site that you want to install the staging site to. You can usually create one on your hosting panel. E.g., http://dev.yourdomain.com.
- An existing absolute path that you have mapped the subdomain to. E.g., /var/www/html/dev.example.com/.
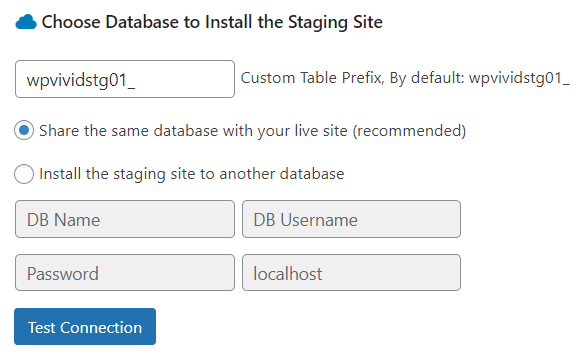
Next, choose a database for the staging site and name the staging table prefix:
- Share the same database with your live site, which is recommended.
- Install the staging site to a different database, this requires you to provide additional login credentials for the database: database name, user name. user password, localhost.
2. Choose What to Copy to the Staging Site
Next, you can customize the content on the live site that you wish to copy to the staging site.
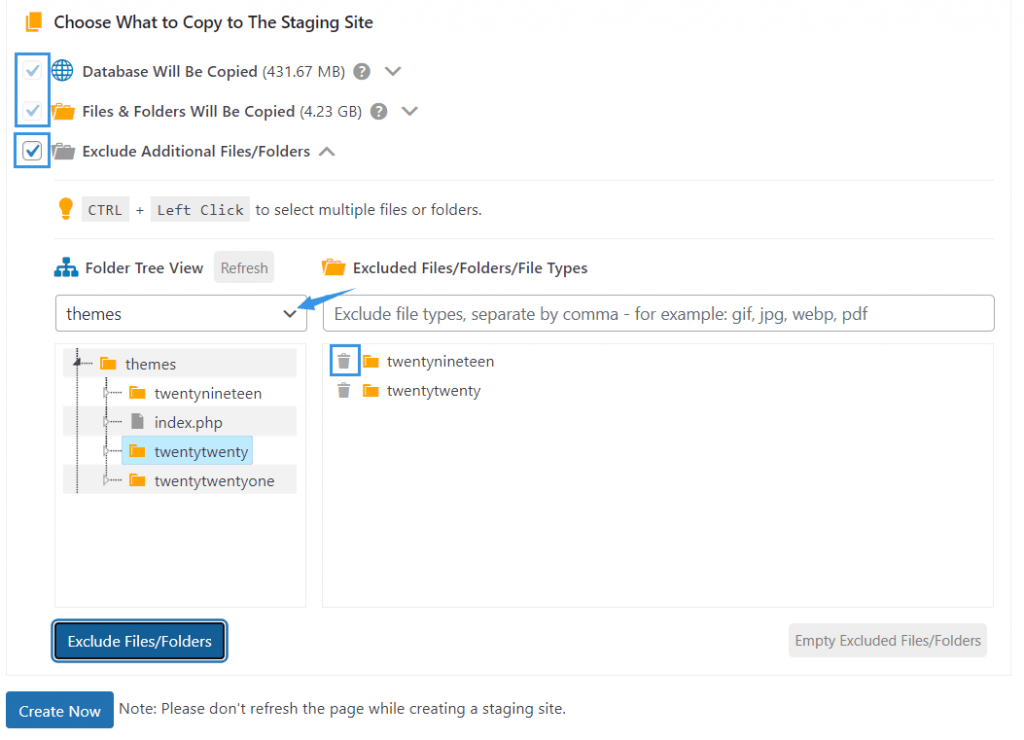
By default, the plugin will copy the entire database and WordPress files to the staging site, however, you do have the option to exclude certain tables or files/folders that you don’t want to copy:
To exclude tables, expand the option ‘Database Will Be Copied’ and deselect tables that you don’t want to copy.
To exclude files/folders, expand the option ‘Exclude Additional Files/Folders’ > select directory from the dropdown menu: /themes, /plugins, /wp-content, /uploads and select files/folders under the directory to exclude them. Click the trashcan icon delete a folder/file from the exclusion list.
3. Create the Staging Site
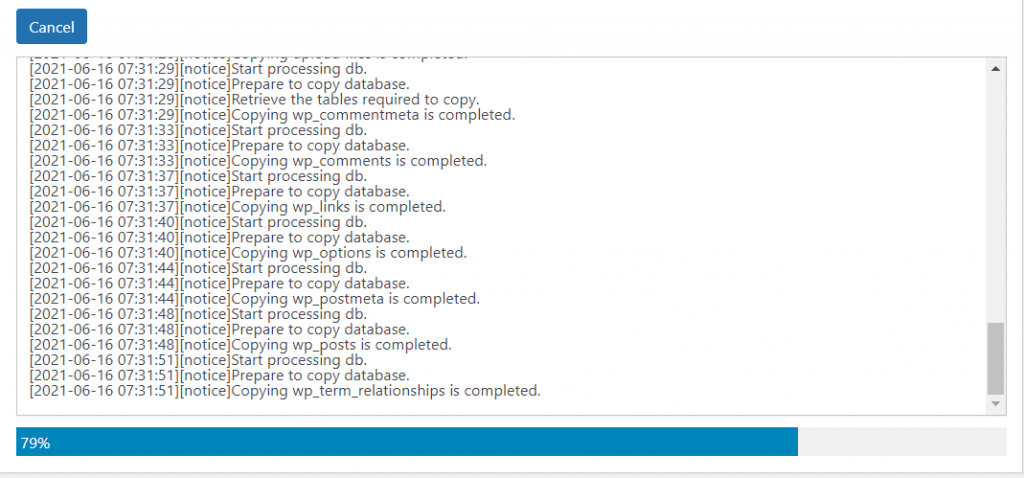
Once you are done with the content, click the Creating Staging button to start creating the staging site.
Note: Please don not close or refresh the page while the plugin is creating a staging site. This can take some time depending on your connection speed and the size of the copy.
Once done, head to Staging Sites tab where all your staging sites are displayed. You can then log in to the staging site’s admin area from login url showing in the list, your login credentials for your staging site’s WordPress dashboard will be the same as your live site’s.
How to Update the Staging Site?
Sometimes when you make changes on the staging site, there can be new data generated on the live site at the same time.
In this case, you may also want to update the new data to the staging site before finally pushing it to the live site.
To do that, go to WPvivid Staging plugin > Staging Sites tab, click the Update the Staging Site button after the site.
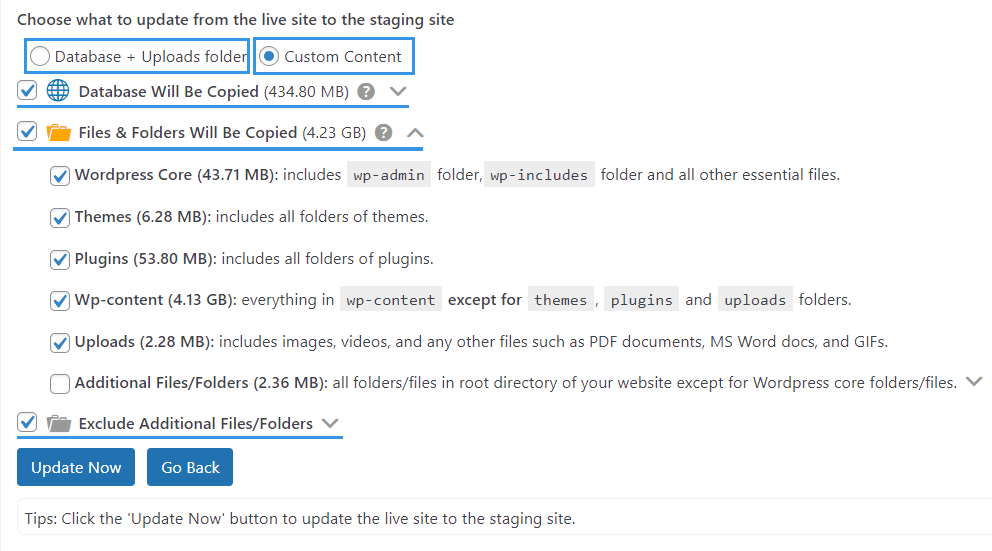
Next, choose what you wish to update from the live site to the staging site.
- Database + Uploads folder: Quickly update the entire database and the uploads folder of the live site to the staging site.
- Custom Content: Choose custom content from the live site to update to the staging site.
Once done, click the Update Now button to start the process.
Note: Please do not close or refresh the page while the plugin is updating the staging. It can take some time depending on your connection speed and the size of the copy.
Once the update is done, you’ll receive a popup message saying ‘Updating the staging site completed successfully’.
Now feel free to develop your site on a staging environment and once the development work is done, you can publish the staging site your live site with one click.
