

What Is WPvivid MainWP Integration
WPvivid MainWP Integration connects the WPvivid Backup & Migration Plugin installed on child sites with the MainWP Dashboard through the WPvivid MainWP Extension.
This integration allows you to:
- Create backups for multiple child sites from a centralized dashboard
- Configure and manage backup schedules globally
- Monitor backup task status and execution progress
- Apply unified backup settings across multiple websites
This integration significantly simplifies backup management workflows and improves operational efficiency for multi-site administrators.
The WPvivid MainWP Extension works with WPvivid Backup & Migration Free on child sites. Some advanced automation features, such as centralized cloud storage management, may require the Pro version.
Requirements
Before using WPvivid MainWP Integration, make sure the following requirements are met:
- MainWP Dashboard plugin is installed and configured
- MainWP Child plugin is installed on all managed child sites
- WPvivid Backup & Migration Free plugin is installed and activated on each child site
- WPvivid MainWP Extension is installed and activated on the MainWP Dashboard
Getting Started with WPvivid MainWP Integration
Follow the steps below to install, connect, and start managing WPvivid backups through MainWP.
Step 1: Install WPvivid Backup Plugin
On each WordPress child site:
- Go to Plugins → Add New
- Search for WPvivid Backup Plugin
- Install and activate the plugin
Once activated, WPvivid will be ready to receive backup commands from the MainWP Dashboard.
Step 2: Install WPvivid MainWP Extension
On your MainWP Dashboard site:
- Navigate to Plugins → Add New
- Search for WPvivid Backup for MainWP
- Install and activate the extension
After activation, WPvivid will appear as a management extension inside your MainWP add-on list.
Always perform a MainWP data synchronization after installing or updating WPvivid plugins to ensure all features and site connections are detected correctly.
Global Backup & Settings Management
Once setup is complete, you can manage backups and settings for all child sites centrally from the MainWP Dashboard.
Create Backups from MainWP Dashboard
You can trigger backups remotely for child sites:
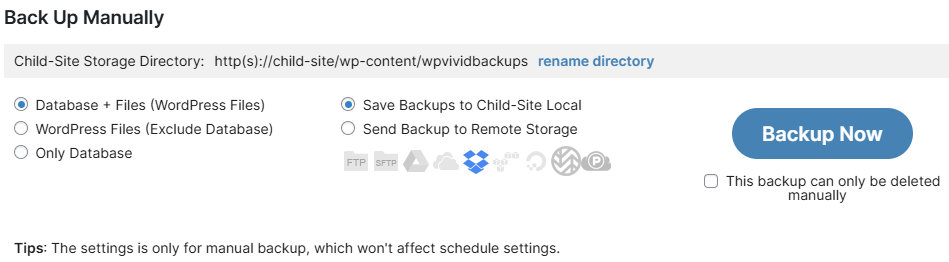
- Go to MainWP → WPvivid Backup and click Backup Now for a target child site
- Select the backup type (Full Backup, Files Only, Database Only)
- Select the backup destination (localhost or cloud storage)
- Click Backup Now to start the task
WPvivid will execute the backup process on the selected child sites and display real-time task status in the MainWP interface.
Backup execution runs on the child site server environment. Backup speed and performance depend on each site’s hosting resources and server configuration.
Configure Backup Schedules Centrally
You can create and manage scheduled backups for child sites directly from MainWP:
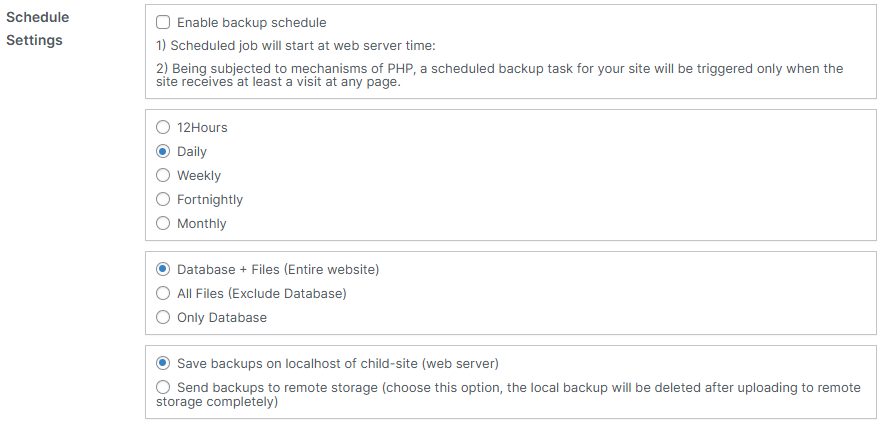
- Select backup frequency (every 12 hours, daily, weekly, fortnightly, monthly)
- Select backup type (Full Backup, Files Only, Database Only)
- Select backup destination (localhost or cloud storage)
- Click Save Changes to synchronize schedules to selected child sites
Sync Plugin Settings Across Sites
Synchronize WPvivid plugin configuration across multiple child sites:
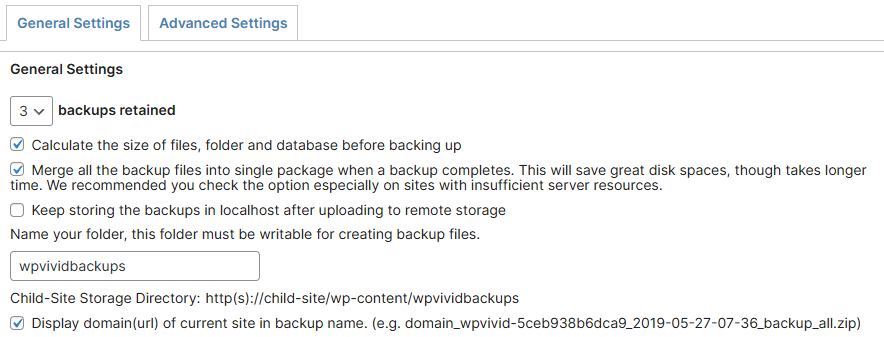
- Go to MainWP → WPvivid Backup → Settings
- Adjust General and Advanced backup settings
- Click Save Changes and Sync
- Select target child sites and apply the configuration
This ensures consistent backup behavior across selected websites.
Advanced settings directly affect backup stability and performance. Apply bulk configuration only if you fully understand your hosting environments or have received guidance from WPvivid documentation or support.
Monitoring Backup Status
From the MainWP Dashboard, you can view detailed backup information for each connected child site, including:
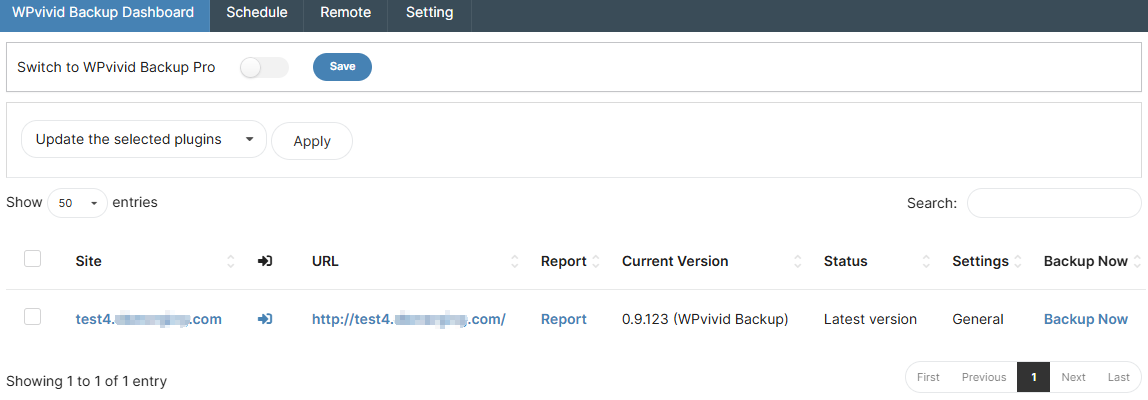
- Backup history report for the last 10 tasks (time and status)
- Installed WPvivid plugin version information
- Quick-access Backup Now buttons
This centralized monitoring allows administrators to quickly identify backup issues without logging into individual websites.
Restore Behavior with MainWP Integration
For stability and security reasons, restore operations are performed directly on the child site interface. MainWP provides quick redirection to initiate restoration.
To restore a backup:
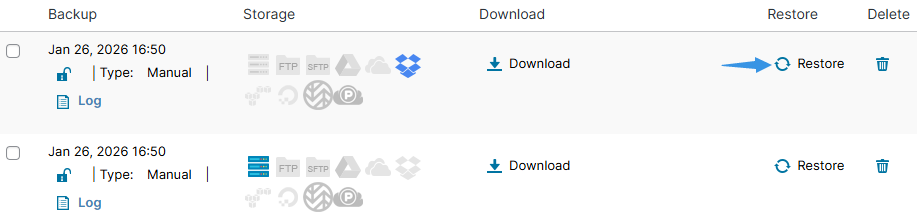
- Go to MainWP → WPvivid Backup and click Backup Now for a child site
- When redirected to the child site backup page, locate the backup
- Click the Restore button to start the restoration process
Restoring a backup will overwrite existing website data. Always verify the selected backup version before proceeding.
Best Practices for MainWP Backup Management
To ensure reliable backup management across multiple websites, WPvivid recommends the following best practices:
- Enable automated schedules
Ensures continuous data protection without manual intervention - Use remote storage destinations
Keeps offsite backup copies safe from server failures - Maintain multiple restore points
Allows rollback to different recovery states when needed - Test restore procedures periodically
Verifies backup integrity and recovery readiness - Monitor disk usage on child sites
Avoids storage shortages that may interrupt backups
Troubleshooting Integration Issues
If WPvivid does not appear in MainWP or backup tasks fail to synchronize:
- Verify connectivity between MainWP Dashboard and child sites
- Perform a full MainWP site synchronization
- Ensure WPvivid and MainWP plugins are updated to the latest versions
If issues persist, contact WPvivid support and provide relevant errors and logs for faster troubleshooting.