

What Is Database Merging
WPvivid Database Merging Pro allows you to merge only the changes (uploads/media files and database) from a development site back to a live production site, without losing existing data on the production site.
This plugin is designed to solve a common development challenge: when you copy a live site to a development environment to make changes, the live site continues to receive new data (orders, form submissions, user registrations, content updates). Traditional migration methods would overwrite the live site and erase all new data that arrived while you were working on the development site.
Typical Usage Scenario
The most common use case for database merging involves e-commerce sites or any site where content is frequently updated:
- You copy your live WooCommerce site to a development environment.
- While you make design changes on the development site, the live site continues receiving new data: orders, contact form submissions, membership subscriptions, product updates, comments, etc.
- After finishing your development work, you need to push your changes to live without losing any of the new data that arrived on the live site.
WPvivid Database Merging Pro tracks all changes made on the development site and merges only those changes to the production site, preserving existing production data.
What Gets Recorded and Merged
WPvivid Database Merging Pro tracks specific types of changes:
Recorded Changes
- Database Changes
All database queries and modifications made on the development site, including new posts, pages, settings, and custom data. - Uploads and Media Files
New media files added to the uploads folder during development.
Changes Not Recorded
- Theme Files
Theme modifications are not tracked. Both sites must use the same theme version. - Plugin Files
Plugin changes are not tracked. Both sites must have identical plugins and versions. - WordPress Core Files
Core WordPress files are not tracked. Both sites must run the same WordPress version.
Prerequisites for Database Merging
Before using database merging, complete the following preparation steps:
1. Install WPvivid Database Merging Pro

- Install and activate WPvivid Database Merging Pro on both your development site and production site.
- Set each site’s role as either “Dev Site” or “Prod Site” in the plugin settings.
2. Connect Development Site to Production Site
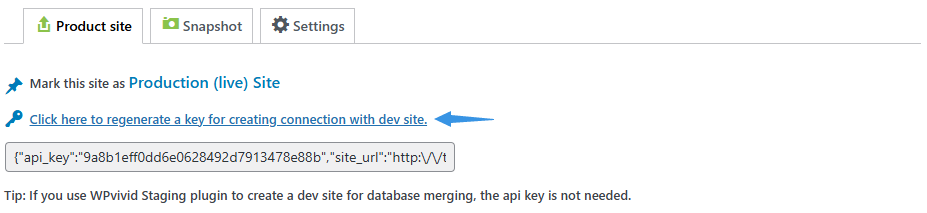
- On the production site, go to WPvivid Merging and click Generate a key for creating connection with dev site.
- Copy the generated connection key.
- On the development site, go to WPvivid Merging, paste the key, and click Connect.
3. Install WPvivid Backup Plugin (Recommended)
- Install the free WPvivid Backup Plugin on both sites.
- This allows you to create snapshots before recording tasks or merging operations.
- Snapshots provide quick recovery options if something goes wrong during the merging process.
Initial Database Synchronization
Before starting database recording, perform an initial synchronization to ensure both sites have matching data.
Step 1: Migrate Production Files to Development Site
- Before syncing databases, migrate files from the production site to the development site.
- You can use WPvivid Backup Plugin (free version) for migration.
- Alternatively, copy the entire production site (files + database) to development to skip the initial database synchronization step.
Step 2: Synchronize Development Database with Production Database
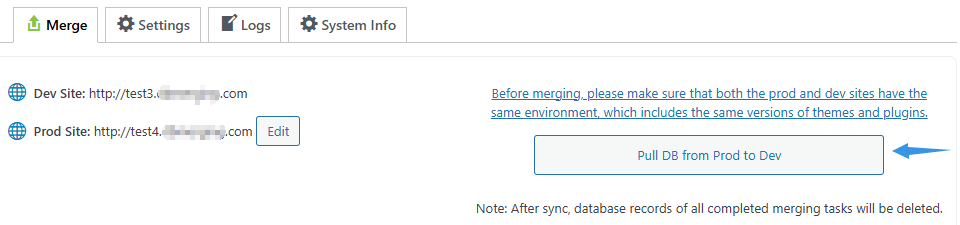
- After files are copied to the development site, go to WPvivid Merging on the development site.
- Click Pull DB from Prod to Dev to start synchronization.
- Wait for the synchronization to complete.
This ensures both databases start from the same baseline before you begin recording changes.
Understanding Database Recording
What Is A Database Recorder?
A database recorder is automatically created and enabled when you create a database recording task. It tracks all changes including media files and database queries on the development site.
What Is A Database Recording Task?
A database recording task contains the full lifecycle of a database recording session. It allows you to merge all recorded changes (files + database queries) to the production site.
Key benefits of the task system:
- You don’t need to re-sync databases after every merge.
- You can perform multiple merges from a single recording task.
- You only need to sync databases after completing multiple merges, saving significant time.
A task is automatically terminated and marked as “Merged” after a successful merge. You can then create a new task as needed.
Creating A Database Recording Task
Once the development database is synchronized with the production database, you can start recording changes.
Step 1: Create the Task
- On the development site, go to WPvivid Merging.
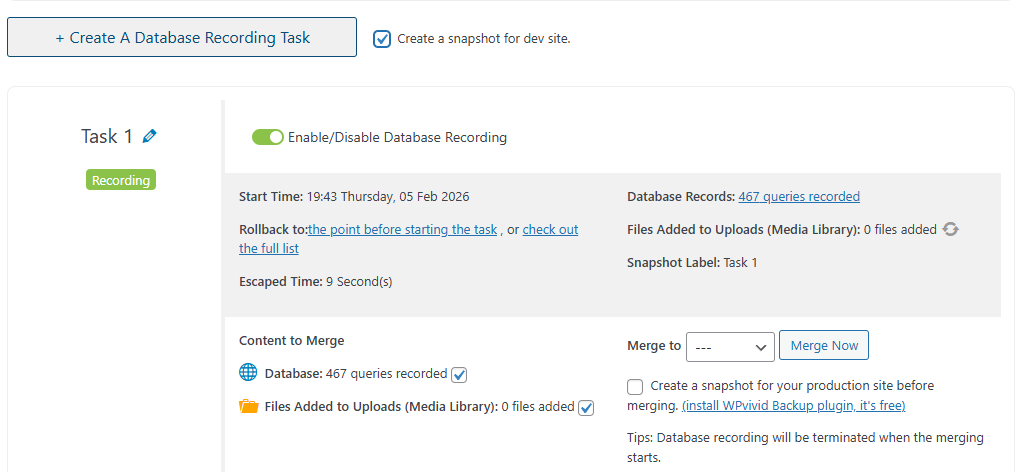
- Click Create A Database Recording Task.
- Check the option Create a snapshot for dev site (highly recommended).
- This creates an automatic snapshot of the development site using WPvivid Backup Plugin.
- Wait for the task creation to complete (may take a few minutes depending on database size and number of plugins/themes).
Step 2: Monitor the Recording Task
Once created, the task will be automatically enabled and will appear in the Tasks section. You can:
- Enable or disable the task as needed.
- View the task start time and elapsed running time.
- See how many database queries have been recorded.
- See how many files have been added.
- Perform database merging operations.
Task information does not update in real time. Refresh the page to see current statistics.
Merging Changes to Production Site
When you’re ready to merge recorded changes from development to production:
Step 1: Prepare for Merge
- On the development site, go to WPvivid Merging → Tasks section.
- Locate your active recording task.
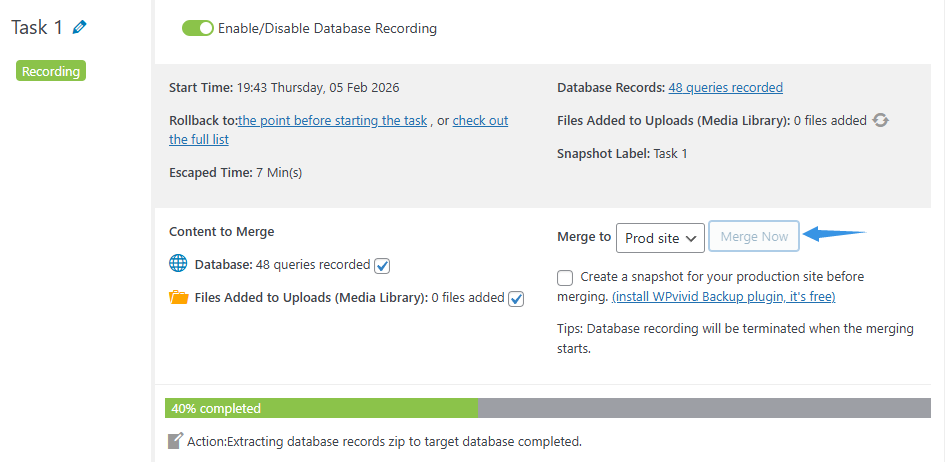
- In the Merge to dropdown, select Production Site.
Step 2: Configure Merge Options
- Choose what to merge: Database and Files, Files only, or Database only
- Check the option Create a snapshot for your production site before merging (highly recommended).
Step 3: Execute the Merge
- Click Merge Now to start the merging process.
- Wait for the merge to complete.
- Do not close or refresh the page during merging, as this will cause the merge to fail and may bring sites down.
Step 4: Verify Merge Success
- After the merge completes, verify that changes appear correctly on the production site.
- Check that existing production data remains intact.
- Test critical functionality to ensure everything works as expected.
Best Practices for Database Merging
For safe and effective database merging operations:
- Create Snapshots Before Major Operations
Use WPvivid Backup Plugin to create snapshots before creating recording tasks or performing merges. - Monitor Recording Tasks Regularly
Check task statistics periodically to ensure recording is working correctly. - Merge Changes Regularly
Avoid running recording tasks for extended periods. Large volumes of accumulated changes increase the risk of merge failures and longer processing times.
Important Limitations
- Only Uploads and Database Changes Merged
To avoid conflicts during merging, the plugin only records uploads (media files) and database changes. It does not record changes to themes and plugins. - Environment Synchronization Required
To prevent conflicts and ensure successful merging, the production and development sites must maintain identical environments for themes, plugins, and WordPress versions before a merging process.