

The Export Site feature is commonly used when migrating sites between servers, creating deployable backups, or preparing a site for transfer to a staging or production environment.
Purpose of Export Site
The Export Site feature enables you to:
- 1. Export a full WordPress site for migration.
- 2. Export only specific components such as WordPress files or database.
- 3. Send backups directly to remote storage services.
- 4. Transfer a site to another WordPress installation using auto-migration.
- 5. Create portable backup archives for manual download.
All exported backups are compatible with WPvivid Backup and can be restored or imported using WPvivid’s Import Site and Restore features.
Accessing the Export Site Page
- 1. Log in to your WordPress admin dashboard.
- 2. Navigate to WPvivid plugin.
- 3. Click the Export Site tab.
The Export Site page displays available export destinations and configuration options.
Export Destinations
WPvivid Backup Pro supports three export destinations, each designed for a different migration workflow.
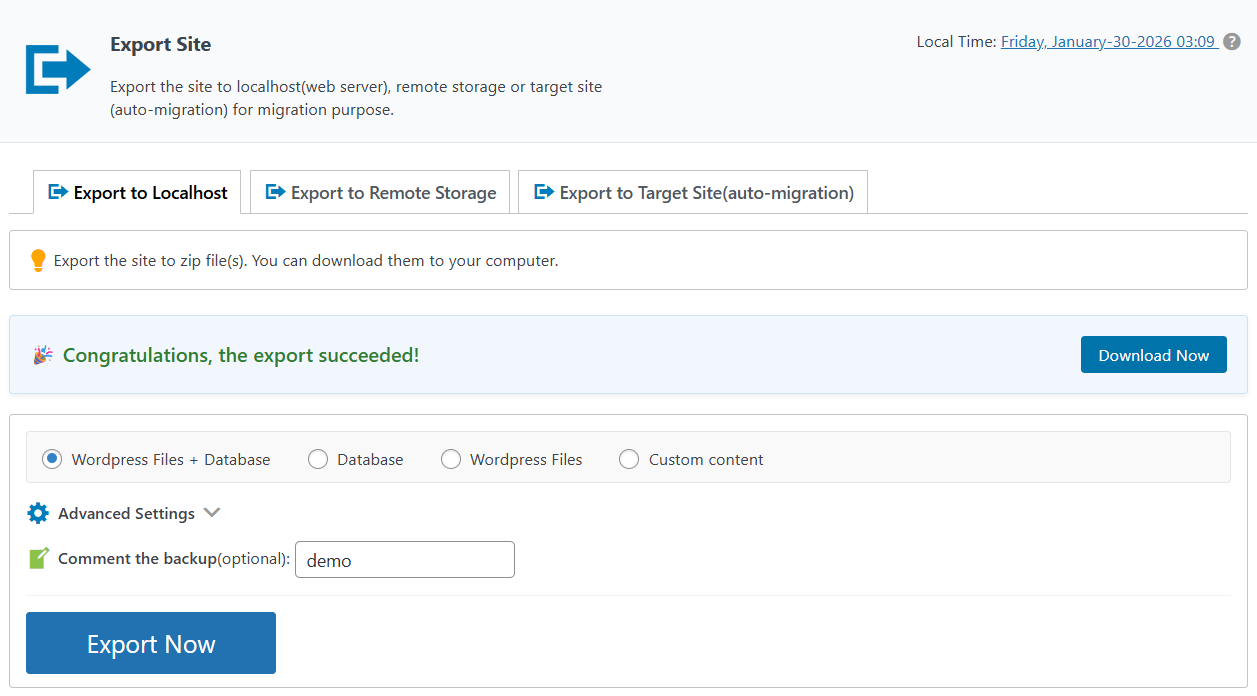
1. Export to Localhost (Web Server)
This option exports the site into ZIP backup files stored on the current web server. You can then download these files to your local computer.
Key characteristics:
- 1. Creates downloadable ZIP backup files.
- 2. Suitable for manual migrations or offline storage.
- 3. Backup files can later be imported via Import Site.
- 4. Ideal for transferring sites without direct server-to-server connectivity.
This is the most commonly used export method for manual site migrations.
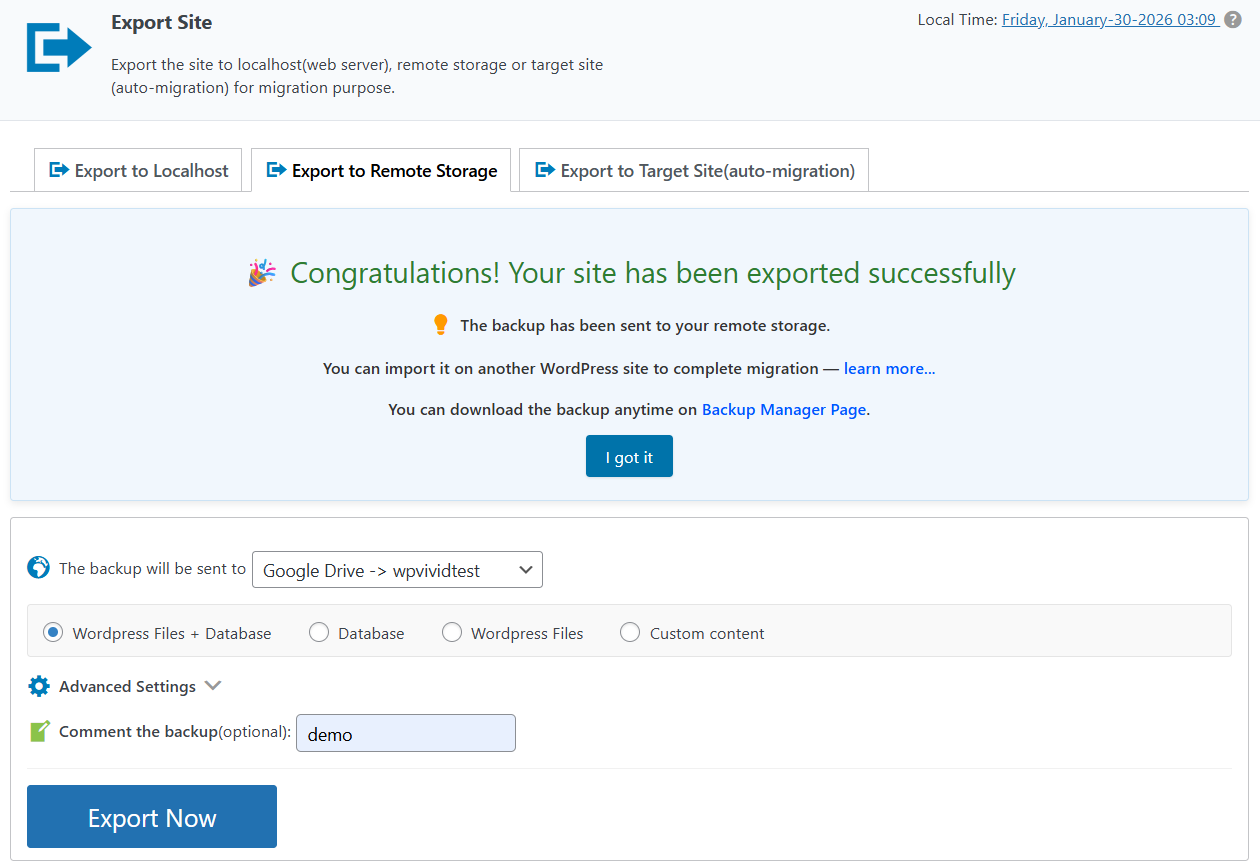
2. Export to Remote Storage
This option exports the site directly to a configured remote storage service.
Supported use cases include:
- 1. Cloud-based backup storage
- 2. Cross-server migrations using shared storage
- 3. Offsite backup archiving
How it works:
- 1. WPvivid packages the site as backup files.
- 2. Files are uploaded directly to the selected remote storage.
- 3. No local download is required.
Remote storage destinations must be configured in advance within WPvivid Backup Pro.
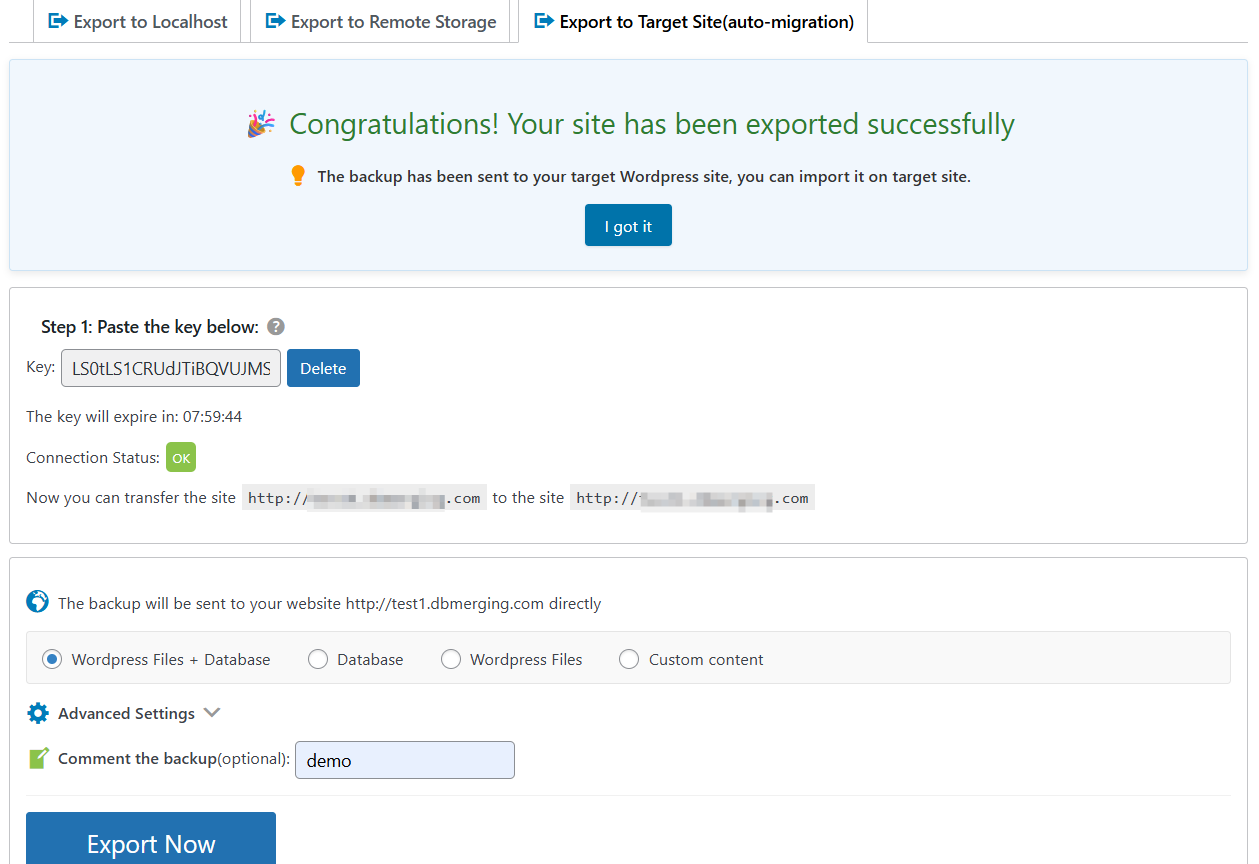
3. Export to Target Site (Auto-Migration)
This option enables direct site transfer between two WordPress installations using WPvivid’s auto-migration mechanism.
Key features:
- 1. Uses a secure migration key generated on the target site.
- 2. Transfers the site directly without manual file handling.
- 3. Faster and more automated than manual export/import workflows.
Auto-migration is recommended when both source and destination sites are accessible and WPvivid Backup Pro is installed on both.
Export Content Options
When exporting a site, you can choose which components to include:
- 1. WordPress Files + Database
- 2. Database
- 3. WordPress Files
- 4. Custom Content
Selecting only the necessary components can reduce export size and improve performance.
Starting the Export
- 1. Select the export destination.
- 2. Choose the content to export.
- 3. (Optional) Adjust advanced settings.
- 4. Add a backup comment if needed.
- 5. Click Export Now.
After Export Completion
Once the export process finishes:
- 1. Local exports can be downloaded to your computer.
- 2. Remote exports appear in the configured storage.
- 3. Auto-migration exports are transferred directly to the target site.
- 4. Exported backups can be restored or imported using WPvivid tools.
Typical Use Cases
- 1. Migrating a site to a new host.
- 2. Deploying a site from staging to production.
- 3. Creating downloadable site backups.
- 4. Transferring sites between servers using auto-migration.
- 5. Exporting partial site data for development or testing.
Summary
The Export Site feature in WPvivid Backup Pro provides a flexible and powerful way to package and transfer WordPress sites. By supporting exports to:
- 1. Localhost (web server)
- 2. Remote storage
- 3. Target site (auto-migration)
WPvivid enables both manual and automated migration workflows while maintaining full compatibility with its restore and import systems.