When you are working on a staging site, new data (such as posts, media uploads, or database changes) may continue to be generated on the live site at the same time. Before publishing the staging site to production, you may want to synchronize this newly generated data from the live site back to the staging site.
WPvivid Staging Pro allows you to update an existing staging site by selectively copying content from the live site, ensuring the staging environment stays up to date.
When You Should Update a Staging Site
You may want to update a staging site when:
- 1. New posts or pages are created on the live site.
- 2. New media files are uploaded to the live site.
- 3. You want the staging site to reflect the latest live data before pushing it live.
How to Update a Staging Site
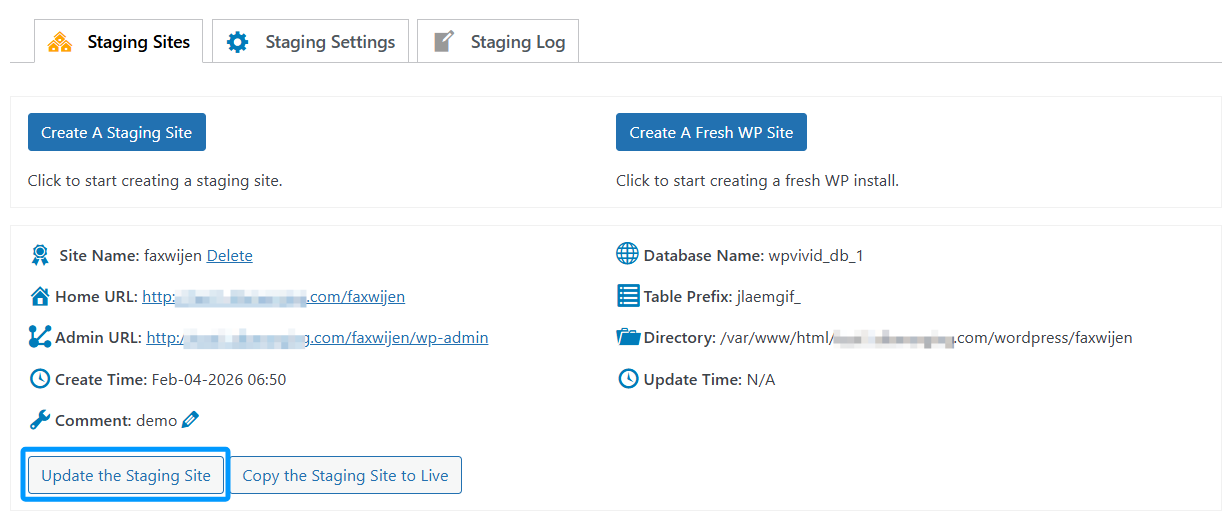
Step 1: Access the Staging Sites Page
- 1. Log in to your WordPress admin dashboard.
- 2. Navigate to WPvivid Plugin.
- 3. Open the Staging Sites tab.
- 4. Locate the staging site you want to update.
- 5. Click Update the Staging Site next to the site.
Step 2: Choose What to Update
After clicking the update option, select the data you want to synchronize from the live site to the staging site.
- 1. Files + DB:
This replaces the entire staging site with the live version. - 2. Only Uploads folder + Database:
Updates the entire live-site database along with the uploads folder to the staging site. This option is ideal for quickly syncing all recent content changes. - 3. Custom Content:
Allows you to manually select specific content to update from the live site to the staging site, giving you more granular control over what gets copied.
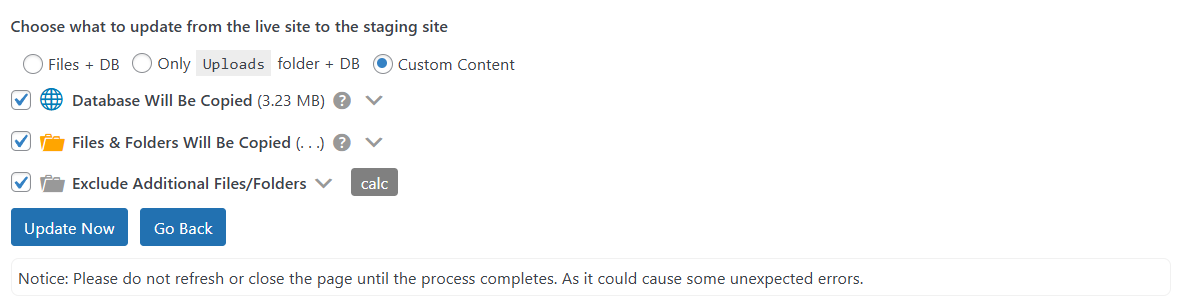
Step 3: Start the Update Process
- 1. After selecting your preferred update option, click Update Now.
- 2. The plugin will begin copying the selected data from the live site to the staging site.
The duration of the update process depends on the size of the data being copied, your server’s performance, and your network connection speed.
Warning
Do not close or refresh the page while the update process is running.
Do not close or refresh the page while the update process is running.
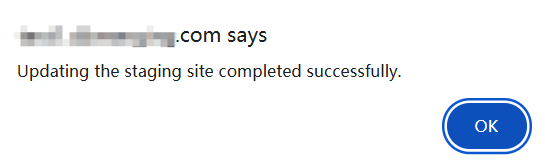
Completion Confirmation
Once the update process finishes successfully, you will see a popup message confirming:
Updating the staging site completed successfully.
At this point, your staging site will reflect the updated data from the live site and is ready for further testing or publishing.