Accessing the Restore Interface
To manage and restore backups:
- 1. Log in to your WordPress admin dashboard.
- 2. Navigate to WPvivid plugin → Backup Manager.
- 3. Open the All Backups tab to view available backups.
From this page, you can browse backups, inspect backup details, and initiate the restore process.
Restore Options Overview
When restoring a backup, WPvivid Backup Pro allows you to control which components are restored:
Folders & Files
- 1. Themes
- 2. Plugins
- 3. wp-content
- 4. Uploads
- 5. WordPress core files
Database
- 1. WordPress Database
This selective restore capability helps prevent unnecessary overwrites and supports partial site recovery.
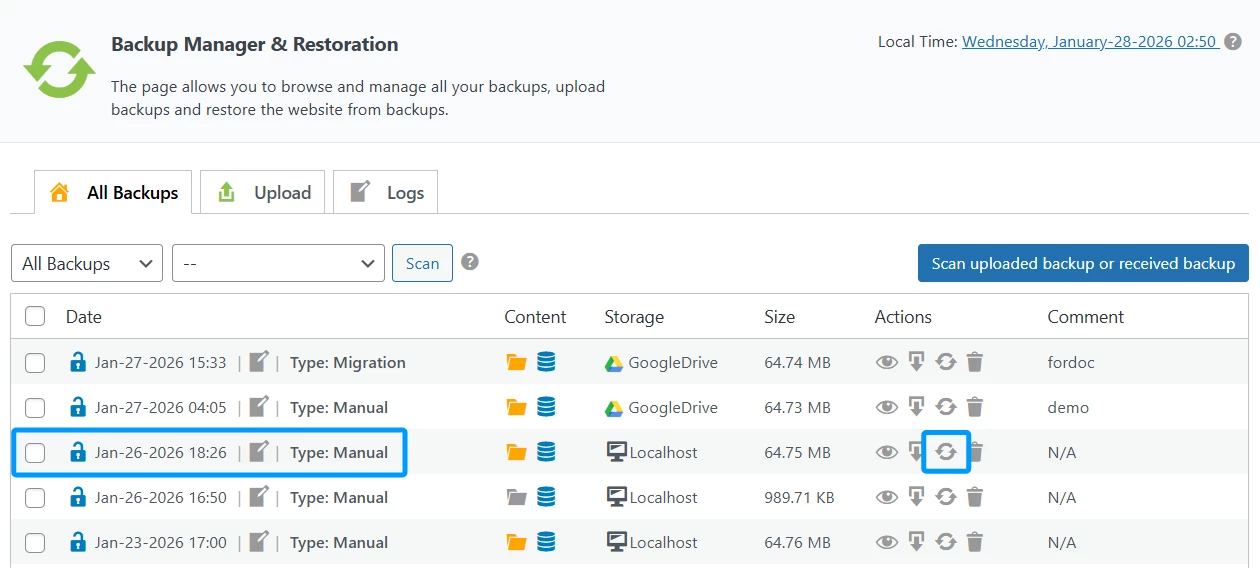
Method 1: Restore a Backup from Localhost
Use this method if the backup file is already present on your web server. These files are typically generated on Localhost or have been manually uploaded to the server.
- 1. Locate the Backup:
Navigate to the Backup Manager & Restoration page and select the All Backups tab. - 2. Identify Local Backups:
Look for backups where the Storage column is labeled as Localhost. - 3. Initiate Restoration:
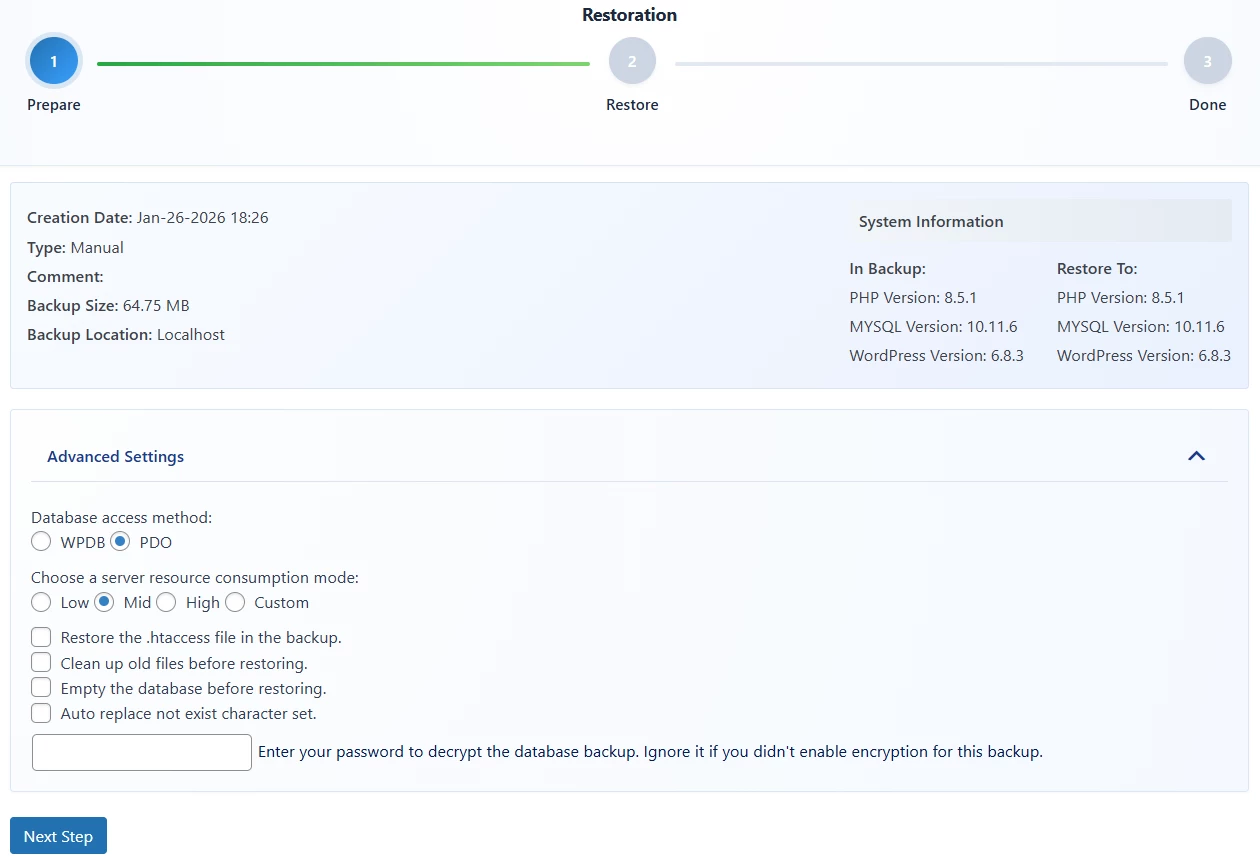
Click the Restore icon (circular arrows) in the Actions column for the specific backup you wish to use. - 4. Configure Advanced Settings:
(Optional) You can expand the Advanced Settings to choose a database access method (WPDB or PDO), set resource consumption levels, or select “Clean up old files before restoring”. - 5. Confirm Content:
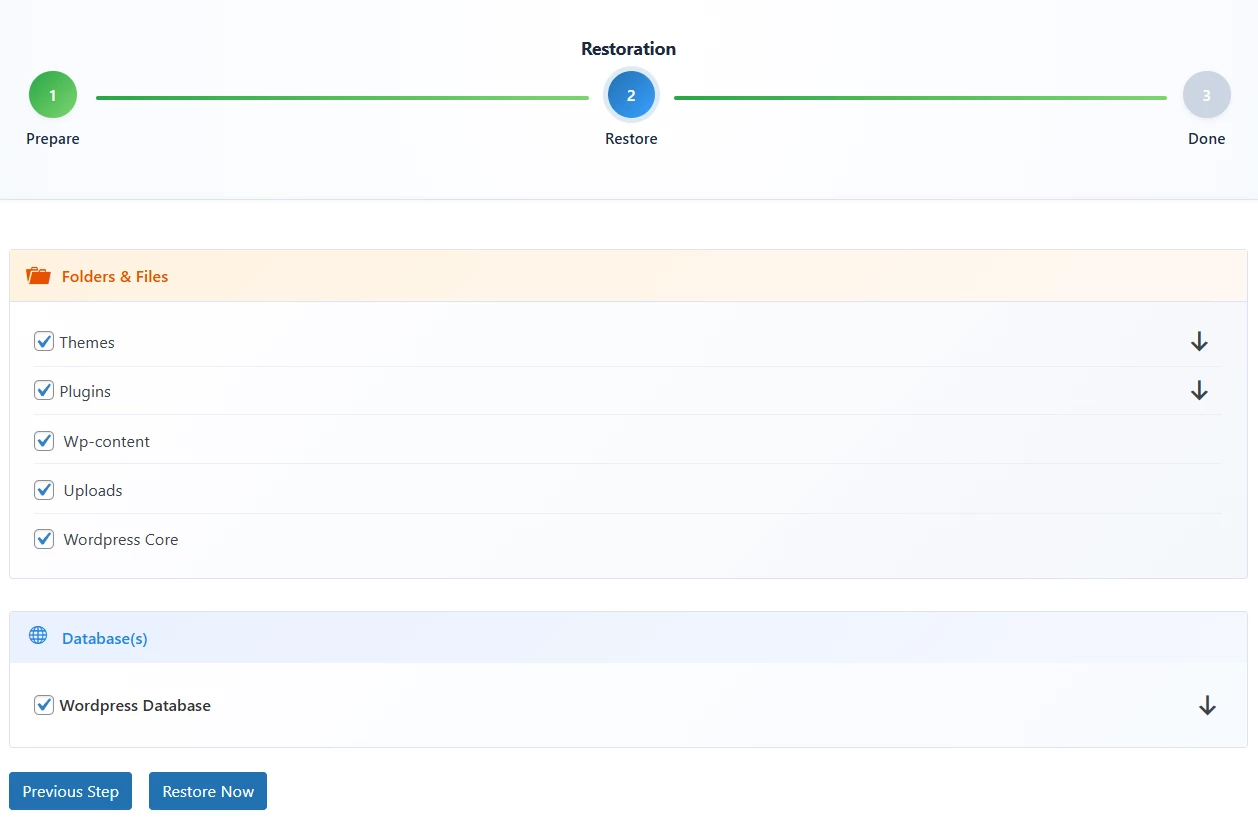
Select the specific components you wish to restore, such as Themes, Plugins, Wp-content, Uploads, WordPress Core, and the Database. - 6. Run Restore:
Click the Restore Now button to begin the process.


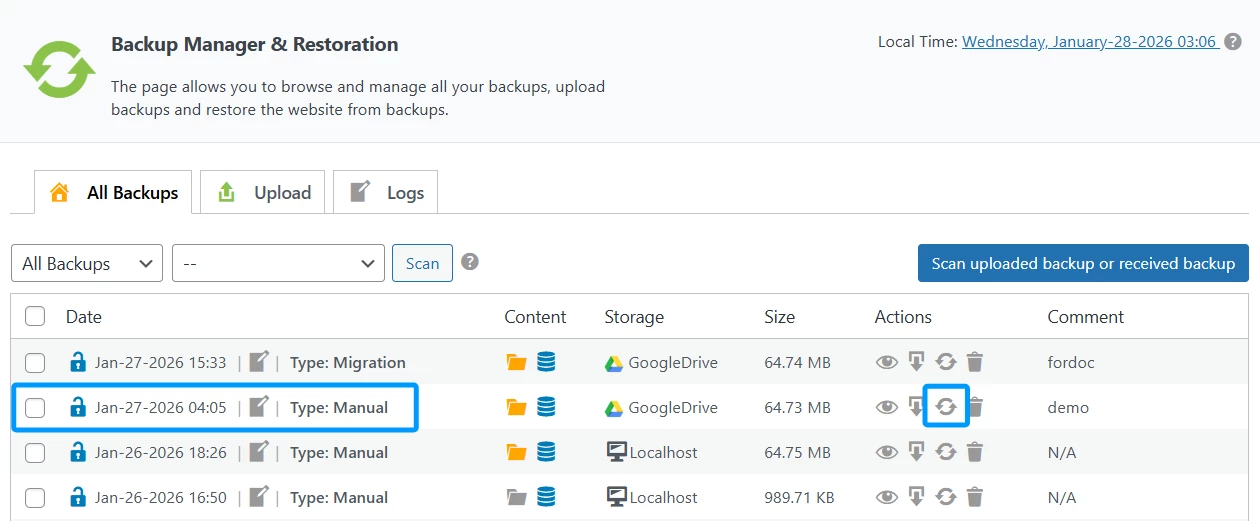
Method 2: Restore a Backup from Cloud Storage
Use this method if your backups are stored on cloud services like Google Drive, Dropbox, or Amazon S3.
- 1. Locate the Cloud Backup:
In the All Backups list, find the entry showing your cloud provider (e.g., GoogleDrive) in the Storage column. - 2. Trigger Download:
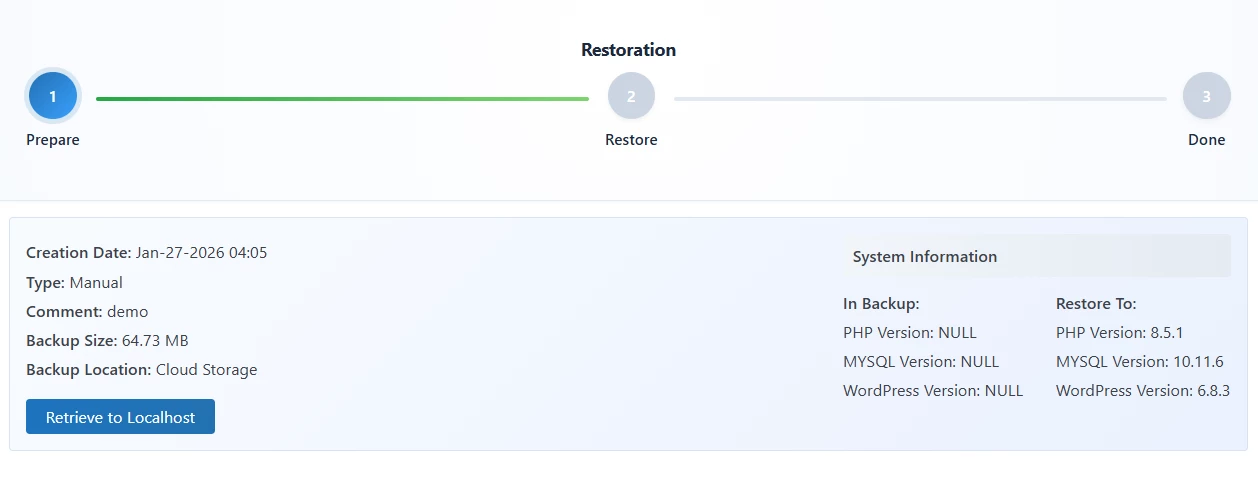
Click the Restore icon next to the cloud backup. - 3. Retrieve to Localhost:
Because the plugin must process files locally, you will see a prompt to Retrieve to Localhost. Click this button to download the backup from the cloud to your web server. - 4. Proceed to Restore:
Once the retrieval is complete, the process follows the same steps as a local restore:- Select your Advanced Settings (e.g., “Empty the database before restoring”).
- Choose the backup content to be restored.
- Click Restore Now.
 Notes
Notes
Under the Advanced Settings toggle, you have several tools to ensure a clean restoration:
1. Clean up old files before restoring:
Deletes existing files on the target site before placing the backup files to avoid leftovers.
2. Empty the database before restoring:
Wipes the current database tables before importing the backup data.
3. Resource Consumption:
If you are on a limited hosting environment, set this to Low or Mid to prevent the process from being killed by the server.Restoration Completion
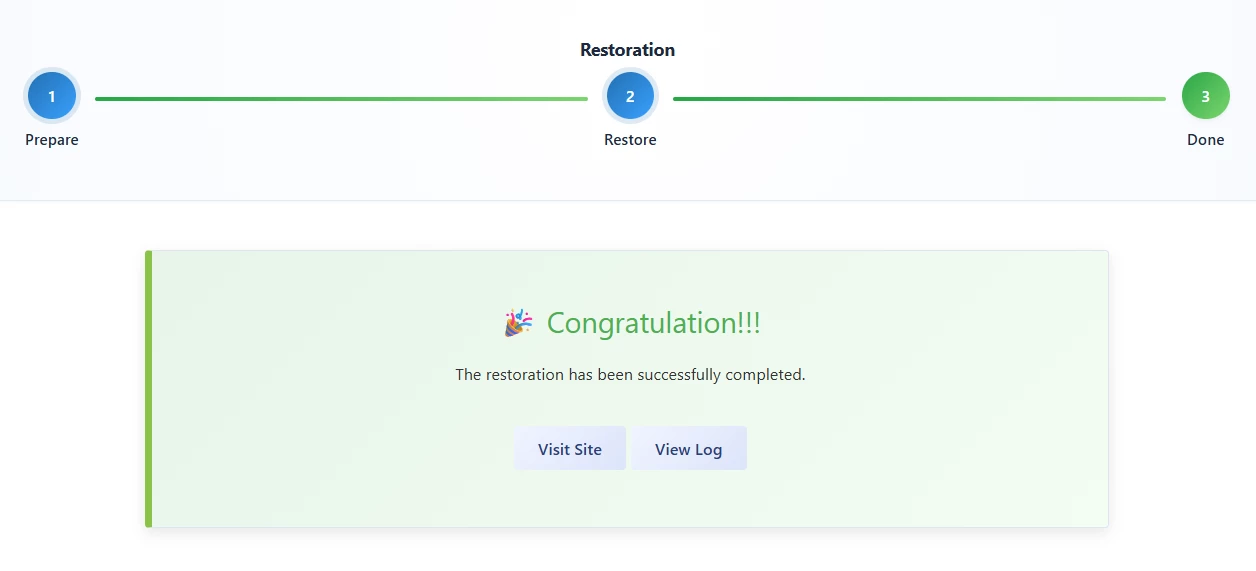
Once the restoration process is finished, the interface will transition to the final step of the wizard to confirm the status and provide next steps.
Accessing the Restore Interface
- 1. Restoration Status:
A green progress bar and a “Done” status indicate that the process has finished successfully. - 2. Completion Message:
You will see a “Congratulations!!!” message confirming that the restoration has been successfully completed.
Post-Restoration Actions
After the restoration is complete, you have two primary options to verify the results:
- 1. Visit Site:
Click this button to open your website in a new tab. This allows you to perform a front-end check to ensure all content, themes, and plugins are appearing and functioning as expected. - 2. View Log:
Click this button to inspect the technical details of the restoration. This is particularly useful for verifying that all database tables and files were processed without errors.