When using Wasabi as a remote storage destination with WPvivid Backup Pro, you can specify a custom folder name to organize your backup files within your Wasabi bucket. This feature helps you keep backups structured and easy to manage, especially when storing backups for multiple sites or environments in the same bucket.
By defining a custom backup folder name, you control where WPvivid uploads your backup archives in the Wasabi storage hierarchy.
Configuration Steps
1. Access Remote Storage Settings
- 1. Log in to your WordPress admin dashboard.
- 2. Navigate to WPvivid plugin > Cloud Storage.
- 3. Select Wasabi from the list of available storage providers.
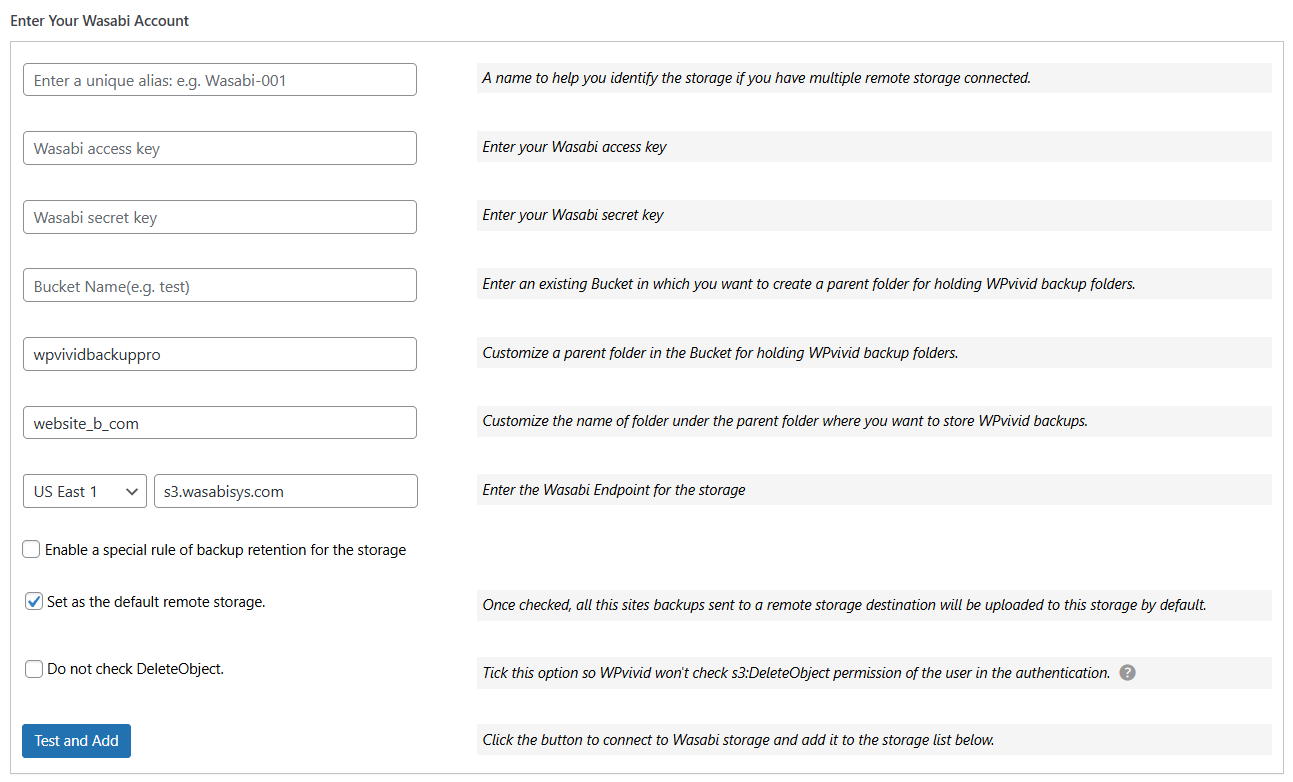
2. Enter Your Wasabi Credentials
To establish a connection and set up your custom folder structure, fill in the following details:
- 1. Unique Alias:
Enter a recognizable name for this storage account (e.g., Wasabi-Production-Bucket). - 2. Wasabi Access Key:
Paste your Wasabi Access Key. - 3. Wasabi Secret Key:
Paste your Wasabi Secret Key. - 4. Bucket Name:
Enter the exact name of the Wasabi bucket you wish to use. - 5. Parent Folder:
Define a main directory for all WPvivid backups (e.g., wpvividbackuppro). - 6. Custom Path:
Enter the name of the subfolder for this specific site (e.g., yourdomain_com). - 7. Wasabi Endpoint:
Select the correct regional endpoint for your bucket (e.g., s3.us-east-1.wasabisys.com). - 8. Backup Retention:
Define the number of backup copies you wish to keep on Wasabi. Once the limit is reached, the oldest backup will be deleted to save space. - 9. Set as Default Storage:
Check this box if you want this Wasabi account to be the primary destination for all manual and scheduled backups. - 10.Check DeleteObject:
Ensure this is enabled if you want the plugin to have permission to remove old backups automatically based on your retention settings. - 11. Click Test and Add to save settings.