

This guide explains how to configure WPvivid Backup & Migration Pro to store backups on Microsoft OneDrive, including authentication, folder organization, and retention settings.
What Is Microsoft OneDrive Integration?
WPvivid Backup & Migration Pro integrates with Microsoft OneDrive to store backups on your OneDrive account. You can define custom folders for each website within the same OneDrive account to keep backups well organized.
Path Example:
- 1.
.../wpvividbackuppro/site_a_com/ - 2.
.../wpvividbackuppro/site_b_com/
Using a hierarchical folder structure lets you keep backups for multiple sites separate and easy to identify — ideal for agencies, freelancers, and multisite workflows.
Configuration Steps
1. Access Remote Storage Settings
- 1. Log in to your WordPress admin dashboard.
- 2. Navigate to WPvivid Plugin → Cloud Storage.
- 3. Select Microsoft OneDrive from the list of storage providers.
2. Authenticate with Microsoft OneDrive
- 1. Click the Authenticate with Microsoft OneDrive button.
- 2. You will be redirected to the Microsoft OneDrive login page — sign in with your Microsoft account and allow permissions to connect.
3. Enter Storage Details
To link your OneDrive account and set up your custom backup directory, provide the following information:
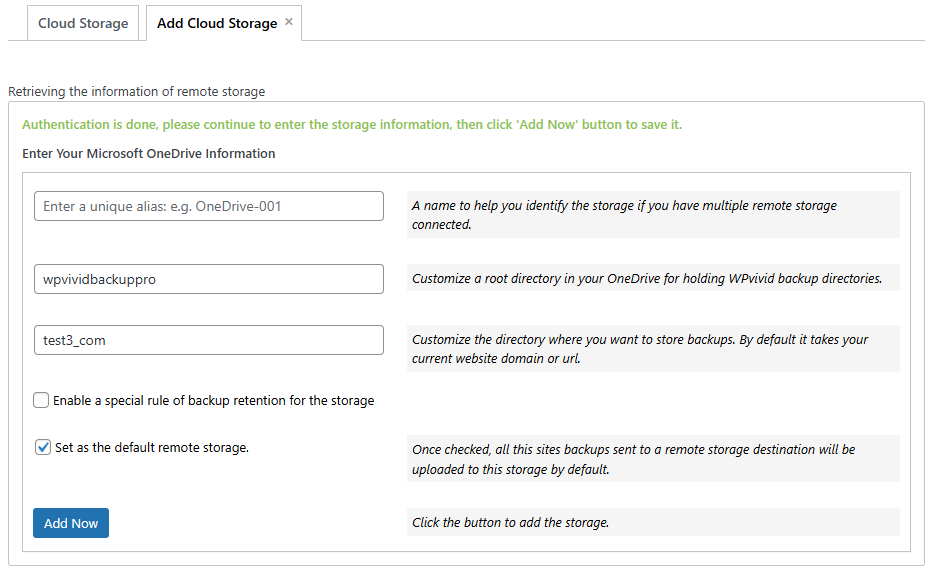
- 1. Unique Alias:
Enter a recognizable name for this OneDrive storage connection (e.g.,OneDrive-001). - 2. Custom Parent Directory:
Define the main folder name that will be created in your OneDrive root for WPvivid backups (e.g.,wpvividbackuppro). - 3. Custom Subfolder:
Enter a unique name for the current website (e.g.,yourdomain_com). - 4. Backup Retention:
Choose how many backup copies to keep on OneDrive. When the limit is reached, oldest backups are removed automatically. - 5. Set as Default Storage:
Check this box if you want OneDrive to be the primary destination for all manual and scheduled backups. - 6. Click Add Now to save and complete the connection.