When using Dropbox as a remote storage destination with WPvivid Backup Pro, you can specify a custom backup folder name to organize your backups within your Dropbox directory. This feature helps keep backups tidy, especially when multiple sites or environments are sharing the same Dropbox account.
By defining a custom folder name, you control where backups are stored in Dropbox, making it easier to manage, locate, and identify backups for each WordPress site.
Example Path Structure:
- 1.
App://Wpvivid backup restore/site_a_com/. - 2.
App://Wpvivid backup restore/site_b_com/.
Configuration Steps
1. Navigate to Remote Storage
- 1. Log in to your WordPress admin dashboard.
- 2.Go to WPvivid plugin > Cloud Storage.
- 3. Select Dropbox from the list of available storage providers.
2. Authenticate with Dropbox
- 1. Click the Authenticate with Dropbox button.
- 2. You will be redirected to the Dropbox authorization page.
- 3. Click Allow to grant WPvivid permission to access its own folder within your Dropbox Apps directory.
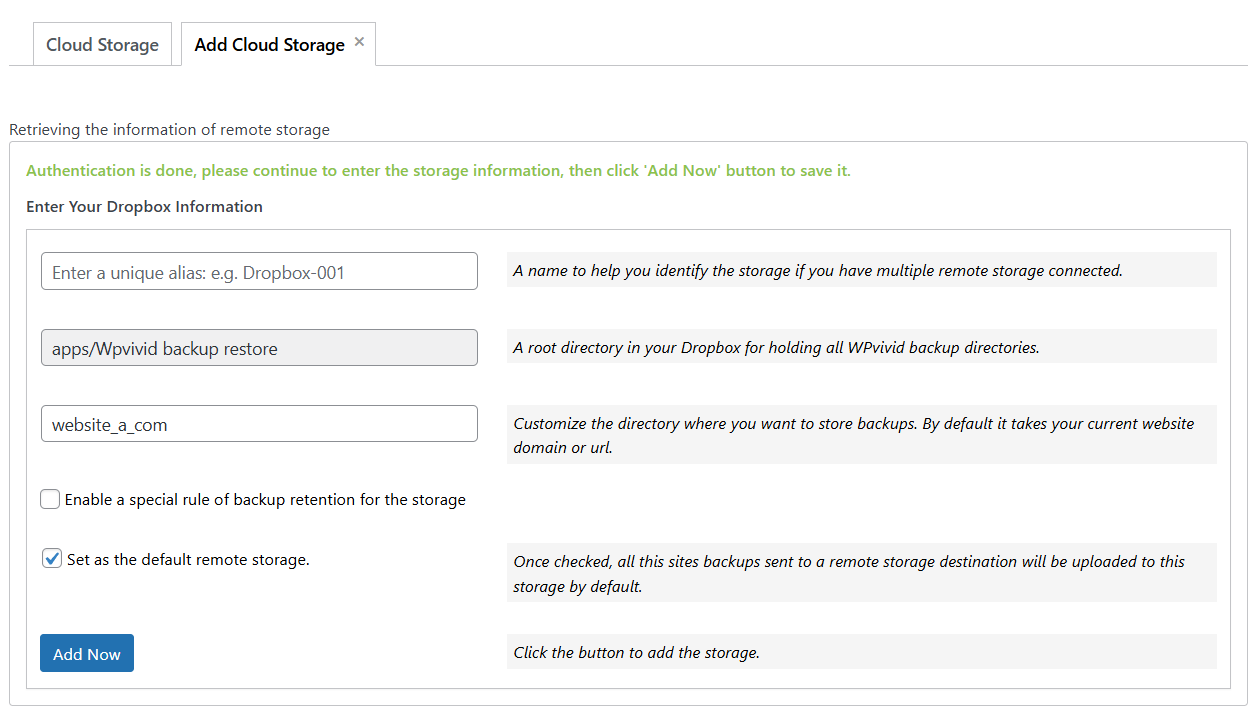
3. Enter Connection Details
To link your site to Dropbox with a custom path, fill in the following fields:
- 1. Unique Alias:
Enter a name to help you identify this storage account (e.g., Dropbox-Personal-Account). - 2. Custom Folder Name:
This is the name of the subfolder that will be created specifically for this website. - 3. Backup Retention:
Define the number of backup copies you wish to keep on Dropbox. Once the limit is reached, the oldest backup will be deleted to save space. - 4. Set as Default:
(Optional) Check this box if you want this Dropbox account to be the primary destination for all future manual and scheduled backups. - 5. Click Add Now to save settings.