

This guide explains how to configure WPvivid Backup & Migration Pro to store backups on Backblaze B2 Cloud Storage, including connection setup, folder organization, and retention policies.
What Is Backblaze Integration?
Backblaze B2 integration allows you to organize backups using a parent folder and site-specific subfolder within an existing B2 bucket. You can define custom folders for each website within the same Backblaze account to keep backups well organized.
Path Example:
- 1.
.../wpvividbackuppro/site_a_com/ - 2.
.../wpvividbackuppro/site_b_com/
This folder structure helps keep backups organized when managing multiple websites within the same Backblaze bucket.
Configuration Steps
1. Access Remote Storage Settings
- 1. Log in to your WordPress admin dashboard.
- 2. Navigate to WPvivid Plugin → Cloud Storage.
- 3. Select Backblaze from the list of available storage providers.
2. Enter Backblaze Storage Account Details
Provide the required Backblaze B2 account information:
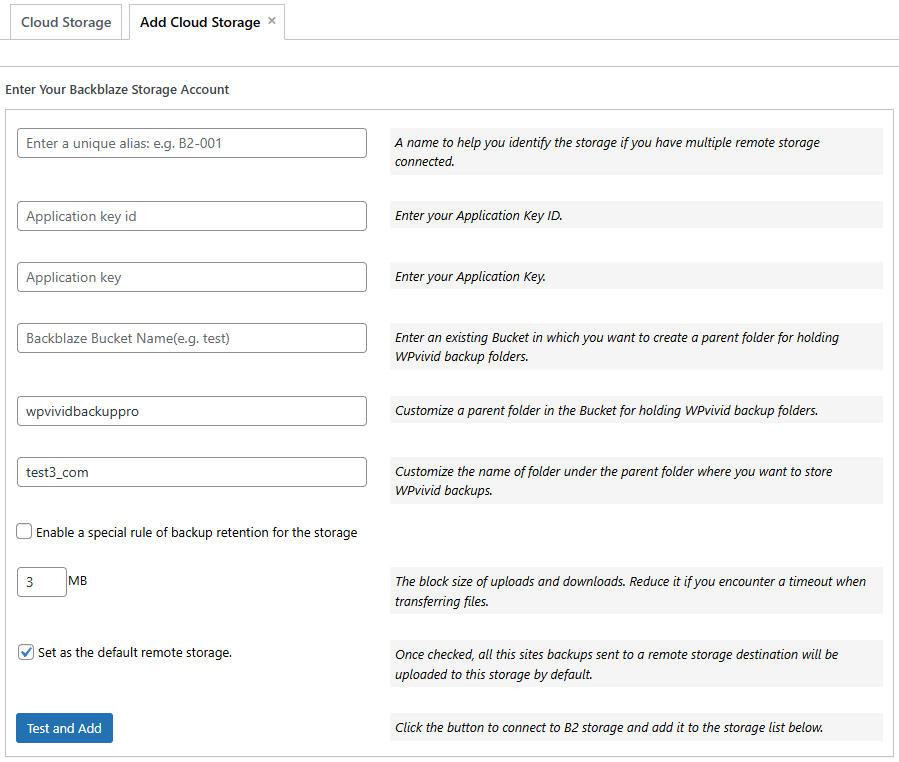
- 1. Unique Alias:
Enter a recognizable name for this storage (e.g.,B2-001) to help identify it when multiple remote storages are connected. - 2. Application Key ID:
Enter your Backblaze Application Key ID. - 3. Application Key:
Enter the corresponding Application Key. - 4. Backblaze Bucket Name:
Enter the name of an existing Backblaze B2 bucket (e.g.,backup) where WPvivid will store backup files. - 5. Custom Parent Folder:
Define a parent folder name inside the bucket for holding WPvivid backup folders (e.g.,wpvividbackuppro). - 6. Custom Subfolder:
Enter a unique folder name for the current website under the parent folder (e.g.,test_com). - 7. Enable a Special Rule of Backup Retention for the Storage:
Enable this option to apply a custom retention policy specifically for this Backblaze storage. - 8. Block Size:
Set the upload and download block size (in MB). Reduce the value if you encounter timeouts during file transfers. - 9. Set as the Default Remote Storage:
Enable this option to upload all manual and scheduled backups to Backblaze B2 by default. - 10. Click Add Now to connect to Backblaze B2.