By default, WPvivid Backup Pro stores backups in a standard directory on your remote storage. However, when managing multiple websites under a single Amazon S3 bucket, it is best practice to organize these backups into a custom directory structure.
WPvivid Backup Pro allows you to define both a Parent Folder (common to all sites) and a Custom Subfolder (unique to the current site), ensuring your S3 bucket remains organized and easy to navigate.
Prerequisites
Before you begin, ensure you have the following information from your AWS Console:
- 1. Access Key and Secret Key
- 2. Bucket Name
Configuration Steps
Step 1: Navigate to Remote Storage Settings
- 1. Log in to your WordPress admin dashboard.
- 2. Go to WPvivid plugin > Cloud Storage.
- 3. Select Amazon S3 from the list of available storage providers.
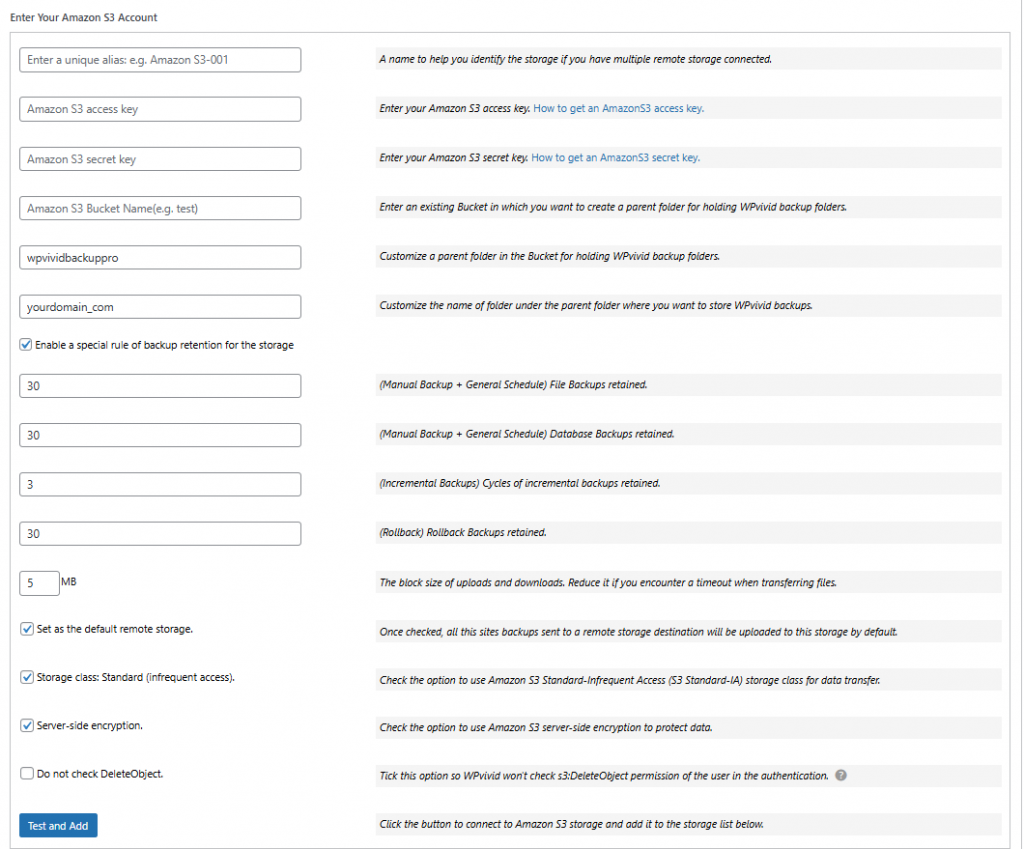
Step 2: Authenticate and Define Path Structure
Enter your S3 account details into the following fields:
- 1. Unique Alias: Enter a recognizable name (e.g., S3-Production-Backups).
- 2. Access Key & Secret Key: Paste your AWS credentials.
- 3. Amazon S3 Bucket Name: Enter the exact name of your target bucket.
- 4. Parent Folder: Define a main directory for all WPvivid backups (e.g., wpvividbackuppro).
- 5. Custom Path (Subfolder): Define a unique subfolder for this specific website (e.g., website_a_com).
Resulting Path: bucket-name/wpvividbackuppro/website_a_com/
Step 3: Configure Advanced Storage Options
Adjust the following settings based on your requirements:
- 1. Backup Retention:
Define how many backup copies to keep on the S3 storage before the oldest are overwritten. - 2. Define block size of data uploads and downloads.
- 3. The option of setting as the default remote storage
- 4. Storage Class: Standard.
- 5. Server-Side Encryption:
Enable this if you require your backups to be encrypted in S3. - 6.Check DeleteObject:
Ensure this is enabled if you want the plugin to have permission to remove old backups automatically based on your retention settings. - 7. Click Test and Add to save settings.
Once saved, WPvivid Backup Pro uses the custom folder name for future backups uploaded to the bucket.