

Accessing the Auto-Migration Page
In the WordPress admin dashboard, navigate to: WPvivid Backup Plugin → Backup & Restore → Auto-Migration.
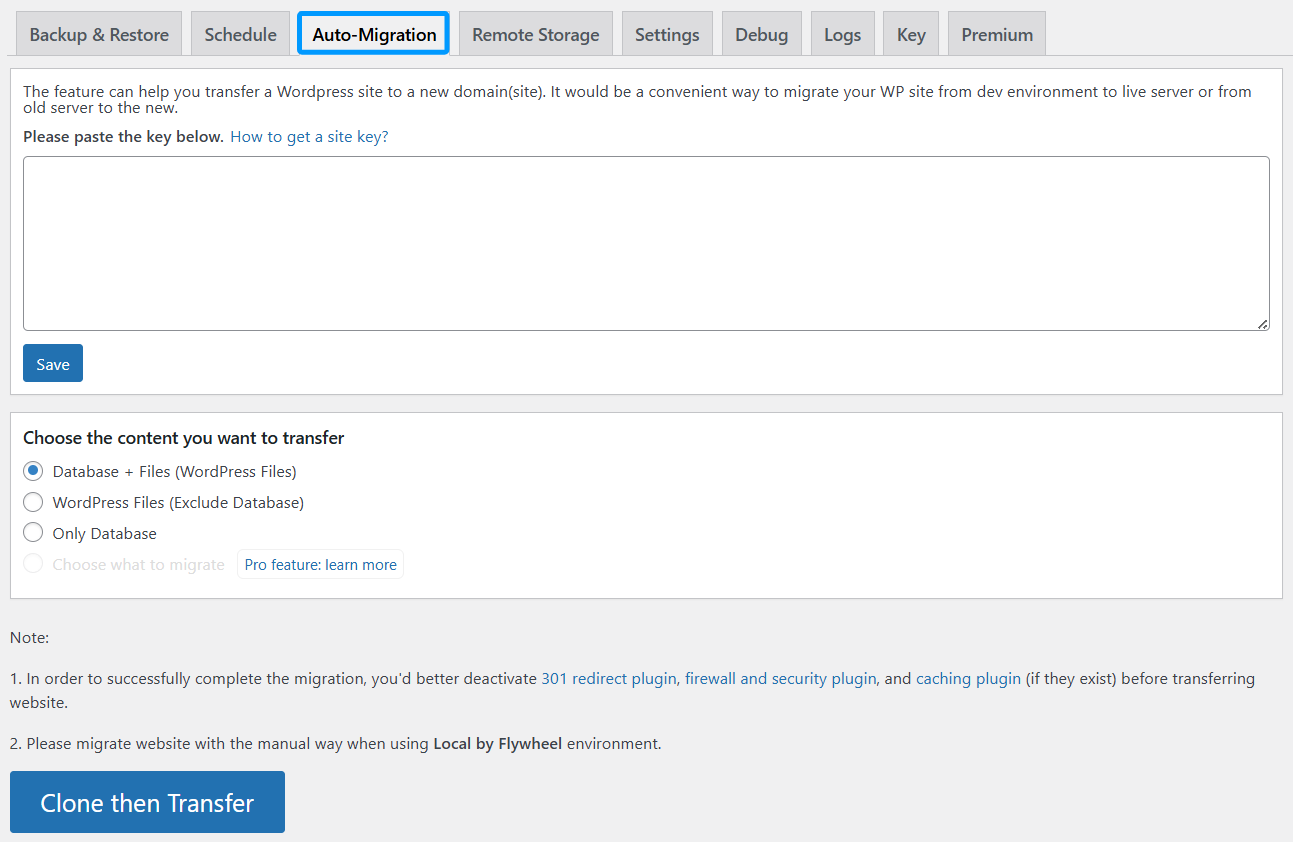
The Auto-Migration page enables you to:
- 1. Connect the source site with the destination site using an auto-migration key.
- 2. Select which website data should be transferred.
- 3. Start the cloning and migration process.
Auto-Migration Key Configuration
At the top of the page, you will find a text field labeled for entering an auto-migration key.
- 1. The auto-migration key is generated on the destination website.
- 2. It is used to establish a secure connection between the source and destination sites.
Paste the auto-migration key into the field and click Save to store it.
Migration Content Selection
Under Choose the content you want to transfer, select what data will be migrated:
- 1. Database + Files (WordPress Files)
Transfers the entire site, including the database and all WordPress files. - 2. WordPress Files (Exclude Database)
Transfers only WordPress files, excluding the database. - 3. Only Database
Transfers database content only.
Starting the Migration
Once the auto-migration key is saved and the content selection is complete, click Clone then Transfer button.
This action will:
- 1. Clone the selected content on the source site.
- 2. Transfer the data to the destination site automatically.
Important Notes Before Migration
Before starting the migration, WPvivid recommends:
- 1. Temporarily deactivating:
301 redirect plugins
Firewall and security plugins
Caching plugins - 2. Using manual migration instead of auto migration when working with Local by Flywheel.
Connection Limitations
Some hosting providers restrict connections between websites. This may result in:
- 1. 403 errors
- 2. Unstable or interrupted migration processes
If this occurs, WPvivid recommends using the manual migration method.
Manual Migration (Alternative)
If auto-migration is not possible, you can migrate the site manually:
- 1. Download a backup from the source site.
- 2. Upload the backup to the destination site using one of the following methods:
Upload via the WPvivid Upload feature
Upload via FTP to the WPvivid backup directory - 3. Scan for uploaded backups on the destination site.
- 4. Restore the backup to complete the migration.