

WPvivid Staging Pro supports creating staging sites in WordPress Multisite networks. You can either clone an entire Multisite network (subdirectory structure only) or create a staging site for a single subsite inside your network.
A staging site is a separate testing environment that mirrors your live multisite setup. It allows you to safely test updates, changes, or new features without affecting your live network.
Supported Multisite Configurations
WPvivid Staging Pro supports:
- 1. Entire Multisite Network Staging:
Creates a staging copy of the full Multisite network (only subdirectory Multisite is supported). - 2. Individual Subsite Staging:
Creates a staging site for a specific network subsite. Subsites are supported in both subdomain and subdirectory multisite setups.
Before You Begin
Prior to creating a staging site:
- 1. Temporarily deactivate caching plugins to avoid conflicts during the staging process.
- 2. Ensure sufficient server resources (memory, execution time,disk space) to handle staging operations.
- 3. Create a backup of your live multisite before staging, especially on large networks.
Steps to Create a Staging Site for Multisite
1. Access the Staging Creation Interface
- 1. Log in to your WordPress admin dashboard.
- 2. Navigate to WPvivid Plugin > Staging Sites tab.
- 3. Click the Create A Staging Site button.
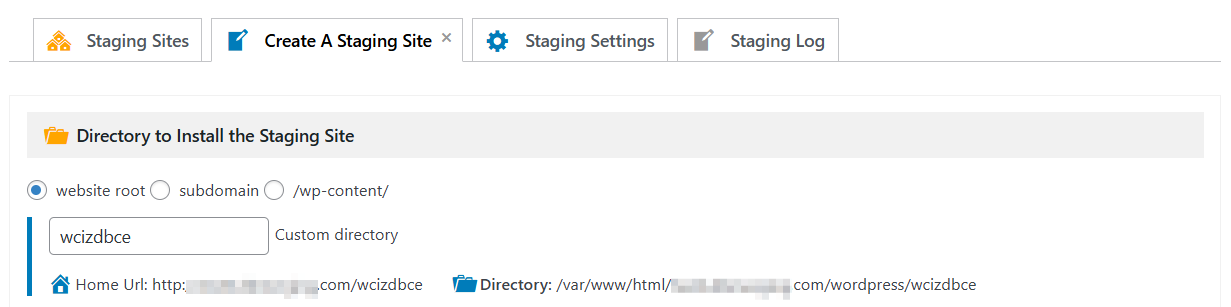
2. Configure Staging Target
Naming & Directory
- 1. Enter a folder name where the staging site will be installed under your WordPress installation.
- 2. This name also becomes part of the staging site’s URL.
Database Options
When choosing where to install the staging database:
- 1. Use the same database as live site (recommended)
- 2. Use a separate database (requires database credentials — database name, username, password, and host)

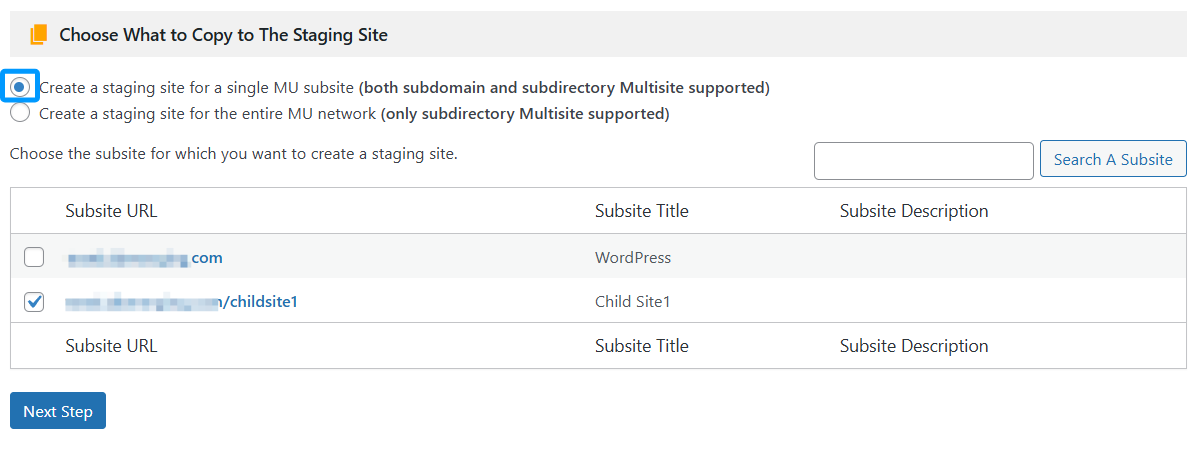
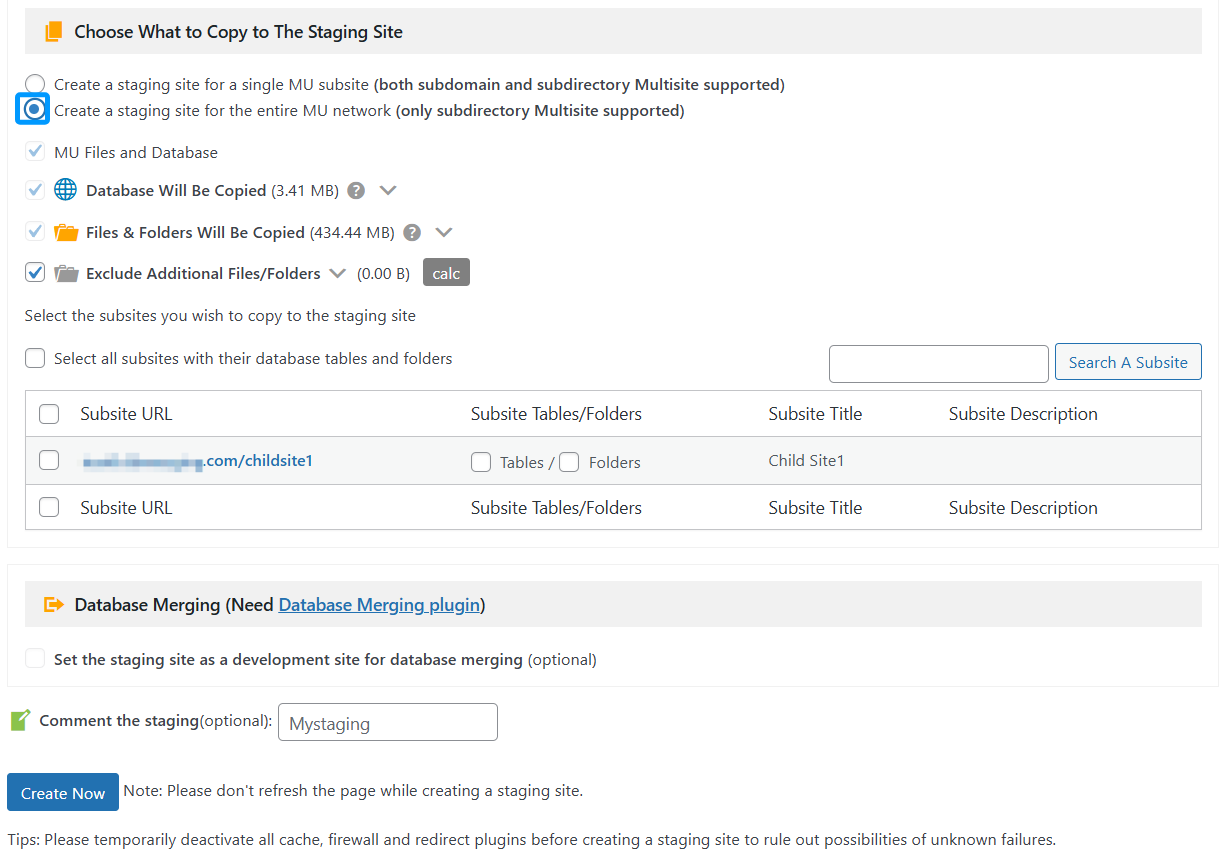
3. Select Content to Copy
Next, choose what content from the live multisite you want to copy:
Option A — Single Subsite Staging
- 1. Choose a specific subsite within the network.
- 2. You can search for the desired subsite if your network contains many.
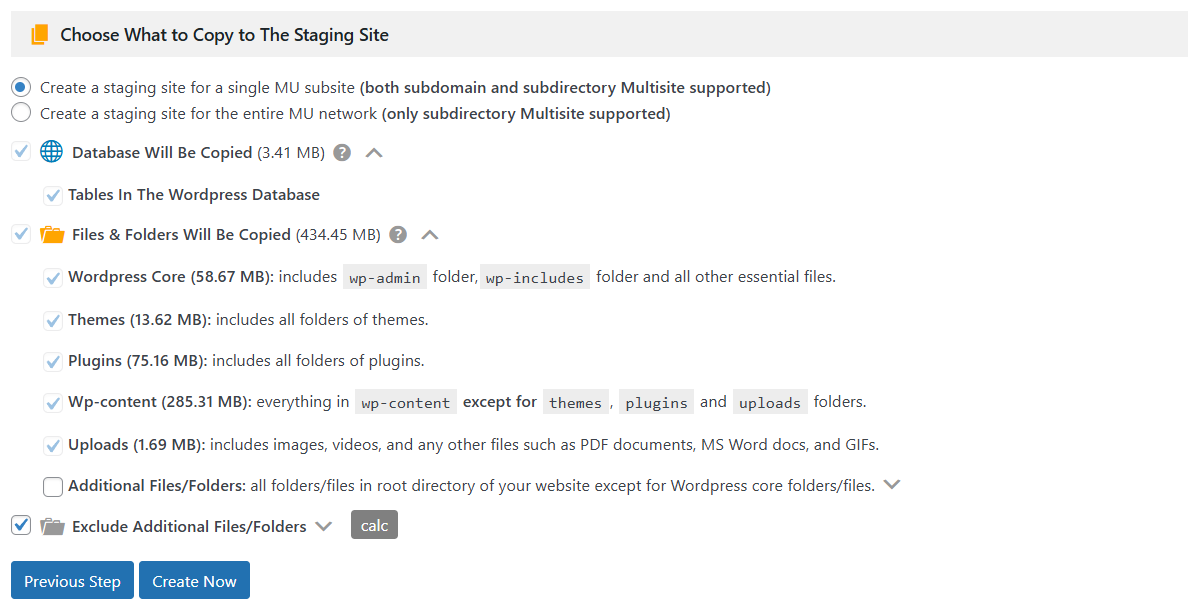
- 3. After selecting a subsite, choose what to include:
– Entire database and WordPress files by default
– Customize by excluding specific tables or folders (e.g., themes, plugins, uploads)
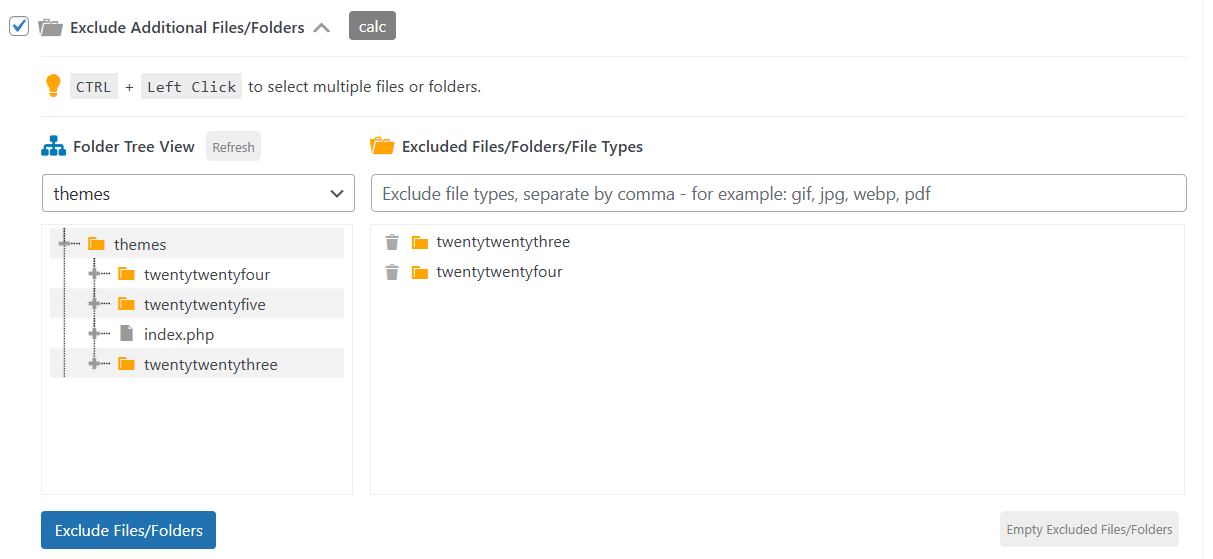
To exclude content:
- 1. Expand Exclude Additional Files/Folders.
- 2. Choose a directory (e.g.,
/themes,/plugins), and select files/folders to exclude。
Option B — Entire Multisite Network Staging
- 1. Select to clone the entire WordPress multisite network.
- 2. This option is only available for Multisite networks using the subdirectory structure.
- 3. You can:
– Copy the entire MU database
– Exclude specific files/folders
– Select specific subsites to include or copy all subsites
4. Create the Staging Site
When your selections are complete:
- 1. Click Create Now to begin the staging process.
- 2. Monitor progress via the dashboard — this can take time depending on site size and server performance.
Warning
Do not close or refresh the page while staging is in progress. Interrupting the process may lead to incomplete staging or errors.
Do not close or refresh the page while staging is in progress. Interrupting the process may lead to incomplete staging or errors.
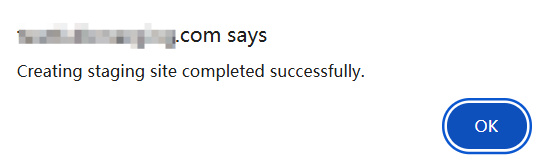
Once the process is complete, a success message will be displayed.
Post-Creation Management
Once successful, your new environment will appear in the Staging Sites tab.
- 1. Accessing the Site:
You will find the Staging Site URL and Admin URL. Your login credentials will match those of your live site. - 2. Available Actions: From the management dashboard, you can:
– Push to Live: Deploy your changes back to the production network.
– Update Staging: Sync your staging site with the latest data from the live site.
– Delete: Completely remove the staging site and its associated database tables.
