

.htaccess files for directory-level configuration, Nginx requires manual updates to the server configuration file to ensure that WordPress staging sites and subdirectories function correctly. Please also see this WP doc for more details – https://wordpress.org/support/article/nginx/.Configuring Nginx Rewrite Rules for WPvivid
Because Nginx does not support directory-level configuration, WordPress cannot automatically update your server rules. You must manually add these rules to your Nginx .conf file to prevent 404 errors on your staging or development sites.
1. Staging Site in a Subdirectory
If you have installed a staging site into a subdirectory (e.g., yourdomain.com/mysite), you must add a specific location block to your Nginx configuration.
Case A: Installed in the Website Root
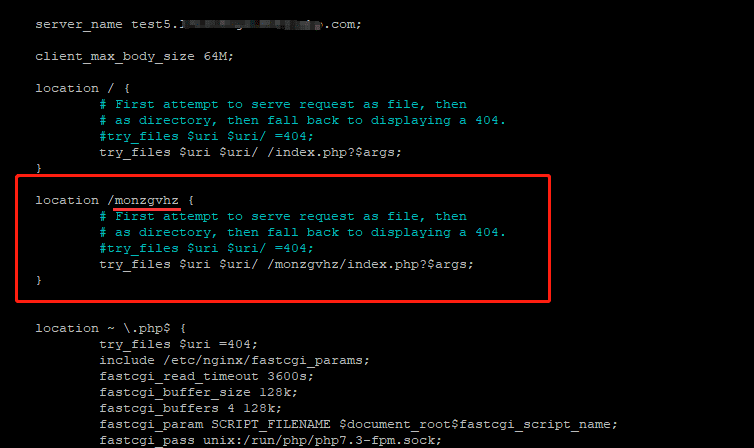
If you choose to install the staging site in the website root using a subdirectory named monzgvhz (or the name you specified), you must add the following rules to your Nginx configuration file:
location /monzgvhz(replace this with your own subdirectory name) {
# First attempt to serve request as file, then
# as directory, then fall back to displaying a 404,
#try_files $uri $uri/ = 404;
try_files $uri $uri/ /monzgvhz(replace this with your own subdirectory name)/ index.php?$args;
}
Case B: Installed in the wp-content Directory
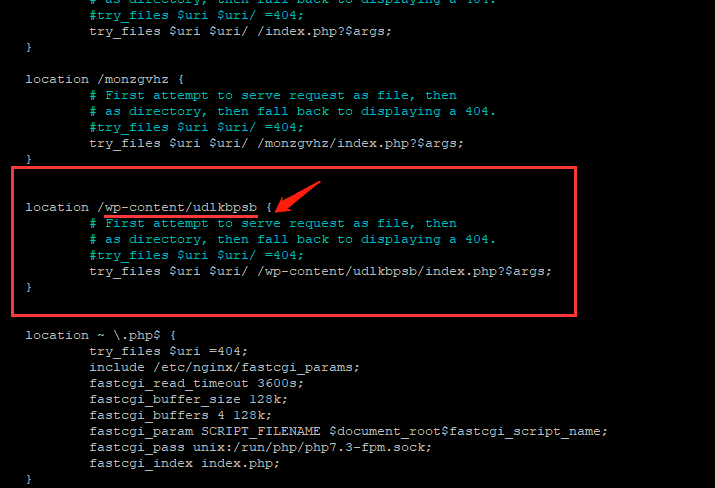
If you choose to install the staging site in the wp-content directory under a subdirectory named udlkbpsb (or whichever name you defined), you will need to add the following rules to your Nginx configuration file:
location /wp-content/udlkbpsb(replace this with your own subdirectory name) {
# First attempt to serve request as file, then
# as directory, then fall back to displaying a 404,
#try_files $uri $uri/ = 404;
try_files $uri $uri/ /udlkbpsb(replace this with your own subdirectory name)/ index.php?$args;
}
2. Staging Site on an Individual Domain or Subdomain
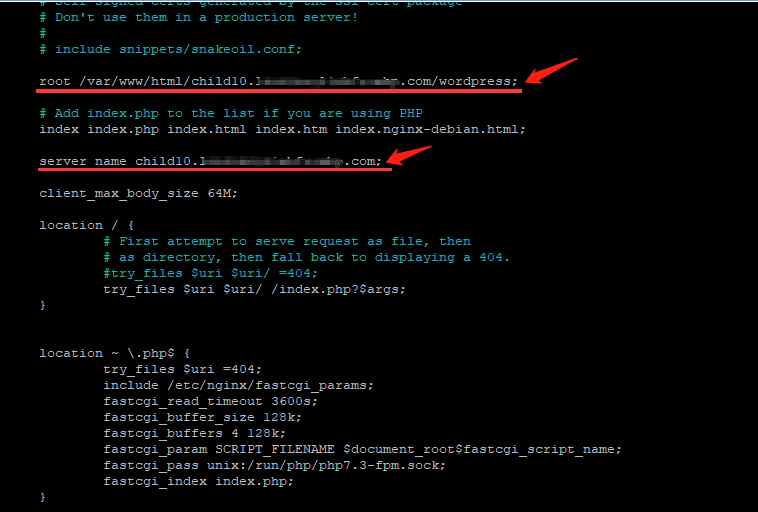
WPvivid Staging Pro supports installing a staging environment on a completely separate domain or subdomain (e.g., dev.a.com or b.com) hosted on the same server.
Here is also a step-by-step Nginx offical doc on How to Install WordPress on Nginx and Configure Nginx.
In this scenario, you need to create or edit the specific Nginx configuration file for that domain and ensure the root and server_name directives are correct:
root /var/www/html/domain.com/wordpress(replace the root folder of the web server, the domain, and the website directory with your owns);
server_name domain.com(replace this with the individual domain name);
3. Mapping a Domain to a Subdirectory
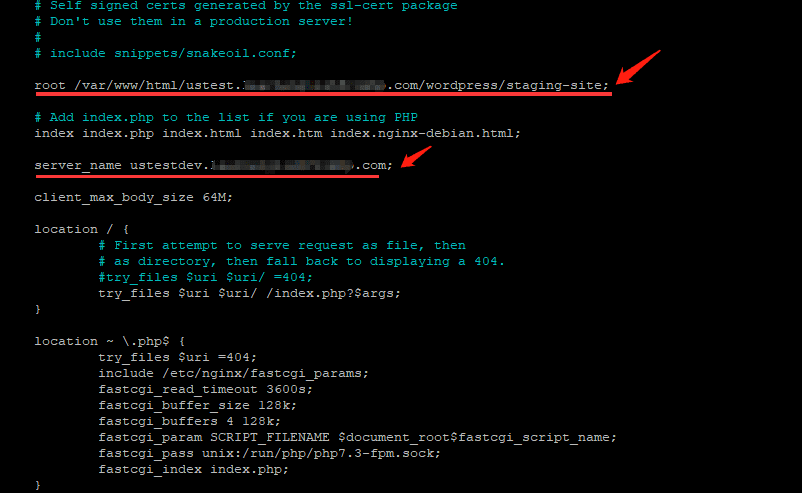
If you are mapping an individual domain to a subdirectory of another site (e.g., mapping dev.b.com to the folder a.com/wordpress/dev), the configuration for dev.b.com should look like this:
root /var/www/html/domain.com/wordpress/subdirectory(replace the root folder of the web server, the domain, and the website subdirectory with your owns);
server_name domain.com(replace this with the individual domain name);
4. Apply & Verify Changes
1. Restart Nginx: After making any changes to your configuration files, you must restart or reload the Nginx service for the changes to take effect:
- 1.
sudo nginx -t(to check for syntax errors) - 2.
sudo systemctl reload nginx(to apply changes)
2. Match Permalinks: Ensure that the Permalink Settings on your staging site match exactly with those on your live site.