

WPvivid Backup Pro allows you to store backups in Microsoft OneDrive Shared Drives, enabling teams and organizations to centrally manage backup files across multiple users and websites.
What Is OneDrive Shared Drives Integration?
OneDrive Shared Drives (also known as shared libraries or shared folders in Microsoft 365) allow multiple users to access and manage files within a shared storage space. Unlike personal OneDrive storage, Shared Drives are owned by the organization rather than individual users.
Using OneDrive Shared Drives provides a collaborative storage solution where backups are accessible to authorized team members, making it ideal for agencies, enterprises, and multi-admin environments.
Configuration Steps
1. Access Remote Storage Settings
- 1. Log in to your WordPress admin dashboard.
- 2. Navigate to WPvivid Plugin → Cloud Storage.
- 3. Select OneDrive Shared Drives from the list of available storage providers.
2. Authenticate with Microsoft OneDrive
- 1. Click the Authenticate with Microsoft OneDrive button.
- 2. Sign in using a Microsoft account that has access to the target Shared Drive.
- 3. Grant the required permissions to allow WPvivid to access the Shared Drive.
3. Configure Storage Details
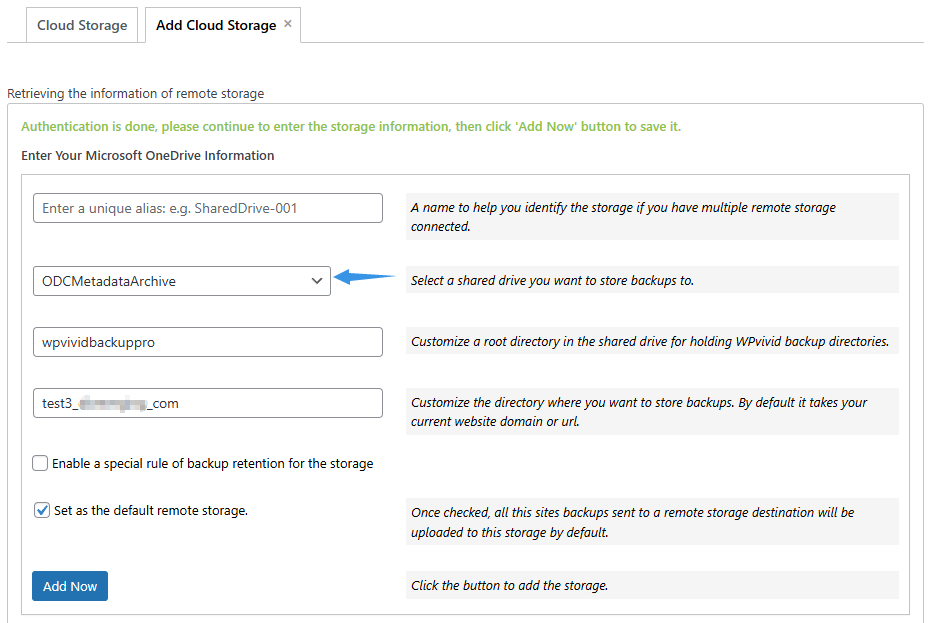
- 1. Unique Alias:
Enter a recognizable name for this storage connection (e.g.,OneDrive-Shared-001). - 2. Select a Shared Drive:
Select the Shared Drive where backups will be stored. - 3. Custom Parent Folder:
Define the parent folder name that will be created in the selected Shared Drive to store WPvivid backups (e.g.,wpvividbackuppro). - 4. Custom Subfolder:
Enter a unique folder name for the current website (e.g.,yourdomain_com). - 5. Backup Retention:
Specify how many backup copies to keep in the Shared Drive. Older backups will be removed automatically once the limit is reached. - 6. Set as Default Remote Storage:
Enable this option to use the Shared Drive as the default destination for all backups. - 7. Save and Connect:
Click Add Now to complete the configuration. The storage will appear in the remote storage list upon successful connection.