

The Import Site page provides multiple import methods to accommodate different deployment scenarios, including local servers, cloud storage, and auto-migration transfers.
Purpose of Import Site
Import Site enables you to:
- 1. Restore a site from a previously created WPvivid backup.
- 2. Migrate a site from another server or hosting environment.
- 3. Import backups stored locally, in remote storage, or transferred via auto-migration.
- 4. Integrate external backups into the WPvivid backup list for management and restoration.
Once imported, backups are treated the same as locally created backups and can be restored, downloaded, or managed from the Backup Manager & Restoration page.
Accessing the Import Site Page
To access the Import Site feature:
- 1. Log in to your WordPress admin dashboard.
- 2. Navigate to WPvivid plugin.
- 3. Open the Import Site tab.
The Import Site interface displays available import methods and provides guidance on uploading or retrieving backup files.
Supported Import Methods
WPvivid Backup Pro supports three methods for importing a site:
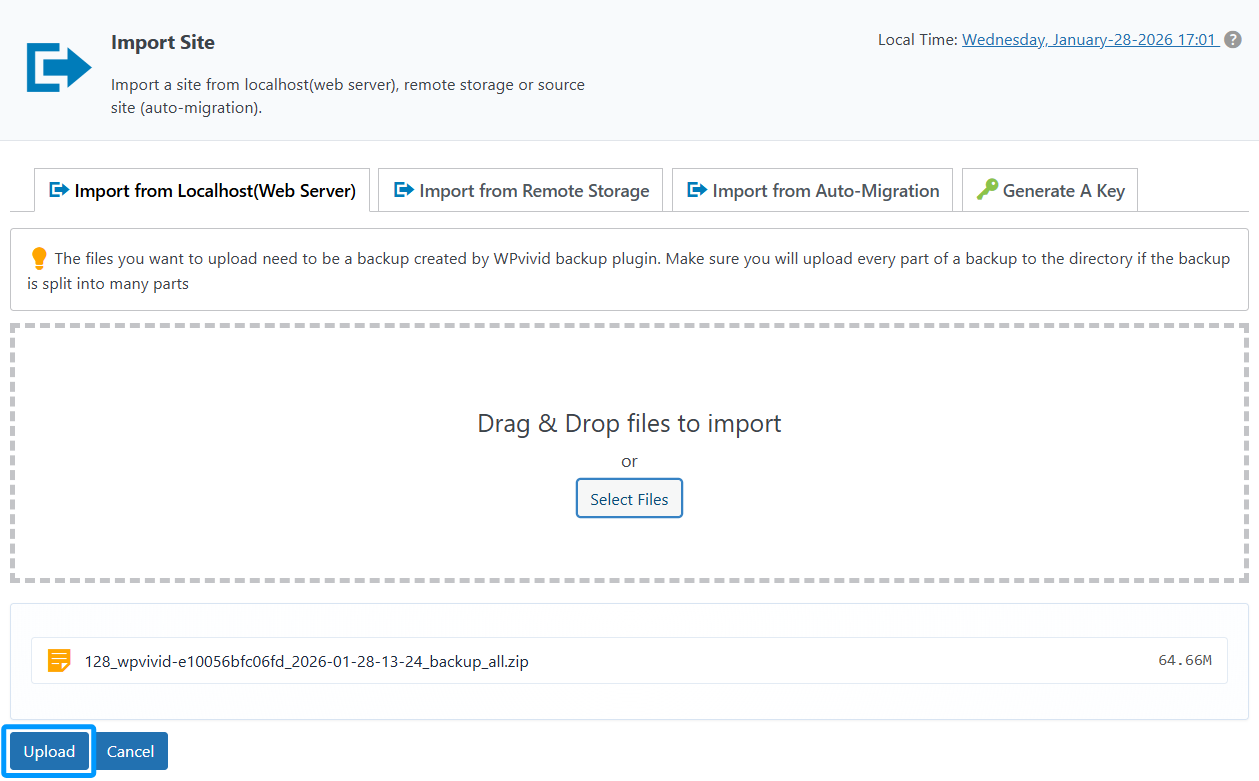
1. Import from Localhost (Web Server)
This method is used when backup files are stored on your local computer and uploaded to the current web server.
Key characteristics:
- 1. Supports drag-and-drop or file selection upload.
- 2. Backup files must be generated by WPvivid Backup.
- 3. All backup parts must be uploaded if the backup is split into multiple files.
- 4. Imported backups are automatically added to the backup list.
This method is commonly used when migrating a site manually or restoring from downloaded backup archives.
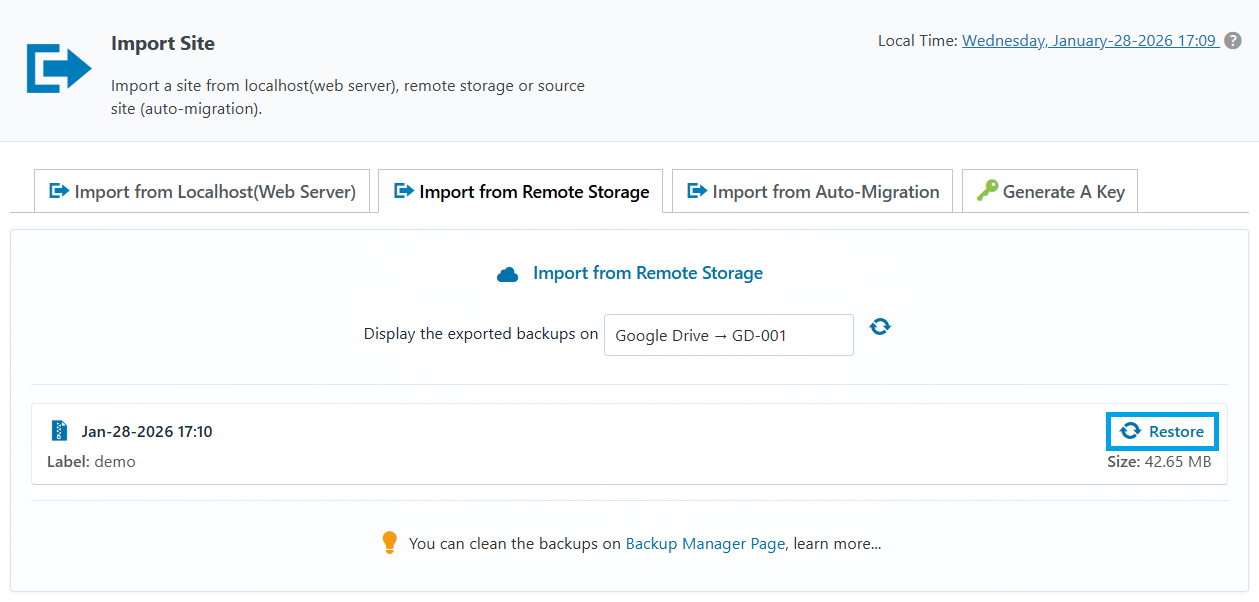
2. Import from Remote Storage
This method allows you to import backups stored in cloud or remote storage services configured in WPvivid Backup Pro.
Supported scenarios include:
- 1. Google Drive backups
- 2. Dropbox backups
- 3. Backups stored in other supported remote storage providers
How it works:
- 1. WPvivid connects to the configured remote storage.
- 2. Available backups are detected and listed.
- 3. Selected backups are imported directly without requiring manual download.
This approach is ideal for restoring or migrating sites using cloud-based backups.
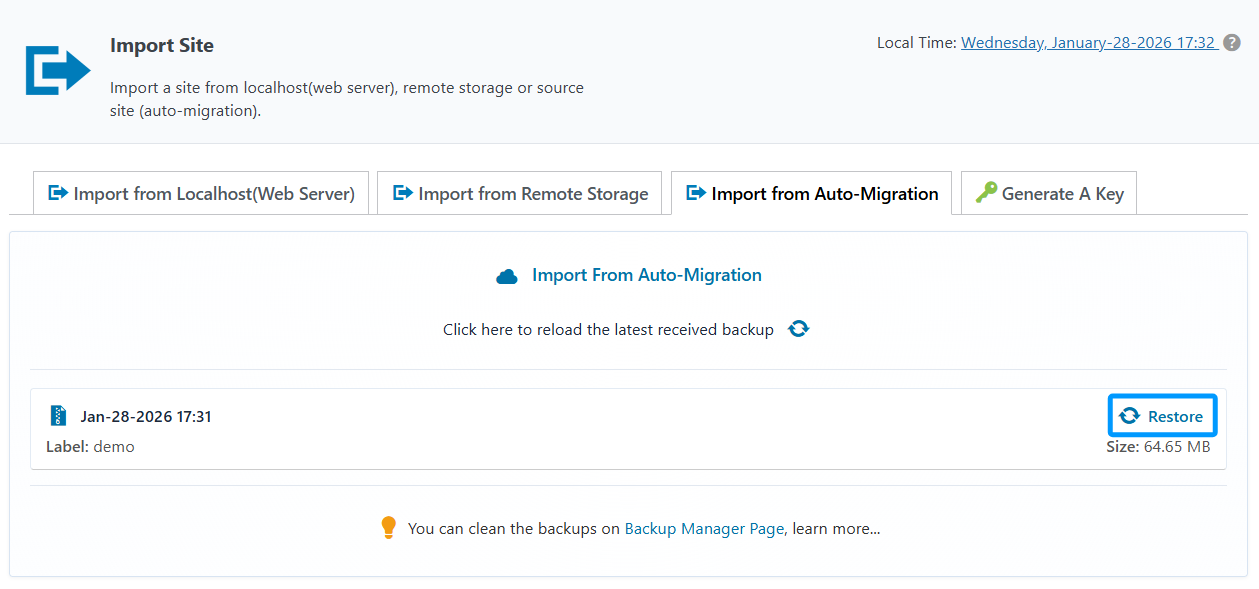
3. Import from Auto-Migration
This method is designed for automated site transfers between two WordPress installations using WPvivid’s auto-migration mechanism.
Key features:
- 1. Uses a secure site key generated on the destination site.
- 2. Allows direct site-to-site transfer without manual backup handling.
- 3. Eliminates the need to download or upload backup files manually.
Auto-migration is best suited for fast migrations between development, staging, and production environments.
Backup File Requirements
When importing a site, ensure the following:
- 1. Backup files must be created by the WPvivid Backup plugin.
- 2. All backup parts must be present if the backup is split.
- 3. Backup files must remain unmodified to avoid integrity issues.
- 4. Sufficient server resources must be available for import and restoration.
Failure to meet these requirements may result in import or restore errors.
Typical Use Cases
- 1. Migrating a WordPress site to a new host.
- 2. Restoring a site from cloud backups.
- 3. Recovering a site from archived backup files.
- 4. Transferring sites between environments using auto-migration.
Summary
The Import Site feature in WPvivid Backup Pro provides a flexible and reliable way to restore or migrate WordPress sites using existing backups. By supporting imports from:
- 1. Localhost (web server)
- 2. Remote storage
- 3. Auto-migration
WPvivid ensures that backups can be reused across environments while maintaining a consistent restoration workflow. This feature is a core component of professional backup management and site migration strategies.