

Accessing the Staging Feature
In the WordPress admin dashboard, navigate to: WPvivid Backup Plugin → Staging. You will see multiple tabs at the top of the page, each corresponding to a different staging-related action.
- 1. Staging Sites
- 2. Create a Staging Site
- 3. Create a Fresh WP Install
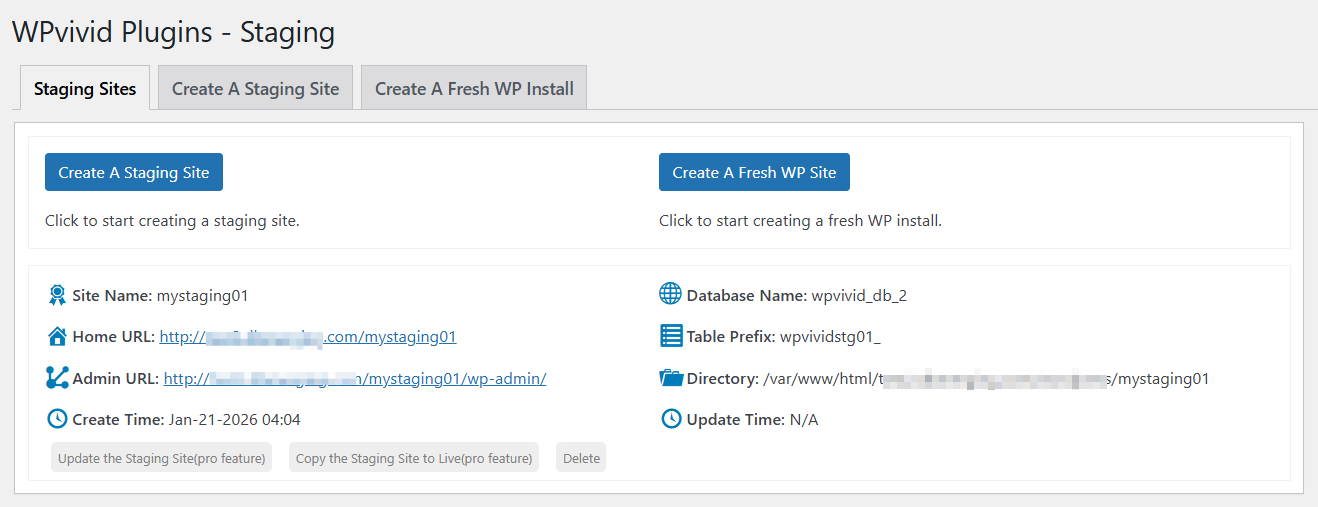
Staging Sites Tab
The Staging Sites tab lists all existing staging environments created using WPvivid.
From this section, you can:
- 1. View existing staging sites
- 2. Manage or remove staging environments
This tab is primarily used for monitoring and managing already-created staging sites.
Create a Staging Site
The Create a Staging Site tab allows you to create a staging copy of your current live website.
Step 1: Choose the Installation Directory
Under Directory to Install the Staging Site, select where the staging site will be created:
- 1. Website root
- 2. /wp-content/
You can also specify a custom directory name, which will be used to generate:
- 1. The staging site URL
- 2. The directory path on the server
Step 2: Choose Database Configuration
Under Choose Database to Install the Staging Site, configure how the staging site database is handled:
- 1. Custom Table Prefix
Defines a unique prefix for staging tables (default prefix is auto-generated) - 2. Install the staging site to the live site’s database (Easy setup)
Uses the same database as the live site but separates data using table prefixes. - 3. Install the staging site to a separate database (Expert setup)
Recommended for advanced users who want full database isolation.
Step 3: Choose What to Copy to the Staging Site
Under Choose What to Copy to The Staging Site, select the content to include:
- 1. Database will be copied
- 2. Files & folders will be copied
This allows you to control the size and scope of the staging environment.
Step 4: Create the Staging Site
Click Create Now to start the staging process.
Do not refresh the page while the staging site is being created.
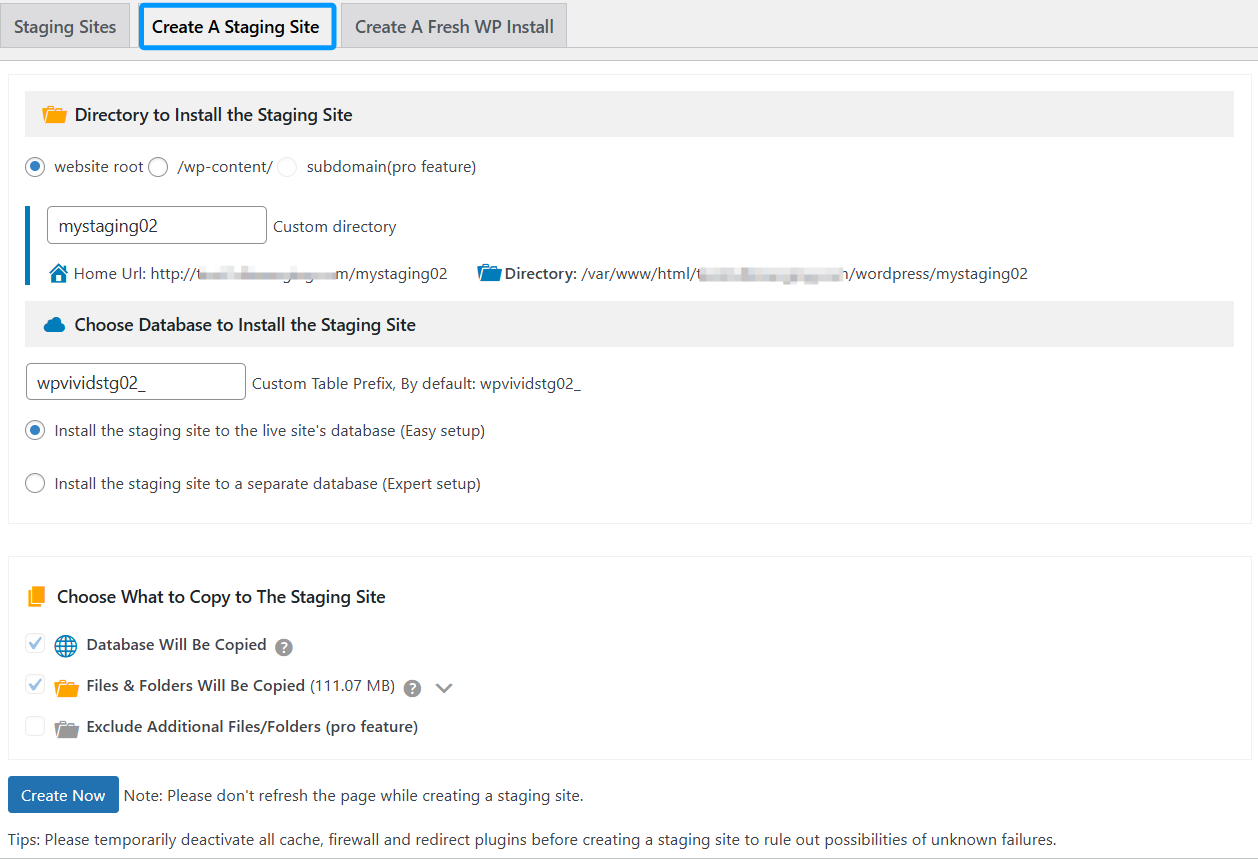
Temporarily deactivate cache, firewall, and redirect plugins to avoid unexpected failures during staging creation.
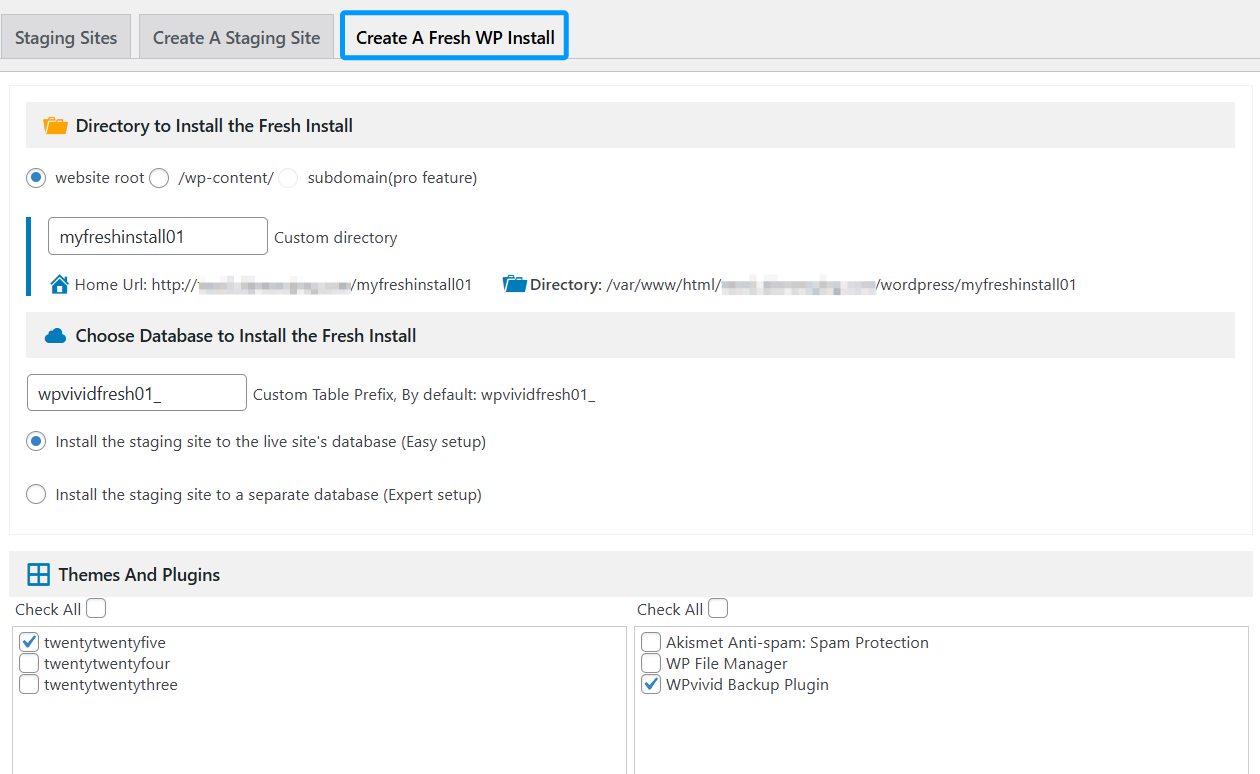
Create a Fresh WP Install
The Create a Fresh WP Install tab allows you to install a brand-new WordPress site without copying any content from the live site.
This is useful for:
- 1. Testing themes or plugins
- 2. Creating a clean WordPress environment
Step 1: Choose Installation Directory
Under Directory to Install the Fresh Install, select the installation location:
- 1. Website root
- 2. /wp-content/
You can define a custom directory name, which determines the new site’s URL and directory path.
Step 2: Choose Database Configuration
Under Choose Database to Install the Fresh Install:
- 1. Specify a custom table prefix
- 2. Choose between:
Live site database (Easy setup)
Separate database (Expert setup)
Step 3: Select Themes and Plugins
Under Themes and Plugins, choose which items should be installed on the fresh WordPress site:
- 1. Select one or more themes
- 2. Select specific plugins (such as WPvivid Backup Plugin)
This allows you to preconfigure the environment before installation.
Step 4: Create the Fresh Install
Click Create Now to begin the installation.
Do not refresh the page during the installation process.
1. Always test major changes in a staging site before applying them to the live site.
2. Disable caching and security plugins during staging creation to prevent conflicts.
3. Clean up unused staging sites to conserve server resources.