

The auto-migration method is suitable for common migration scenarios such as moving a site from a development environment to production or transferring a site to a new hosting provider.
Migration Workflow Overview
The auto-migration process consists of the following stages:
- 1. Generate an auto-migration key on the target site.
- 2. Paste the auto-migration key on the source site.
- 3. Select the content to transfer and start auto-migration.
- 4. Scan received backups on the target site.
- 5. Restore the backup to complete the migration.
Each stage is described in detail below.
Step 1: Generate a Migration Key on the Target Site
- 1. Log in to the WordPress admin dashboard of the target site.
- 2. Navigate to WPvivid Backup Plugin → Backup & Restore → Key.
- 3. Select an expiration time for the migration key (for example, 8 hours).
- 4. Click Generate to create a site key.
- 5. Copy the generated key.
This key allows the source site to securely send a backup to the target site.
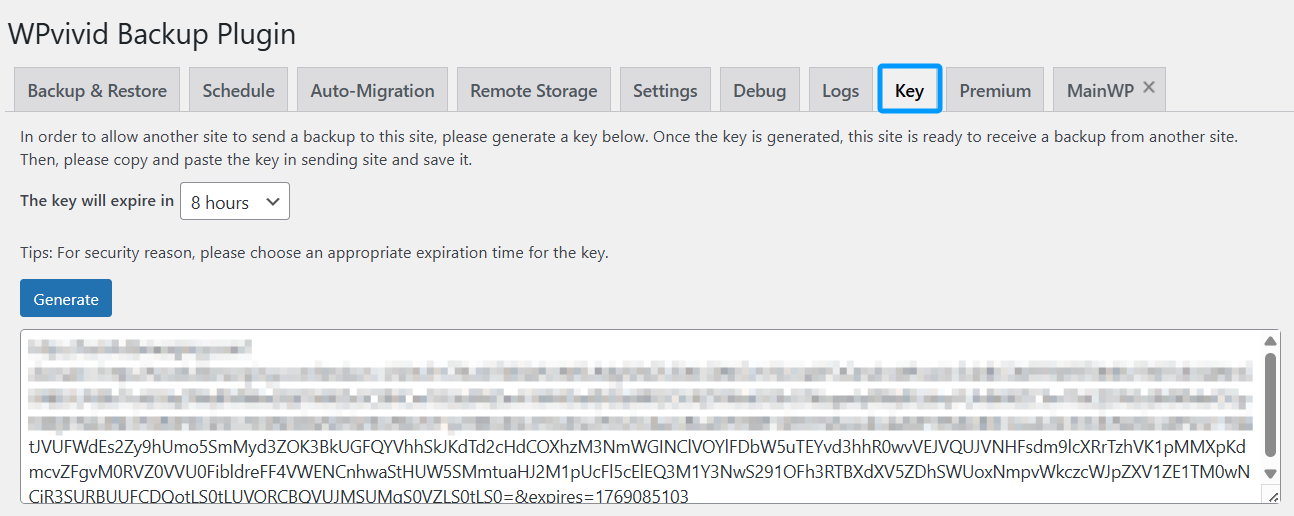
For security reasons, choose an expiration time that matches your migration schedule.
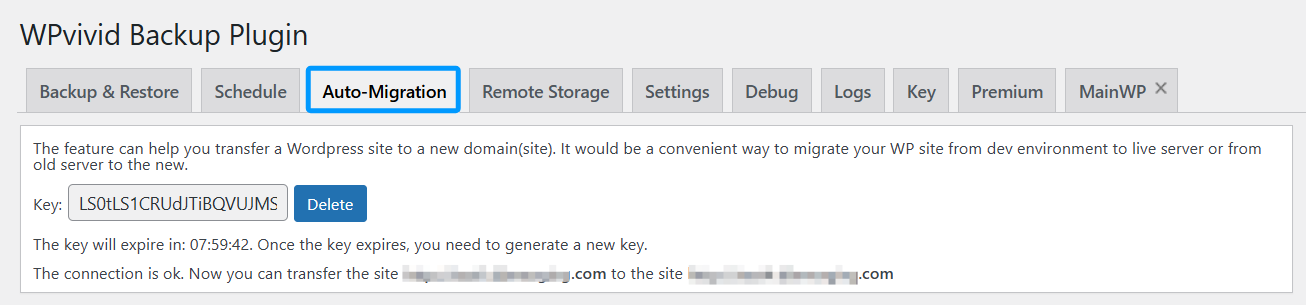
Step 2: Paste the Key on the Source Site
- 1. Log in to the WordPress admin dashboard of the source site.
- 2. Go to WPvivid Backup Plugin → Backup & Restore → Auto-Migration.
- 3. Paste the copied key into the key input field.
- 4. Click Save to confirm the connection between the source and target sites.
Once saved, the source site is authorized to transfer data to the target site.
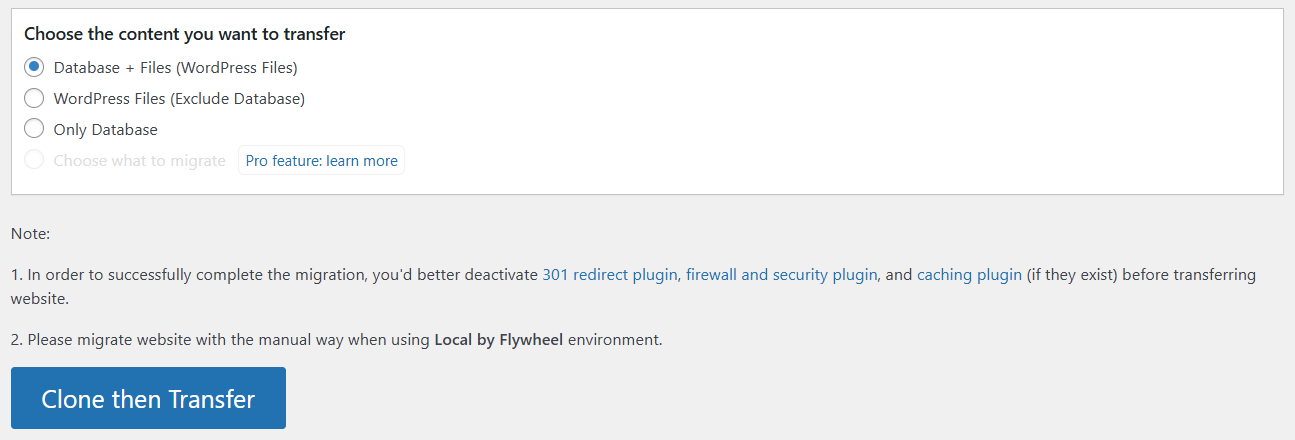
Step 3: Choose Content to Transfer and Start Auto-Migration
On the source site, under the Auto-Migration tab:
- 1. Select the content you want to transfer:
Database + Files (WordPress Files)
WordPress Files (Exclude Database)
Only Database - 2. Review the migration notes and recommendations displayed on the page.
- 3. Click Clone then Transfer to start the auto-migration process.
WPvivid will create a backup of the selected content and automatically send it to the target site.
Step 4: Scan Received Backups on the Target Site
After the transfer completes:
- 1. Log in to the WordPress admin dashboard of the target site.
- 2. Go to WPvivid Backup Plugin → Backup & Restore.
- 3. Click Scan uploaded backup or received backup.
This action scans the backup directory and adds the received backup to the backup list.
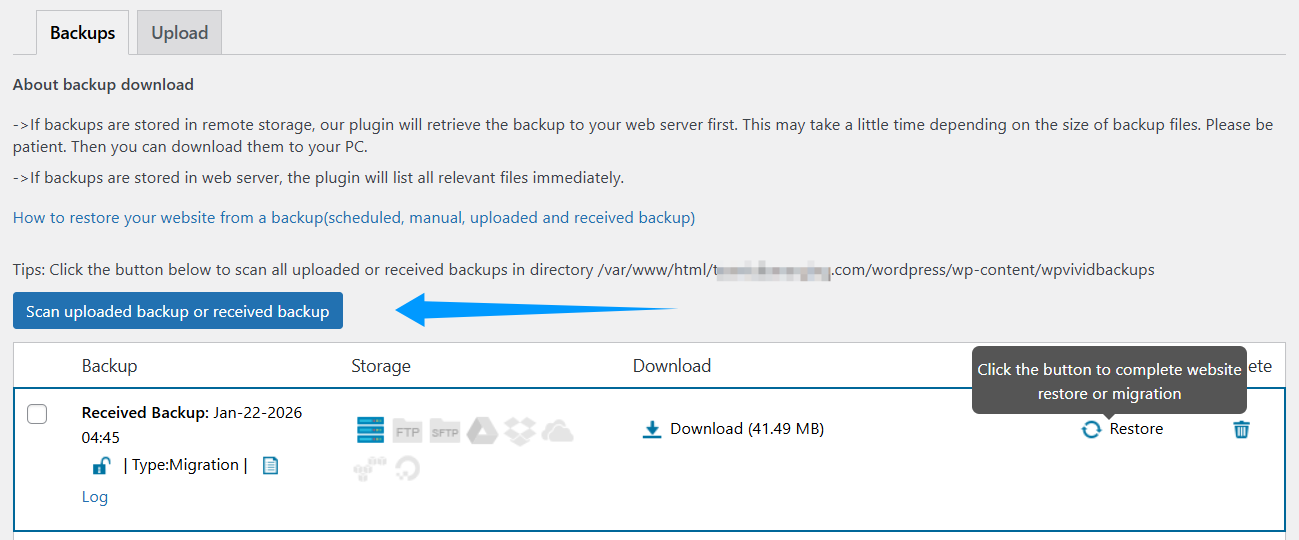
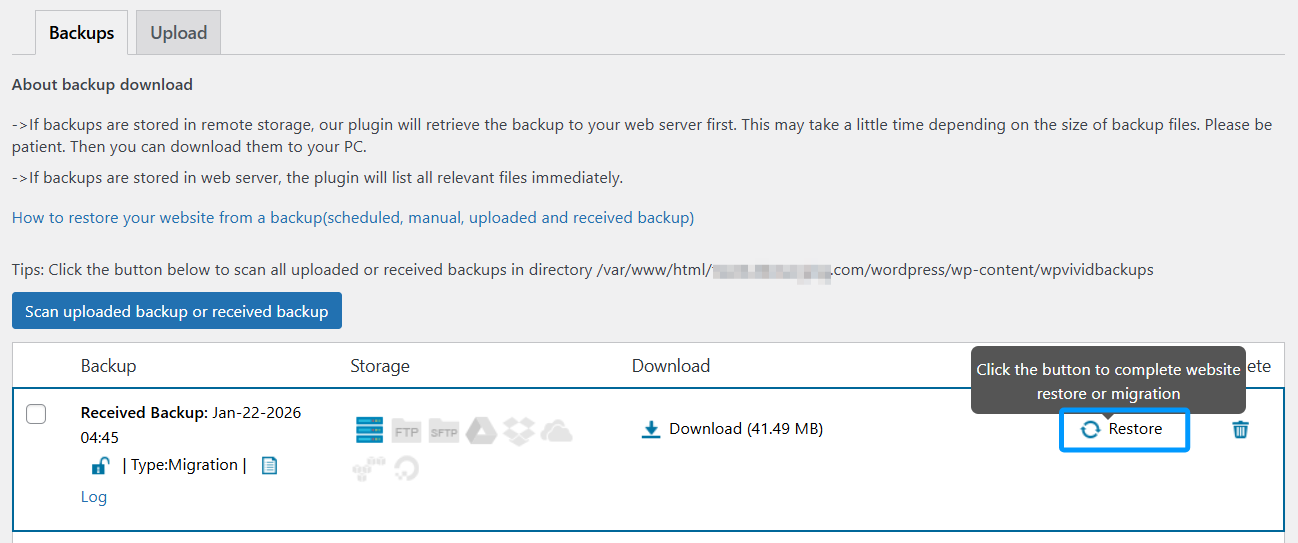
Step 5: Restore the Backup on the Target Site
- 1. Locate the received backup in the backup list.
- 2. Click Restore next to the backup.
Once the restore process finishes, the migrated WordPress site will be available on the target site.
1. Temporarily disable cache, firewall, security, and redirect plugins before migration to avoid interruptions.
2. Some hosting providers may restrict server-to-server connections, which could affect auto-migration.
3. If auto-migration fails due to hosting restrictions, manual upload migration can be used as an alternative.